
Butterfinger Pie Recipe That’s Quick and Fun
Crafting a decadent butterfinger pie brings pure dessert magic to your kitchen table.
Sweet chocolate and crispy candy bars create an irresistible combination that melts hearts instantly.
Creamy textures dance with crunchy bits, promising a delightful experience for anyone who loves indulgent treats.
Each slice reveals layers of rich flavor and playful crunch that surprise and delight.
Candy enthusiasts and dessert lovers will find this recipe impossible to resist.
Smooth filling paired with buttery crust makes every bite a celebration of deliciousness.
Let’s whip up this incredible pie that will become your new favorite sweet sensation.
What Makes Butterfinger Pie So Delicious
Essential Elements of Butterfinger Pie
Crust Ingredients:Filling Ingredients:Topping Ingredients:How to Prepare Butterfinger Pie
Step 1: Craft the Crunchy Crust
Combine graham cracker crumbs, sugar, and melted butter in a bowl. Press the mixture firmly into a 9-inch pie dish, covering the bottom and sides completely. The goal is a solid, even base that will hold your delicious filling.
Step 2: Bake and Cool the Crust
Place the crust in the oven at 350F (175C) and bake for 10 minutes. Remove and let it cool completely. This helps set the crust and prevents a soggy bottom.
Step 3: Whip the Cream Cheese Mixture
In a large bowl, blend cream cheese and powdered sugar until smooth and creamy. The mixture should be free of lumps and have a silky texture.
Step 4: Create Fluffy Whipped Cream
In a separate bowl, whip heavy cream and vanilla extract until stiff peaks form. This creates a light, airy texture that will make your pie incredibly delightful.
Step 5: Combine Cream Mixtures
Gently fold the whipped cream into the cream cheese mixture. Use a spatula and mix carefully to maintain the airiness of the whipped cream.
Step 6: Add Butterfinger Crunch
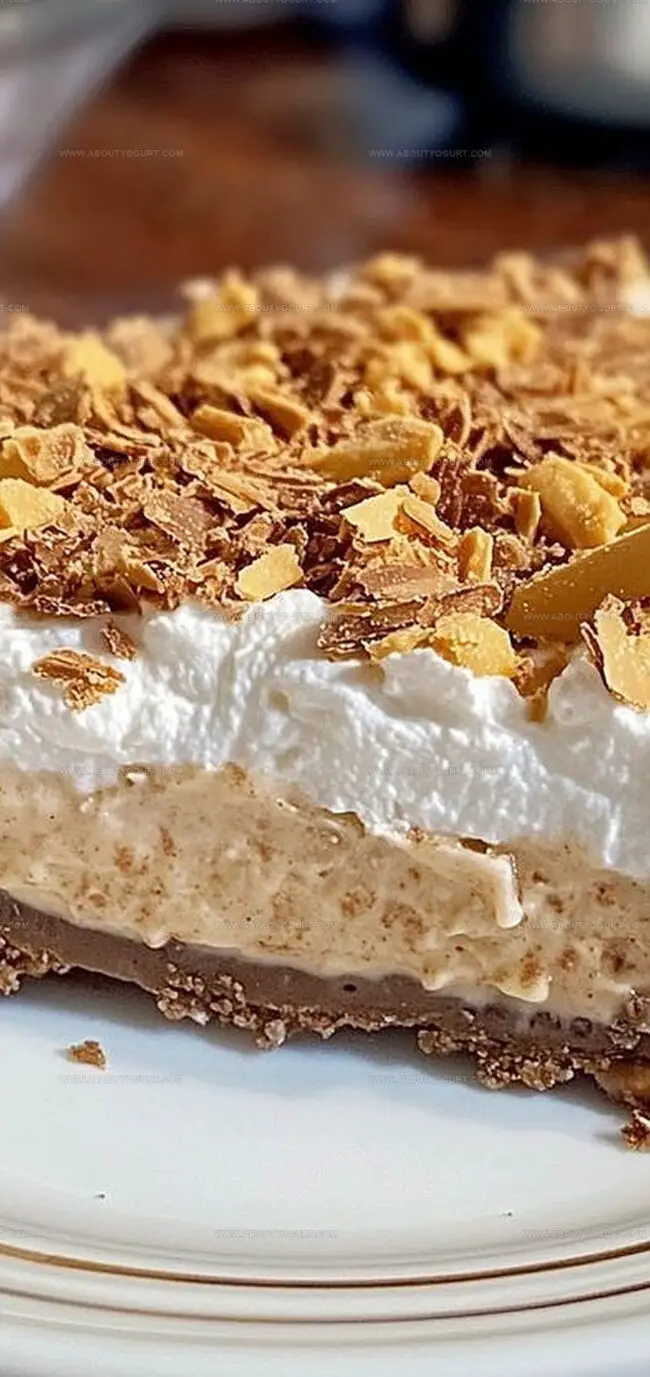
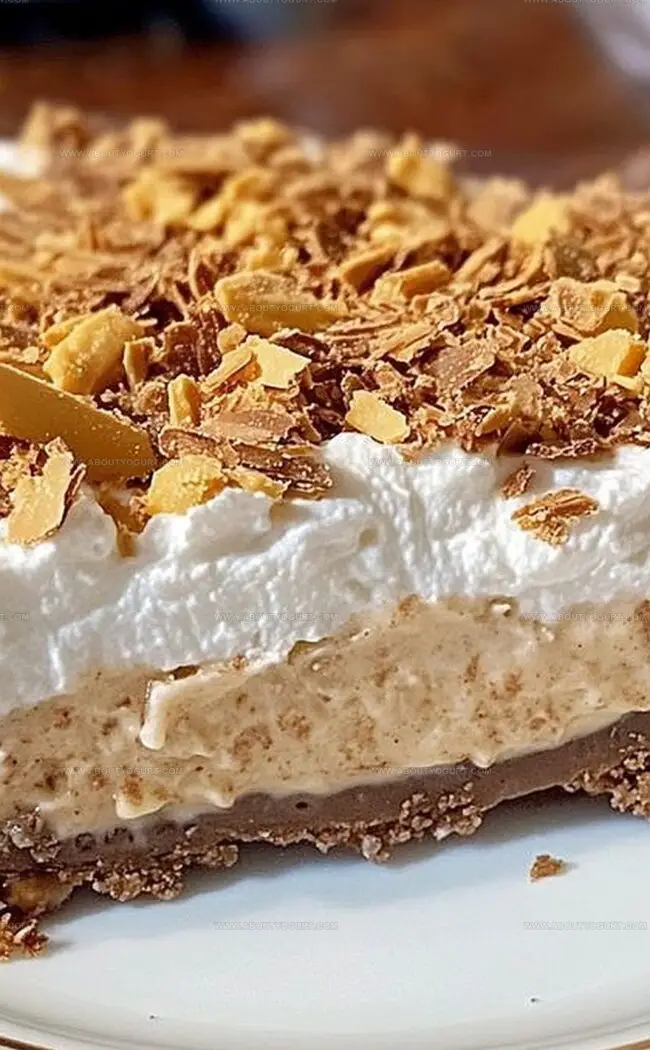
Crush Butterfinger candy bars and fold them into the cream mixture. The candy pieces will add a delightful crunch and flavor throughout the pie.
Step 7: Fill and Smooth
Spoon the Butterfinger-studded filling into the cooled crust. Use a spatula to create a smooth, even surface across the top of the pie.
Step 8: Chill and Set
Refrigerate the pie for at least 4 hours. This allows the filling to set and the flavors to meld together perfectly.
Step 9: Garnish and Serve
Before serving, sprinkle additional crushed Butterfinger pieces on top. Add a dollop of whipped cream if desired. Slice and enjoy the creamy, crunchy masterpiece you’ve created!
Insider Tips for Butterfinger Pie Success
Flavor Variations of Butterfinger Pie
Suggested Pairings for Butterfinger Pie
How to Keep Butterfinger Pie Fresh
Common Questions on Butterfinger Pie
Yes, you can substitute Butterfinger with other candy bars like Snickers or Reese’s, but the flavor profile will change.
No, a hand mixer or even whisking by hand can work, though it might require more effort to achieve the right consistency.
No, Butterfinger contains peanuts, so this pie is not safe for those with nut allergies.
The pie can be stored in the refrigerator for up to 3-4 days while maintaining its best texture and flavor.
Print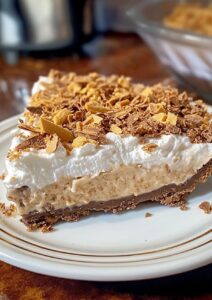
Butterfinger Pie Recipe
- Total Time: 4 hours 25 minutes
- Yield: 8 1x
Description
Indulgent Butterfinger Pie brings sweet nostalgia with its creamy filling and crunchy candy bar layers. Chocolate graham cracker crust and silky peanut butter mousse create a delightful dessert you’ll crave again and again.
Ingredients
Main Ingredients:
- 4 ounces (113 grams) cream cheese, softened
- 1 cup powdered sugar
- 1 cup creamy peanut butter
Pie Crust:
- 1 1/2 cups graham cracker crumbs
- 1/4 cup granulated sugar
- 1/2 cup unsalted butter, melted
Topping and Garnish:
- 1 cup whipped cream
- 4–5 Butterfinger candy bars, crushed
- 2 tablespoons chocolate syrup
Instructions
- Preheat the oven to 350°F (175°C), preparing a foundation for a crisp graham cracker crust.
- Combine graham cracker crumbs, sugar, and melted butter in a mixing bowl, creating a cohesive mixture that will form the pie’s structural base.
- Press the crumb mixture firmly into a 9-inch pie dish, ensuring an even coverage across the bottom and sides to create a sturdy crust.
- Bake the crust for precisely 10 minutes, allowing it to develop a golden, slightly toasted appearance, then remove and let cool completely.
- In a large bowl, whip cream cheese and powdered sugar until achieving a silky, lump-free consistency that provides a smooth canvas for the filling.
- Separately whip heavy cream with vanilla extract until stiff peaks emerge, representing the airy foundation of the pie’s texture.
- Gently incorporate the whipped cream into the cream cheese mixture, maintaining the delicate airiness while creating a unified filling.
- Carefully fold crushed Butterfinger pieces throughout the cream mixture, distributing the candy’s signature crunch and flavor evenly.
- Transfer the filling into the cooled crust, using a spatula to create a smooth, even surface that showcases the pie’s elegant profile.
- Refrigerate the pie for a minimum of 4 hours, allowing the filling to set and flavors to meld together harmoniously.
- Just before serving, garnish with additional crushed Butterfinger fragments and optional dollops of whipped cream to enhance visual appeal and flavor complexity.
Notes
- Ensure graham cracker crust is packed tightly to prevent crumbling when slicing the pie.
- Crush Butterfinger bars while they’re slightly chilled to get more uniform pieces without turning them into powder.
- Use room temperature cream cheese for smoother mixing and preventing lumps in the filling.
- For a gluten-free version, swap graham cracker crust with gluten-free cookie crumbs like almond or coconut flour-based cookies.
- Freeze leftover pie slices individually wrapped for up to 2 weeks, maintaining texture and flavor.
- If cream doesn’t whip properly, chill the mixing bowl and whisk in the refrigerator for 15 minutes before whipping.
- For a lighter version, substitute half the cream cheese with Greek yogurt to reduce calories.
- Prep Time: 15 minutes
- Cook Time: 10 minutes
- Category: Desserts
- Method: Baking
- Cuisine: American
Nutrition
- Serving Size: 8
- Calories: 175
- Sugar: 7 g
- Sodium: 55 mg
- Fat: 10 g
- Saturated Fat: 6 g
- Unsaturated Fat: 3 g
- Trans Fat: 0.2 g
- Carbohydrates: 18 g
- Fiber: 1 g
- Protein: 1 g
- Cholesterol: 25 mg
Michael Thompson
Founder & Recipe Developer
Expertise
Education
Cascade Culinary Institute – Bend, OR
ServSafe Food Handler Certification – Portland, OR
Focus: Certified in core food safety and hygiene principles for both home and professional kitchens, with emphasis on ingredient handling, kitchen cleanliness, and safe preparation methods.
Mike’s kitchen journey began with a single goal: to make everyday meals feel like something worth celebrating.
After earning his Certificate in Culinary Arts from Cascade Culinary Institute, he spent years working with local farmers and small kitchens across Oregon, learning the beauty of seasonal, small-batch cooking.
Mike’s approach is simple, cook with what’s fresh, keep it approachable, and always leave room for a little creativity. When he’s not testing yogurt marinades or designing single-serving meals, you’ll find him hiking trails or hunting down the best berries at local markets.