Creamy Caramel Banana Pudding Cups Recipe: Sweet Comfort Joy
Sweet memories cascade when caramel banana pudding cups spark nostalgia in my kitchen.
Layers of creamy goodness promise delightful comfort with every spoonful.
Ripe bananas mingle with rich caramel, creating a dessert that feels like a warm embrace.
Smooth custard whispers promises of indulgence between delicate cookie crumbles.
Childhood favorites reimagined invite you to savor each magical bite.
Southern charm meets contemporary dessert artistry in this simple yet stunning treat.
Let the first scoop transport you to a world of pure deliciousness.
Reasons to Love Caramel Banana Pudding Cups
Key Ingredients Behind Caramel Banana Pudding Cups
Main Components:Dairy and Cream:Fruit and Toppings:How to Make Caramel Banana Pudding Cups
Step 1: Whip Up Creamy Pudding Base
Grab a large mixing bowl and combine instant vanilla pudding mix with cold milk. Whisk vigorously until the mixture transforms into a thick, smooth consistency. This should take about two minutes of dedicated stirring.
Step 2: Enhance Pudding Texture
Pour in sweetened condensed milk and blend thoroughly. Gently fold in whipped cream or Cool Whip, creating a luxuriously light and creamy mixture that will become the heart of your dessert.
Step 3: Create First Layer
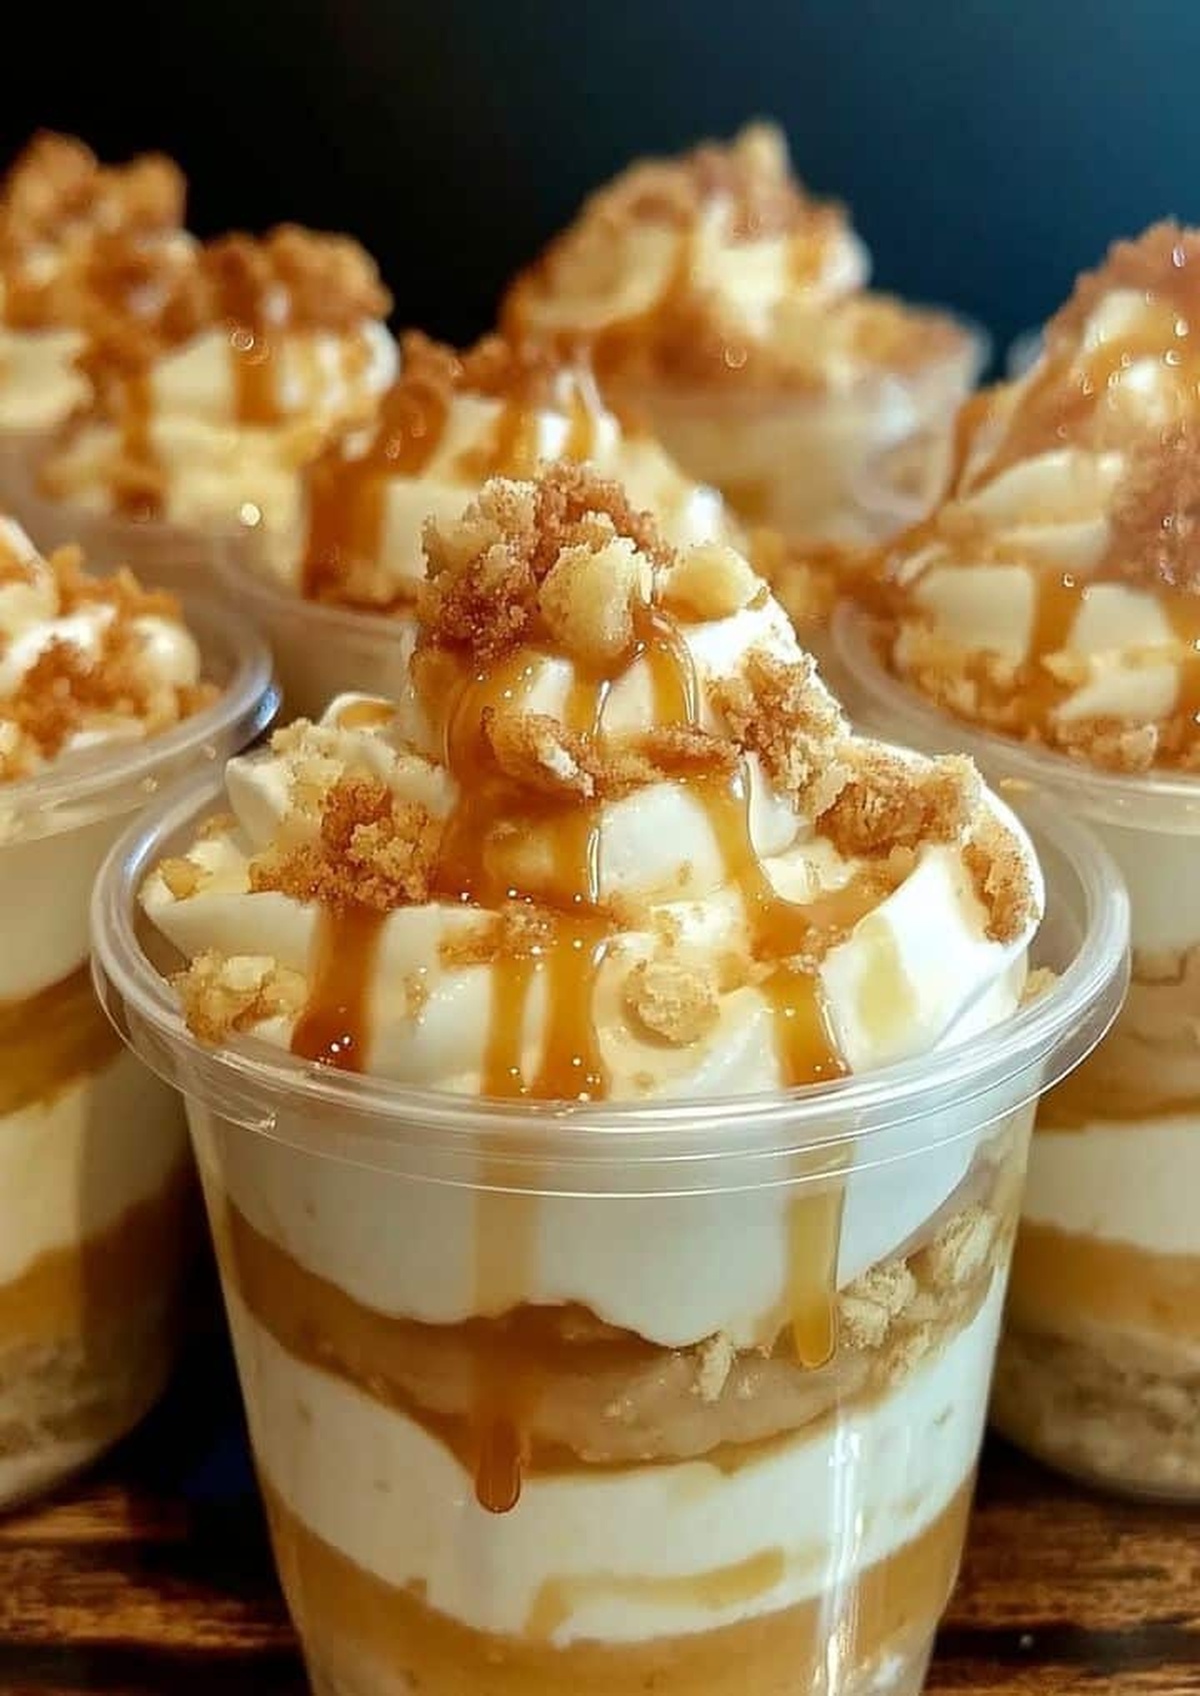
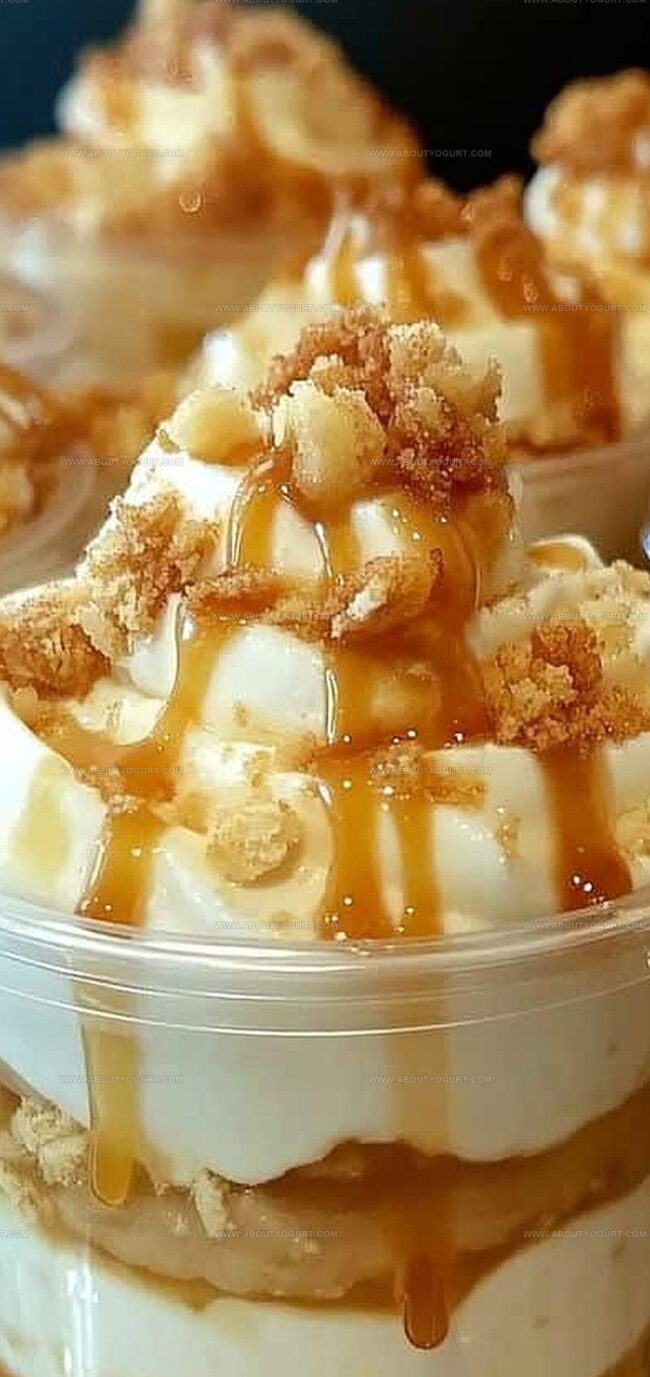
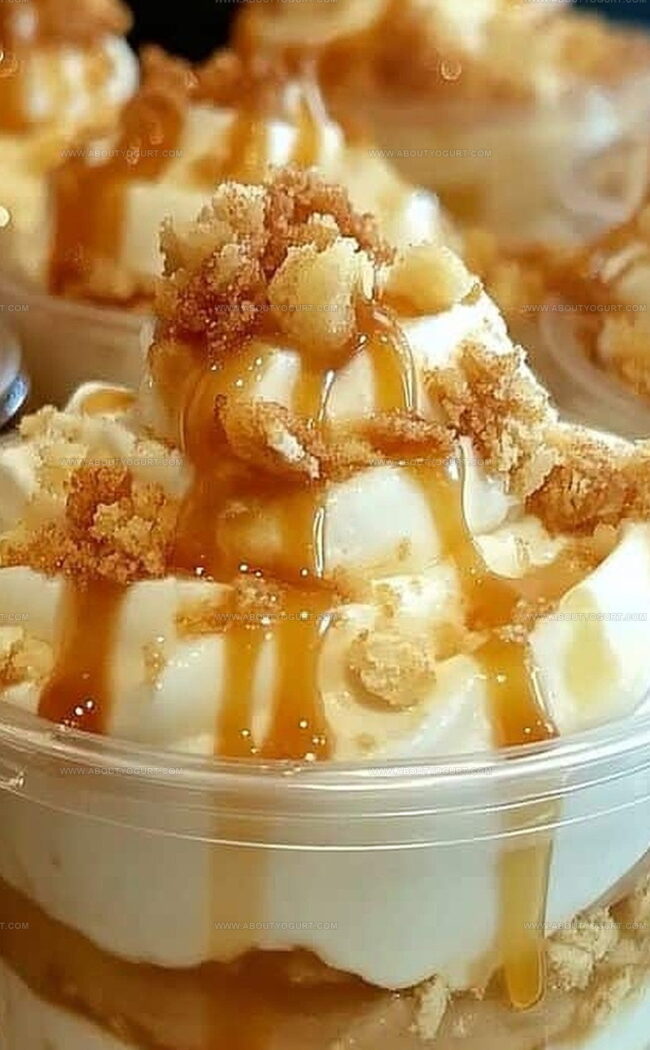
Select clear serving cups or mason jars. Sprinkle a generous layer of crushed vanilla wafers along the bottom, creating a delightful crunchy foundation for your pudding.
Step 4: Add Fruity Goodness
Carefully arrange fresh banana slices directly on top of the wafer crumbs. Choose ripe bananas for maximum sweetness and flavor.
Step 5: Pour Pudding Magic
Spoon the prepared pudding mixture generously over the banana layer, ensuring complete coverage. Drizzle a ribbon of rich caramel sauce across the surface for an extra indulgent touch.
Step 6: Build Delicious Layers
Repeat the layering process:Continue building layers until your cups are filled to the brim, finishing with a final dramatic drizzle of caramel on top.
Step 7: Chill and Settle
Refrigerate the pudding cups for at least one hour. This resting time allows flavors to mingle and develop, transforming individual ingredients into a harmonious dessert experience.
Helpful Hints for Perfect Caramel Banana Pudding Cups
Delicious Twists for Caramel Banana Pudding Cups
Best Pairings with Caramel Banana Pudding Cups
Tips for Storing Caramel Banana Pudding Cups
Answers to Common Questions About Caramel Banana Pudding Cups
Yes, homemade whipped cream works perfectly and often tastes fresher. Just ensure it’s whipped to stiff peaks before folding into the pudding mixture.
Instant pudding mix is recommended as it sets quickly and provides a smooth, creamy texture. Homemade pudding might make the dessert too runny or take longer to prepare.
Choose bananas that are yellow with a few brown spots – they’re sweet and soft, which enhances the pudding’s flavor without being too mushy.
Print
Caramel Banana Pudding Cups Recipe
- Total Time: 1 hour 10 minutes
- Yield: 6 1x
Description
Irresistible caramel banana pudding cups bring Southern comfort straight to dessert lovers’ hearts. Creamy layers of vanilla custard, ripe bananas, and caramel-soaked cookies create a delightful sweet experience you cannot resist.
Ingredients
Main Ingredients:
- 3 large ripe bananas, sliced
- 1 (3.4 ounces / 96 grams) box instant vanilla pudding mix
- 2 cups (480 milliliters) cold milk
- 1 (14 ounces / 397 grams) can sweetened condensed milk
Creamy Components:
- 1 cup (240 milliliters) whipped cream or Cool Whip
Topping and Garnish:
- 1/2 cup (120 milliliters) caramel sauce
- 20 vanilla wafers, crushed
- Additional caramel sauce for drizzling
Instructions
- Whisk instant vanilla pudding mix with cold milk until smooth and thickened, creating a rich, creamy base in approximately 2 minutes.
- Incorporate sweetened condensed milk into the pudding, blending thoroughly, then gently fold in whipped cream to achieve a light, airy texture.
- Create a foundational layer in each serving cup by sprinkling crushed vanilla wafers, providing a delightful crunch.
- Arrange freshly sliced bananas atop the wafer crumbs, ensuring even coverage across the cup’s surface.
- Carefully ladle the prepared pudding mixture over the banana layer, completely covering the fruit.
- Elegantly drizzle caramel sauce across the pudding, allowing it to cascade and create beautiful swirls.
- Continue layering: add another round of wafer crumbs, banana slices, pudding, and finish with an additional caramel sauce drizzle.
- Refrigerate the assembled dessert for a minimum of 1 hour, allowing flavors to harmonize and pudding to set completely.
- Before serving, optionally garnish with additional crushed wafers or a light caramel swirl for enhanced presentation.
Notes
- Prevent banana browning by tossing sliced bananas in a little lemon juice to keep them fresh and vibrant.
- Customize texture by adjusting wafer crush size: coarse crumbs create more crunch, fine crumbs provide smoother consistency.
- Make it gluten-free by substituting vanilla wafers with gluten-free graham crackers or almond flour-based cookies.
- Enhance richness by using homemade whipped cream instead of store-bought Cool Whip for a more luxurious, authentic flavor profile.
- Prep Time: 10 minutes
- Cook Time: 0 minutes
- Category: Desserts, Snacks
- Method: Blending
- Cuisine: American
Nutrition
- Serving Size: 6
- Calories: 432 kcal
- Sugar: 55 g
- Sodium: 280 mg
- Fat: 12 g
- Saturated Fat: 7 g
- Unsaturated Fat: 4 g
- Trans Fat: 0.2 g
- Carbohydrates: 75 g
- Fiber: 2 g
- Protein: 6 g
- Cholesterol: 30 mg
Sarah Mitchell
Content Specialist & Home Cooking Enthusiast
Expertise
Education
Asheville-Buncombe Technical Community College – Asheville, NC
American Fitness Professionals & Associates – Online
Sarah’s passion for food was sparked by weekend trips to the farmers’ market and her belief that healthy meals should never feel boring.
After earning her culinary diploma and becoming a certified Nutrition and Wellness Consultant, she set out to help others fall in love with simple, wholesome cooking.
She’s all about celebrating the small wins in the kitchen: a colorful yogurt bowl, a new twist on a classic dish, or a homemade snack that feels just a little extra special.
Outside the kitchen, Sarah is a gardener at heart, a yoga enthusiast, and a believer that fresh herbs can brighten any meal, and any day.