Cheesy Taco Sticks Recipe That Always Get Eaten
Crispy golden taco sticks promise a delightful twist on classic Mexican-inspired snacks that will make you smile.
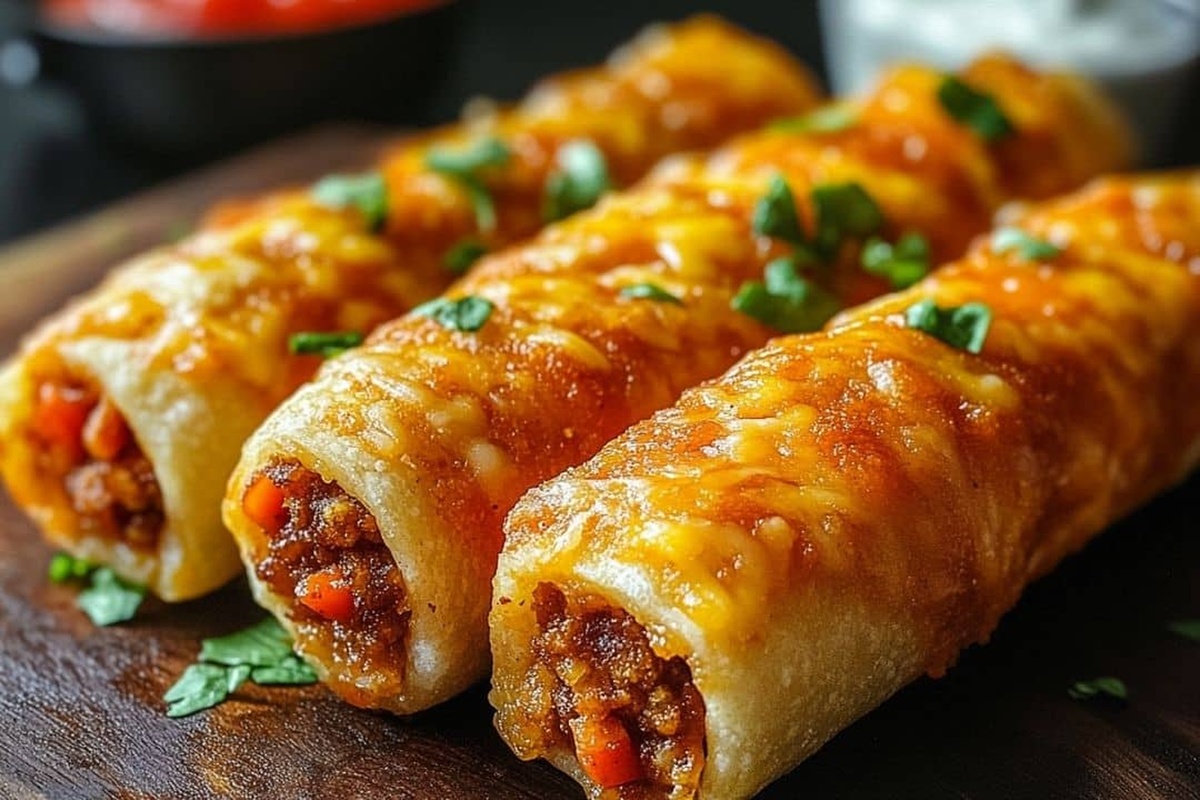
Melted cheese and seasoned ground beef create an irresistible combination inside a perfectly crunchy exterior.
Weeknight dinners suddenly become more exciting with these handheld treats.
Kids and adults alike cannot resist the savory crunch and gooey center.
Minimal ingredients and simple preparation mean you can whip up this crowd-pleaser in minutes.
Quick to assemble and even faster to devour, these taco sticks will become your new favorite party appetizer.
Grab a plate and get ready to impress everyone at the table.
Reasons to Love Cheesy Taco Sticks Recipe

Ingredients for Cheesy Taco Sticks Recipe
Main Protein:Dairy Components:Dough and Seasoning:Butter and Herb Topping:Optional Serving Sides:How to Prepare Cheesy Taco Sticks Recipe
Step 1: Warm Up The Cooking Space
Get your oven cranking at 400°F and line a baking sheet with parchment paper for easy cleanup.
Step 2: Brown The Meat
Sizzle ground beef in a skillet over medium heat, breaking it into small crumbles until fully cooked. Drain away excess fat.
Step 3: Spice Up The Meat
Sprinkle taco seasoning over the beef, stirring thoroughly to distribute the zesty flavors evenly.
Step 4: Prepare The Dough Canvas
Unroll pizza dough on a lightly floured surface. Slice the dough into 10 rectangular sections with smooth, even cuts.
Step 5: Layer And Roll
Place a generous spoonful of seasoned beef down the center of each dough rectangle.
Ingredients for rolling:Fold and roll the dough around the filling, pinching edges firmly to create sealed pockets.
Step 6: Create A Flavor Glaze
Mix together:Brush the herbed butter mixture generously over each rolled stick.
Step 7: Bake To Golden Perfection
Arrange rolls on the prepared baking sheet. Bake for 12-15 minutes until the exterior turns a beautiful golden brown.
Step 8: Serve With Delicious Companions
Allow rolls to cool slightly. Offer dipping options like salsa, guacamole, or sour cream for extra excitement.
Pro Tips for Cheesy Taco Sticks Recipe

Variation Ideas for Cheesy Taco Sticks Recipe
Pairing Suggestions for Cheesy Taco Sticks Recipe
Storage Advice for Cheesy Taco Sticks Recipe
FAQs About Cheesy Taco Sticks Recipe
Yes, you can substitute ground beef with ground turkey, chicken, or even plant-based meat alternatives for a different flavor profile.
You can prepare the taco sticks and refrigerate them unbaked for up to 24 hours, or freeze them for up to a month before baking.
You can use crescent roll dough, pizza dough from a local bakery, or make your own homemade pizza dough as a replacement.
Add some diced jalapeños to the beef mixture or use a spicy taco seasoning blend to increase the heat level of the recipe.
Print
Cheesy Taco Sticks Recipe
- Total Time: 27-30 minutes
- Yield: 6 1x
Description
Savory cheesy taco sticks combine Mexican-inspired flavors with crispy, melted goodness that promises pure comfort. Crisp tortillas wrapped around spicy ground beef and gooey cheese create an irresistible snack you’ll crave again and again.
Ingredients
Meat and Protein:
- 1 pound (1 lb) ground beef
Cheese:
- 5 colby jack and cheddar cheese sticks, halved
Dough and Seasoning:
- 1 tube Pillsbury Pizza Dough
- 1 packet taco seasoning mix
- 4 tablespoons (4 tbsp) butter, melted
- 1 teaspoon (1 tsp) garlic powder
- 1 teaspoon (1 tsp) dried parsley
Instructions
- Prepare the culinary workspace by heating the oven to 400°F and lining a baking sheet with parchment paper for optimal cooking surface.
- In a skillet, transform ground beef into a savory mixture, browning thoroughly over medium heat and eliminating any surplus fat.
- Infuse the meat with robust taco seasoning, stirring meticulously to ensure complete flavor integration and creating a zesty filling.
- Unleash the pizza dough’s potential by stretching it across a flour-dusted surface, then precisely dividing into ten uniform rectangular sections.
- Craft each taco stick by layering seasoned beef onto the dough rectangles, strategically positioning a cheese stick fragment atop the meat, then carefully enveloping and sealing the contents within a tight dough embrace.
- Elevate the flavor profile by whisking melted butter with aromatic garlic powder and herbaceous dried parsley, then delicately brushing this mixture across the exterior of each assembled taco stick.
- Transfer the prepared taco sticks onto the parchment-lined baking sheet, allowing them to transform in the preheated oven for 12-15 minutes until achieving a golden, crisp exterior.
- Allow a brief cooling period to prevent potential mouth burns, then present the taco sticks alongside complementary dipping companions like salsa, guacamole, or sour cream for an enhanced culinary experience.
Notes
- Experiment with different ground meats like turkey or chicken for a leaner protein option that still packs tons of flavor.
- Consider making homemade taco seasoning to control sodium and customize spice levels, which allows for more personalized taste profiles.
- Gluten-free alternatives work perfectly by substituting pizza dough with gluten-free crescent roll dough or cauliflower-based wrap alternatives.
- Veggie lovers can replace meat with black beans, roasted corn, or plant-based crumbles to create a delicious vegetarian version without losing the classic taco essence.
- Prep Time: 15 minutes
- Cook Time: 12-15 minutes
- Category: Snacks, Appetizer
- Method: Baking
- Cuisine: Mexican
Nutrition
- Serving Size: 6
- Calories: 510
- Sugar: 2 g
- Sodium: 700 mg
- Fat: 35 g
- Saturated Fat: 15 g
- Unsaturated Fat: 17 g
- Trans Fat: 0.5 g
- Carbohydrates: 25 g
- Fiber: 1 g
- Protein: 22 g
- Cholesterol: 70 mg
Sarah Mitchell
Content Specialist & Home Cooking Enthusiast
Expertise
Education
Asheville-Buncombe Technical Community College – Asheville, NC
American Fitness Professionals & Associates – Online
Sarah’s passion for food was sparked by weekend trips to the farmers’ market and her belief that healthy meals should never feel boring.
After earning her culinary diploma and becoming a certified Nutrition and Wellness Consultant, she set out to help others fall in love with simple, wholesome cooking.
She’s all about celebrating the small wins in the kitchen: a colorful yogurt bowl, a new twist on a classic dish, or a homemade snack that feels just a little extra special.
Outside the kitchen, Sarah is a gardener at heart, a yoga enthusiast, and a believer that fresh herbs can brighten any meal, and any day.