
Chicken Ranch Wraps Recipe That Make Lunch Easy
Nothing beats a quick lunch like these mouthwatering chicken ranch wraps that combine zesty flavors with creamy textures.
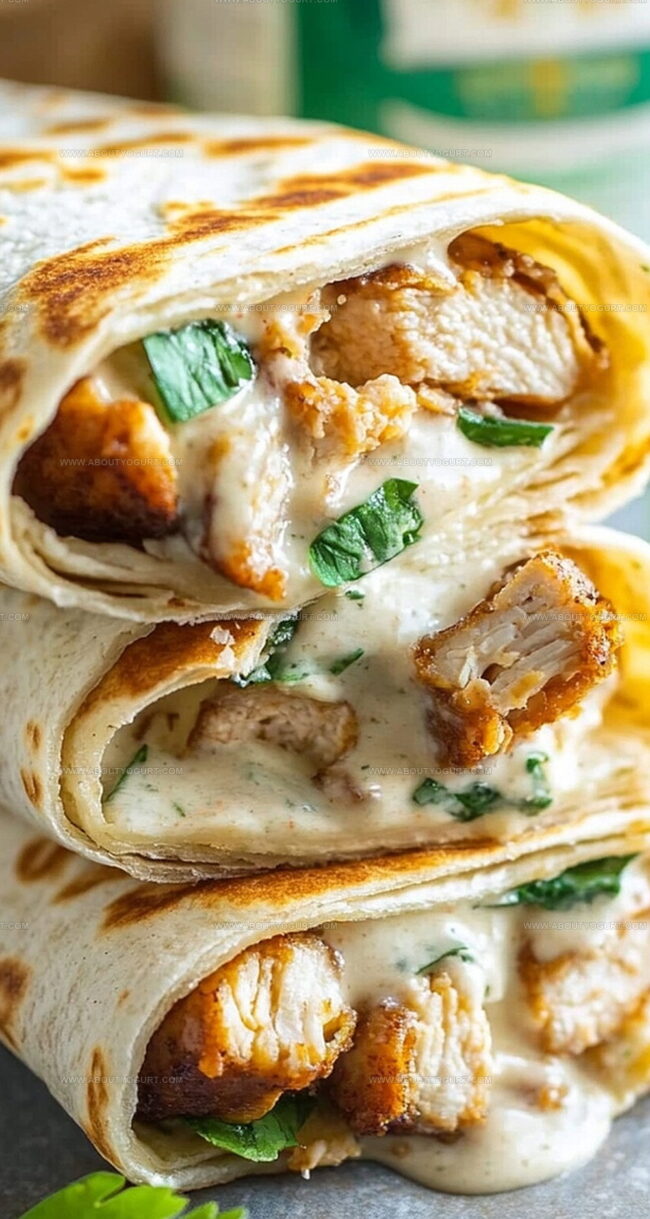
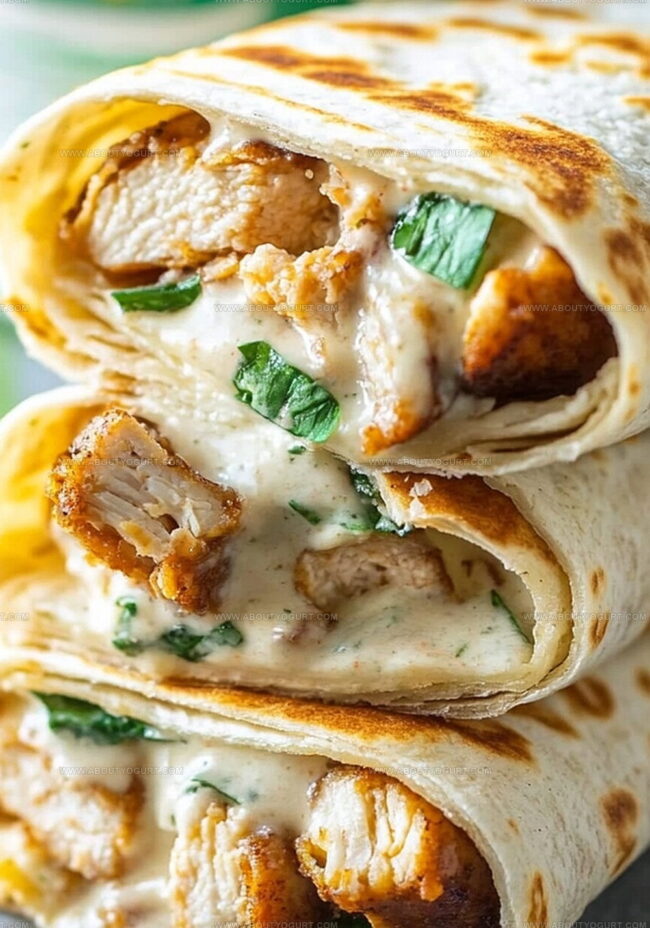
Crisp vegetables and tender chicken create a delightful combination inside soft tortillas.
Fresh ingredients make this recipe surprisingly simple to assemble.
Ranch dressing adds a tangy kick that elevates every bite.
Protein-packed and satisfying, these wraps work perfectly for meal prep or spontaneous gatherings.
Crispy and cool, they promise a delicious experience you won’t want to miss.
Grab your ingredients and let’s make something amazing together!
Reasons To Enjoy Chicken Ranch Wraps
What’s Inside Chicken Ranch Wraps
Main Protein:Wrap Base:Flavor Enhancers:Cooking Essentials:Steps For Making Chicken Ranch Wraps
Step 1: Prepare Workspace
Spread out clean tortillas on a flat surface, ensuring you have enough room to work comfortably.
Step 2: Layer Delicious Fillings
Add the following ingredients to each tortilla:Distribute ingredients evenly across the center of the tortilla.
Step 3: Wrap With Precision
Carefully fold the bottom edge of the tortilla over the filling. Tuck in the sides, then roll the tortilla tightly into a compact burrito shape. Ensure the edges are sealed to prevent ingredients from falling out.
Step 4: Sizzle And Crisp
Heat a skillet or grill pan over medium heat. Lightly grease the surface with cooking spray or a small amount of oil. Place the wrapped tortillas seam-side down on the hot surface.
Step 5: Toast To Golden Perfection
Cook the wraps for 1-2 minutes on each side. Watch for a beautiful golden-brown color and crispy exterior. The cheese should start to melt, creating a delightful texture.
Step 6: Serve And Enjoy
Remove the wraps from heat. Slice each wrap diagonally and serve immediately while hot and crispy. Pair with additional ranch dressing or your favorite dipping sauce for extra flavor.
Helpful Tips When Making Chicken Ranch Wraps
Chicken Ranch Wraps You Can Try Different Ways
What To Serve With Chicken Ranch Wraps
How To Keep Chicken Ranch Wraps Fresh
FAQs For Chicken Ranch Wraps
You can swap mozzarella with cheddar cheese, use Greek yogurt instead of ranch dressing, and replace chicken with grilled tofu or pulled pork for variety.
Fold the tortillas tightly, tucking in edges while rolling, and always place the wrap seam-side down when cooking to help seal the wrap.
Yes, you can prepare the wraps in advance and store them in the refrigerator for up to 24 hours before cooking. Just wrap them in plastic wrap to keep them fresh.
Large flour tortillas are ideal because they’re soft, flexible, and hold ingredients well without tearing during rolling and cooking.
Print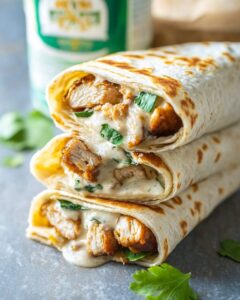
Chicken Ranch Wraps Recipe
- Total Time: 9 minutes
- Yield: 4 1x
Description
Irresistible Chicken Ranch Wraps bring zesty flavors from classic American comfort cuisine into a quick, handheld meal perfect for busy families. Crisp tortillas packed with seasoned chicken, cool ranch dressing, and fresh vegetables create a satisfying lunch you cannot resist.
Ingredients
Main Protein:
- 2 cups cooked grilled chicken breasts
Cheese and Dairy:
- 1/2 cup mozzarella cheese (shredded)
- 1/4 cup Hidden Valley Simply Ranch dressing
Herbs and Wrap Components:
- 1/4 cup cilantro (minced)
- 4 8-inch tortillas
Instructions
- Prepare the tortillas by laying them flat on a clean surface, creating a workspace for assembly.
- Distribute shredded chicken evenly across each tortilla, ensuring comprehensive coverage.
- Drizzle ranch dressing over the chicken, creating a smooth and flavorful base layer.
- Sprinkle mozzarella cheese generously to add richness and create a melty texture.
- Optionally garnish with fresh cilantro to enhance the wrap’s aromatic profile.
- Carefully fold the tortilla edges inward, then roll tightly to create a compact burrito shape, sealing the ingredients inside.
- Preheat a skillet or griddle to medium heat, lightly coating the surface with cooking oil to prevent sticking.
- Position the wraps seam-side down in the heated pan, allowing them to crisp and develop a golden-brown exterior.
- Cook for approximately 2-3 minutes per side, rotating to ensure even browning and warming of the filling.
- Once the tortillas achieve a crispy, golden finish, remove from heat and let rest momentarily.
- Slice each wrap diagonally to create appealing presentation and easier handling.
- Serve immediately while the wraps are warm and the cheese remains melted.
Notes
- Adapt tortillas by using whole wheat or gluten-free options for different dietary needs.
- Swap ranch dressing with Greek yogurt for a lighter, protein-rich alternative that cuts calories.
- Enhance nutrition by adding extra vegetables like spinach, bell peppers, or shredded carrots inside the wrap.
- Prep chicken ahead of time by batch cooking and storing in the refrigerator to speed up weeknight meal preparation.
- Prep Time: 5 minutes
- Cook Time: 4 minutes
- Category: Lunch, Dinner, Snacks
- Method: Sautéing
- Cuisine: American
Nutrition
- Serving Size: 4
- Calories: 371 kcal
- Sugar: 2 g
- Sodium: 583 mg
- Fat: 17 g
- Saturated Fat: 7 g
- Unsaturated Fat: 8 g
- Trans Fat: 0 g
- Carbohydrates: 27 g
- Fiber: 3 g
- Protein: 32 g
- Cholesterol: 75 mg
Michael Thompson
Founder & Recipe Developer
Expertise
Education
Cascade Culinary Institute – Bend, OR
ServSafe Food Handler Certification – Portland, OR
Focus: Certified in core food safety and hygiene principles for both home and professional kitchens, with emphasis on ingredient handling, kitchen cleanliness, and safe preparation methods.
Mike’s kitchen journey began with a single goal: to make everyday meals feel like something worth celebrating.
After earning his Certificate in Culinary Arts from Cascade Culinary Institute, he spent years working with local farmers and small kitchens across Oregon, learning the beauty of seasonal, small-batch cooking.
Mike’s approach is simple, cook with what’s fresh, keep it approachable, and always leave room for a little creativity. When he’s not testing yogurt marinades or designing single-serving meals, you’ll find him hiking trails or hunting down the best berries at local markets.