Fried Apple or Peach Pies Recipe with Crispy Golden Crust
Sweet memories of southern kitchens swirl around these delectable fried apple pies that capture childhood comfort.
Grandmothers across Alabama and Georgia perfected these crispy handheld treats generations ago.
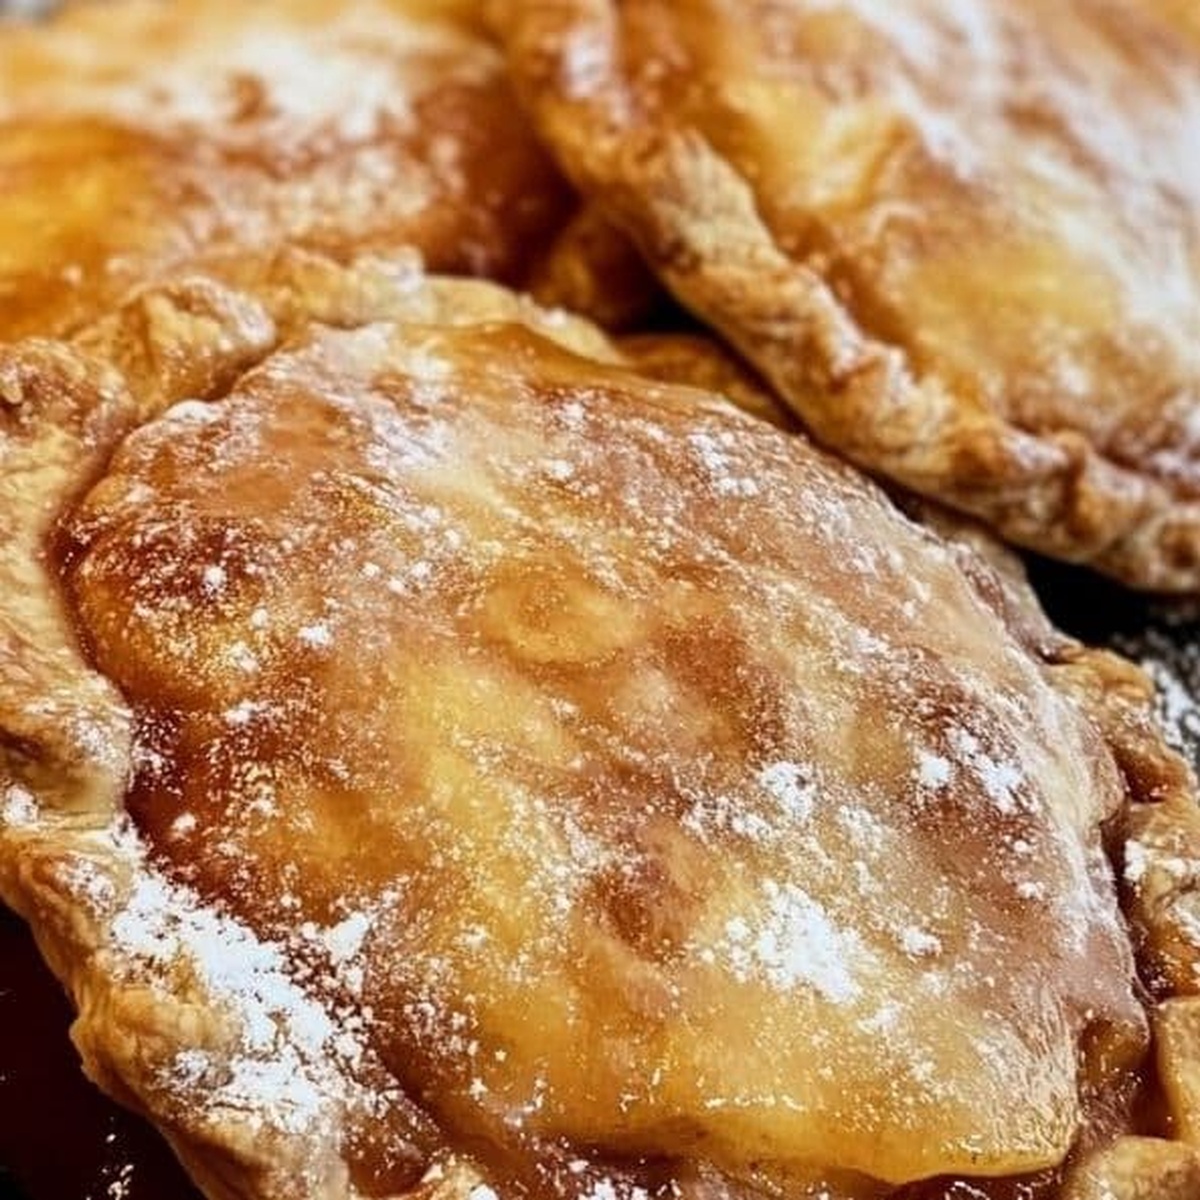
Delicate pastry pockets burst with warm, caramelized fruit filling that melts in your mouth.
Seasonal apples shine brightest when wrapped in tender, golden-brown dough and quickly fried to perfection.
Cinnamon and nutmeg dance through each bite, creating an irresistible aroma that pulls people closer.
Simple ingredients transform into magic when you understand the technique.
We can make something extraordinary together with this classic recipe.
Come roll up your sleeves and create a dessert that tells a delicious story.
Fried Apple Or Peach Pies That Delight

Ingredients For Fried Apple Or Peach Pies
Main Pie Ingredients:Spice and Flavor Enhancers:Coating and Glaze Ingredients:How To Make Fried Apple Or Peach Pies
Step 1: Warm Up the Oven
Fire up your oven to a toasty 425F (220C). Let those pie crusts relax and come to room temperature while you get ready to create magic.
Step 2: Create Fruity Filling
Grab a bowl and pour in your favorite fruit filling. Using a fork and knife, chop the fruit into tiny, bite-sized pieces. Sprinkle in a dash of cinnamon and mix everything together until it’s perfectly blended. Set this delicious mixture aside.
Step 3: Shape the Pie Bases
Gently unroll your pie crusts and use a 4-inch biscuit cutter to create 6 perfect circles from each crust. If you’re short on circles, don’t worry – just re-roll those scraps and keep going.
Step 4: Build Your Mini Pies
Place a generous spoonful of fruity filling right in the center of each pie crust circle. Fold the circle in half, creating a half-moon shape. Pinch those edges together firmly. Fold the edges over and press with a fork to create a beautiful seal. Poke a few tiny holes in each pie to prevent any unexpected bursting.
Step 5: Prepare for Baking
Whip up the egg white until it’s light and frothy. Brush this over the top of each hand pie, giving them a gorgeous golden sheen. Arrange the pies on a parchment-lined baking sheet, leaving a little space between each one.
Step 6: Bake to Perfection
Slide the baking sheet into the preheated oven and bake for about 15 minutes. Watch for a beautiful golden-brown color that signals they’re ready to be devoured.
Step 7: Add the Finishing Touch
While the pies are baking, whip up a quick glaze by mixing powdered sugar and milk until smooth and silky. Once the pies are out of the oven and still warm, dip each one into the glaze. Use two forks to carefully coat and remove them. Place them back on the parchment paper and let the glaze set for a few minutes.
Step 8: Indulge and Enjoy
Grab a pie, take a bite, and savor the delicious moment you’ve created!
Tips For Crispy Fried Pies

Variations For Fried Apple Or Peach Pies
Pairings For Fried Apple Or Peach Pies
Storage Tips For Fried Apple Or Peach Pies
FAQs About Fried Apple Or Peach Pies
Yes, these hand pies are perfect for beginners. The recipe is straightforward, requires minimal ingredients, and follows simple steps that anyone can easily follow.
Absolutely! While the recipe suggests peach filling, you can experiment with apple, cherry, or even berry fillings. Just ensure the filling isn’t too runny to prevent leaking.
To prevent breaking, make sure to seal the edges completely by pinching and pressing with a fork. Also, poking small holes with a fork helps release steam and reduces the chance of bursting.
Print
Crispy Fried Apple Or Peach Pies Recipe
- Total Time: 30 minutes
- Yield: 8 1x
Description
Delightful Southern fried apple or peach pies deliver a crispy golden embrace of sweet fruit filling nestled in a tender pastry pocket. Homemade comfort wraps you in nostalgic flavors that dance between flaky crust and luscious fruit, promising pure culinary joy with each delectable bite.
Ingredients
Main Ingredients:
- 1 can (21 ounces / 595 grams) peach pie filling
- 2 boxes (14.1 ounces / 400 grams each) refrigerated pie crust
Spices and Flavoring:
- 1 teaspoon cinnamon
Coating and Glaze:
- 2 cups powdered sugar
- 1/2 cup milk
- 1 egg white, beaten
Instructions
- Prepare a preheated oven at 425F (220C), allowing pie crusts to reach room temperature during filling preparation.
- Create filling by dicing peaches or apples into small pieces within a shallow bowl, thoroughly incorporating cinnamon for enhanced flavor distribution.
- Unroll refrigerated pie crusts and precision-cut 6 circular shapes using a 4-inch biscuit cutter, maximizing dough utilization by re-rolling remaining scraps.
- Carefully position fruit filling at the center of each circular dough segment, gently folding edges to form half-moon shapes, meticulously sealing borders with fork crimping and creating strategic ventilation holes.
- Delicately brush pie surfaces with whisked egg white, ensuring uniform golden coloration during baking process, then arrange pies on parchment-lined baking sheet with minimal spacing.
- Bake approximately 15 minutes until achieving rich golden-brown exterior, simultaneously preparing smooth glaze by blending powdered sugar and milk.
- Remove baked pies and immediately immerse in prepared glaze, utilizing forks for precise coating and controlled placement on parchment paper, allowing 5 minutes for glaze solidification.
- Serve warm and enjoy the delectable handheld pastry treat.
Notes
- Choose soft, ripe fruits for the most flavorful and tender hand pies, ensuring a rich, sweet filling that melts in your mouth.
- Chop fruits into small, uniform pieces to create a consistent texture and prevent large chunks from tearing through the delicate pie crust.
- Experiment with alternative fillings like apple butter, mixed berries, or even savory options like cheese and herbs for a unique twist on the classic recipe.
- Freeze unbaked hand pies for up to 3 months, allowing you to prepare ahead and enjoy fresh, homemade treats whenever a craving strikes.
- Prep Time: 15 minutes
- Cook Time: 15 minutes
- Category: Desserts, Snacks
- Method: Baking
- Cuisine: American
Nutrition
- Serving Size: 8
- Calories: 362 kcal
- Sugar: 31 g
- Sodium: 231 mg
- Fat: 18 g
- Saturated Fat: 7 g
- Unsaturated Fat: 9 g
- Trans Fat: 0.5 g
- Carbohydrates: 49 g
- Fiber: 1 g
- Protein: 3 g
- Cholesterol: 15 mg
Sarah Mitchell
Content Specialist & Home Cooking Enthusiast
Expertise
Education
Asheville-Buncombe Technical Community College – Asheville, NC
American Fitness Professionals & Associates – Online
Sarah’s passion for food was sparked by weekend trips to the farmers’ market and her belief that healthy meals should never feel boring.
After earning her culinary diploma and becoming a certified Nutrition and Wellness Consultant, she set out to help others fall in love with simple, wholesome cooking.
She’s all about celebrating the small wins in the kitchen: a colorful yogurt bowl, a new twist on a classic dish, or a homemade snack that feels just a little extra special.
Outside the kitchen, Sarah is a gardener at heart, a yoga enthusiast, and a believer that fresh herbs can brighten any meal, and any day.