
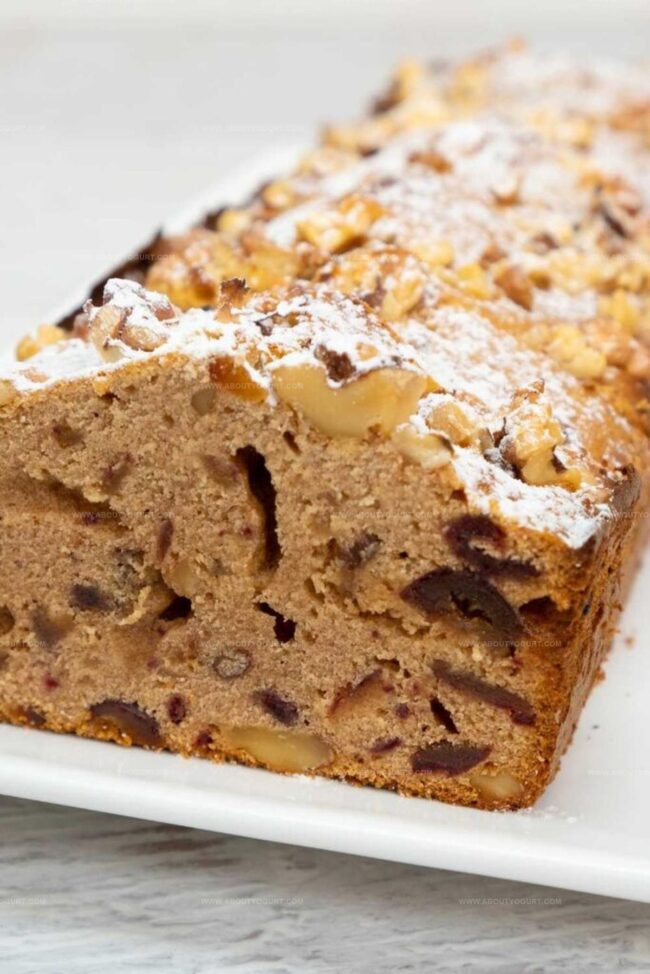
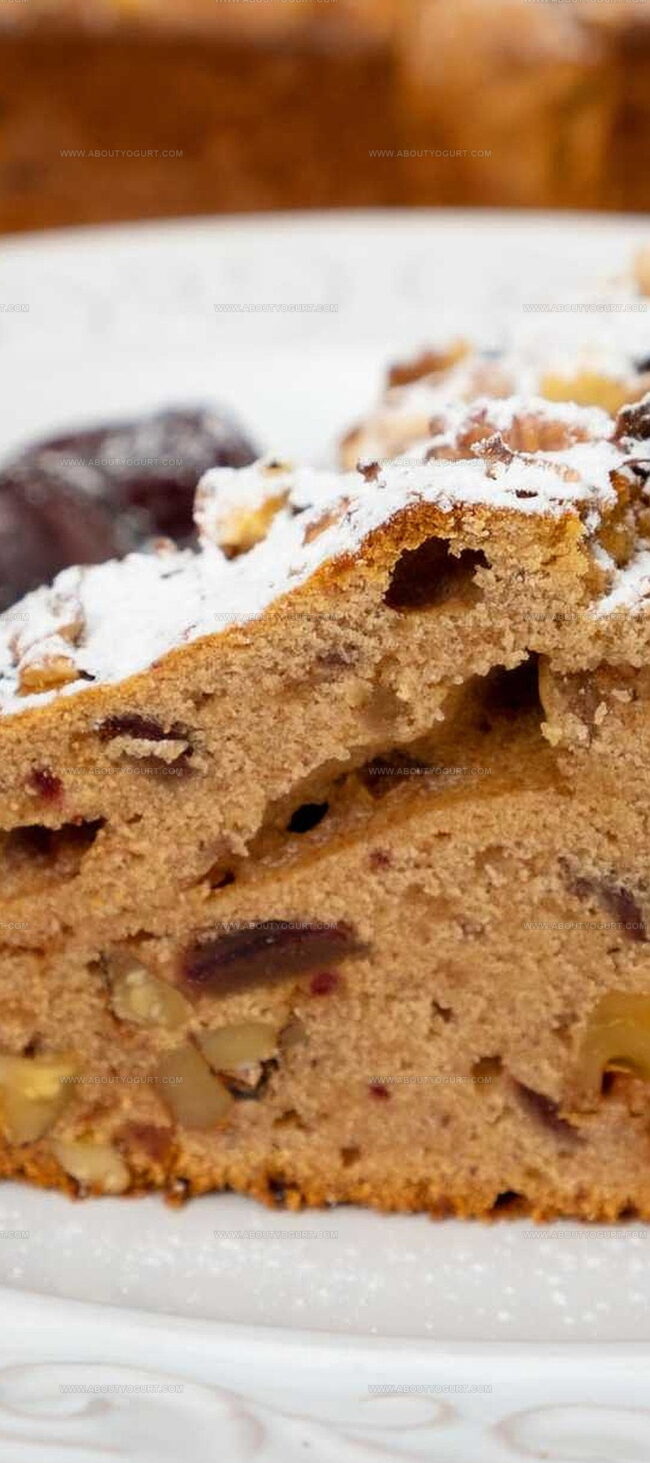
Sweet & Crunchy Date and Walnut Cake Recipe for Cozy Baking
Sweet memories often revolve around a delightful date and walnut cake that brings warmth to our kitchen.
Nutty aromas waft through the house, promising comfort in every slice.
My grandmother’s cherished recipe whispers stories of tradition and love.
Delicate crumbs melt on your tongue, creating moments of pure bliss.
Baking becomes an intimate dance of ingredients, connecting generations through shared flavors.
Simple yet sophisticated, this cake turns ordinary afternoons into extraordinary experiences.
You’ll find yourself falling in love with each perfectly balanced bite that marries the richness of dates and the crunch of walnuts.
Why Mary Berry Date And Walnut Cake Is Loved
What’s Inside Mary Berry Date And Walnut Cake
Wet Ingredients:Dry Ingredients:Sugars and Nuts:How To Bake Mary Berry Date And Walnut Cake

Step 1: Prepare Baking Equipment
Grab a 2lb loaf tin and get it ready by greasing the sides and lining it with parchment paper. Set your oven to warm up at 180C or 160C for fan-forced ovens.
Step 2: Create Flavor-Packed Soak
Combine ingredients in a mixing bowl:Let this delicious mixture sit and mingle for half an hour, allowing the dates to soften and flavors to develop.
Step 3: Incorporate Sweet Binders
Stir in both white and brown sugars until well blended. Crack eggs into the mixture and whisk until smooth and creamy.
Step 4: Build the Cake Base
Gently sift dry ingredients directly into the wet mixture:Fold ingredients together with a light touch, avoiding overmixing to keep the cake tender.
Step 5: Add Nutty Crunch
Reserve a handful of walnuts for topping. Fold most of the nuts into the batter, creating pockets of nutty goodness throughout the cake.
Step 6: Fill and Decorate Tin
Transfer batter to the prepared loaf tin. Sprinkle remaining walnuts on top and dust with demerara sugar for a beautiful, crunchy finish.
Step 7: Bake to Perfection
Start baking at the initial temperature for 30 minutes. Then reduce heat to 170C and continue baking for 25-30 minutes until a skewer comes out clean.
Step 8: Cool and Serve
Allow cake to rest in the tin for 5 minutes. Transfer to a wire rack and let cool completely before slicing and enjoying your delectable date and walnut creation.
Tips That Help With Mary Berry Date And Walnut Cake
Ways To Change Mary Berry Date And Walnut Cake

Perfect Pairings For Mary Berry Date And Walnut Cake
How To Store Mary Berry Date And Walnut Cake Right
Mary Berry Date And Walnut Cake FAQs Explained
Yes, you can use Medjool, Deglet Noor, or any soft dates available. Choose pitted dates and chop them finely for best results.
Coffee enhances the depth of flavor and complements the dates, but you can substitute with hot water if you prefer a non-coffee version.
Insert a skewer or toothpick into the center of the cake. If it comes out clean with no wet batter, the cake is ready. The top should also be golden brown and slightly firm to touch.
Print
Date And Walnut Cake Recipe
- Total Time: 90-95 minutes
- Yield: 8 1x
Description
Sweet indulgence meets Middle Eastern charm in this date and walnut cake, blending rich nutty flavors with caramel-like dates. Comfort baking reaches new heights with each moist, aromatic slice that connects you to cherished culinary traditions.
Ingredients
Main Ingredients:
- 250 grams (8.8 ounces) soft dates, chopped
- 100 grams (3.5 ounces) walnuts, chopped
- 225 grams (8 ounces) self-raising flour
- 2 medium eggs
Sweeteners:
- 75 grams (2.6 ounces) caster sugar
- 55 grams (1.9 ounces) dark muscovado sugar
- 1 tablespoon demerara sugar
Additional Ingredients:
- 100 grams (3.5 ounces) unsalted butter, softened
- 150 milliliters (5 fluid ounces) boiling water
- 1 teaspoon instant coffee
- 1 teaspoon baking powder
- 1 pinch of salt
Instructions
- Combine softened butter, chopped dates, hot water, and instant coffee in a mixing bowl. Allow mixture to rest and infuse flavors for approximately 30 minutes at room temperature.
- Incorporate brown and white sugars into the date mixture, then gently blend in eggs until smooth and well integrated.
- Carefully sift flour, baking powder, and salt directly into the wet ingredients, stirring minimally to prevent overmixing and maintain cake’s delicate texture.
- Gently fold most of the walnuts into the batter, reserving some for topping.
- Transfer batter into a prepared loaf tin, ensuring even distribution and smoothing the surface with a spatula.
- Sprinkle remaining walnuts and demerara sugar across the top of the unbaked cake for added crunch and visual appeal.
- Place in preheated oven at 180°C (160°C fan) and bake for initial 30 minutes.
- Reduce oven temperature to 170°C and continue baking for additional 25-30 minutes, or until a skewer inserted comes out clean.
- Remove from oven and let cake rest in tin for 5 minutes to stabilize structure.
- Carefully transfer cake to wire rack and allow complete cooling before slicing and serving.
Notes
- Swap coffee with herbal tea or apple juice for a kid-friendly version that maintains moisture and depth of flavor.
- Toast walnuts briefly before adding to enhance their nutty richness and prevent them from sinking in the cake batter.
- Use gluten-free flour blend as a direct substitute to make this recipe suitable for those with wheat sensitivities, ensuring the same tender crumb.
- Store wrapped tightly in parchment paper at room temperature for up to 4 days, allowing flavors to develop and intensify over time.
- Prep Time: 35 minutes
- Cook Time: 55-60 minutes
- Category: Desserts
- Method: Baking
- Cuisine: British
Nutrition
- Serving Size: 8
- Calories: 296kcal
- Sugar: 25g
- Sodium: 120mg
- Fat: 15g
- Saturated Fat: 5g
- Unsaturated Fat: 9g
- Trans Fat: 0.1g
- Carbohydrates: 38g
- Fiber: 3g
- Protein: 4g
- Cholesterol: 45mg
Michael Thompson
Founder & Recipe Developer
Expertise
Education
Cascade Culinary Institute – Bend, OR
ServSafe Food Handler Certification – Portland, OR
Focus: Certified in core food safety and hygiene principles for both home and professional kitchens, with emphasis on ingredient handling, kitchen cleanliness, and safe preparation methods.
Mike’s kitchen journey began with a single goal: to make everyday meals feel like something worth celebrating.
After earning his Certificate in Culinary Arts from Cascade Culinary Institute, he spent years working with local farmers and small kitchens across Oregon, learning the beauty of seasonal, small-batch cooking.
Mike’s approach is simple, cook with what’s fresh, keep it approachable, and always leave room for a little creativity. When he’s not testing yogurt marinades or designing single-serving meals, you’ll find him hiking trails or hunting down the best berries at local markets.