
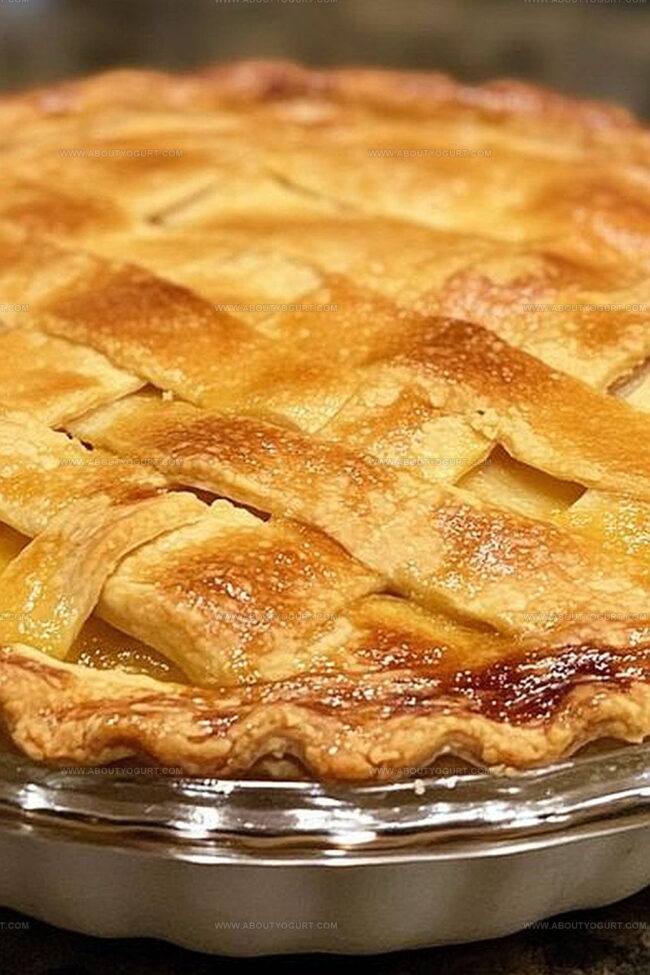
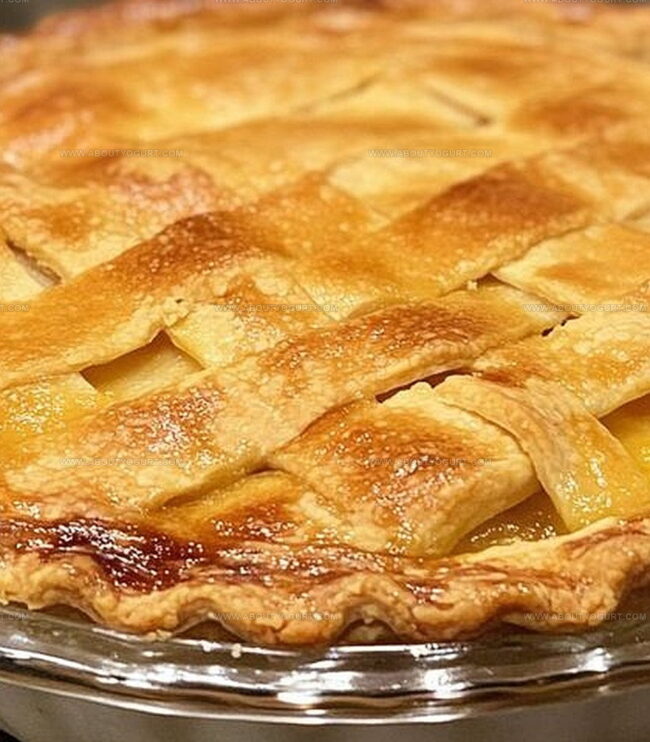
Deliciously Flaky No-Fail Pie Crust Recipe: Foolproof Magic
Crafting a deliciously flaky no-fail pie crust can transform your baking from ordinary to extraordinary.
Pastry making intimidates many home cooks, but this recipe breaks down complex techniques into simple steps.
Professional bakers have long guarded their secrets, yet our approach demystifies the process completely.
Butter plays a crucial role in creating those coveted layers of tender, crisp pastry.
Salt and flour interact with cold butter to produce a remarkably light texture that melts in your mouth.
Precision matters, but don’t let that scare you away from experimenting.
Come along and master a technique that will impress everyone at your next gathering.
Why Deliciously Flaky No-Fail Pie Crust Is Essential for Baking
Ingredients for Deliciously Flaky No-Fail Pie Crust
Dry Ingredients:Fat:Liquid:How to Make Deliciously Flaky No-Fail Pie Crust
Step 1: Mixing Dry Ingredients
Grab a spacious mixing bowl and toss in the flour, salt, and sugar. Whisk these dry ingredients together until they’re well combined and look evenly distributed.
Step 2: Incorporating Butter
Break out a pastry cutter or your trusty fingertips. Work the cold butter into the flour mixture, breaking it down until the texture looks like rough, uneven breadcrumbs. The key is to keep the butter cold and work quickly so it doesn’t warm up.
Step 3: Adding Liquid Magic
Drizzle in the ice-cold water, one splash at a time. Gently stir and press the dough together. You want the mixture to just barely hold together – not too wet, not too dry. Stop adding water the moment the dough starts to form a shaggy ball.
Step 4: Shaping the Dough
Divide the dough into two equal portions. Use your hands to shape each portion into a smooth, flat disc. This helps it chill and roll out more evenly later.
Step 5: Chilling the Dough
Wrap each disc tightly in plastic wrap. Slide them into the refrigerator and let them rest for at least an hour. This relaxes the gluten and helps prevent shrinking when you bake the crust.
Step 6: Rolling Out the Crust
When you’re ready to bake, remove the dough from the fridge. Let it sit for a few minutes to soften slightly. Roll it out on a lightly floured surface, rotating and flipping to prevent sticking. Transfer to your pie pan with care.
Tips for Baking a Flaky No-Fail Pie Crust
Variations to Try With Deliciously Flaky No-Fail Pie Crust
Pairings That Complement Deliciously Flaky No-Fail Pie Crust
Proper Storage of Deliciously Flaky No-Fail Pie Crust
FAQs About Deliciously Flaky No-Fail Pie Crust
You’ll need all-purpose flour, salt, sugar, cold butter, and ice water.
Yes, you can prepare the dough and refrigerate it for up to 3 days before using.
The mixture should look like coarse crumbs with small pea-sized butter pieces throughout.
Absolutely! Cold butter helps create those delicious flaky layers in your pie crust by preventing the butter from melting too quickly.
Print
Deliciously Flaky No-Fail Pie Crust Recipe
- Total Time: 1 hour 15 minutes
- Yield: 8 1x
Description
Mastering the ultimate “deliciously flaky no-fail pie crust” recipe promises baking success for home chefs everywhere. Buttery, tender layers guarantee a perfect pastry foundation that elevates sweet and savory pies with professional-level precision.
Ingredients
Main Ingredients:
- 2 1/2 cups (300 grams) all-purpose flour
- 1 cup (227 grams) unsalted butter, chilled and diced
Seasoning:
- 1 teaspoon salt
- 1 teaspoon sugar
Liquid:
- 6 to 8 tablespoons (90 to 120 milliliters) ice water
Instructions
- Sift dry ingredients – flour, salt, and sugar – into a spacious mixing vessel, ensuring even distribution.
- Utilize a pastry cutter or cold butter knife to methodically slice chilled butter into the flour mixture, creating a texture reminiscent of rough, uneven pebbles.
- Gradually introduce ice-cold water, incorporating one tablespoon at a time, gently folding and pressing until the dough begins to cohesively bind.
- Partition the tender dough into two equal segments, carefully molding each portion into flat, circular discs with smooth edges.
- Encase each disc securely in transparent culinary wrap, protecting from moisture and potential freezer burn.
- Allow dough to rest and chill in the refrigerator for a minimum of 60 minutes, permitting gluten to relax and butter to solidify, which guarantees an extraordinarily flaky, tender crust.
- Remove from refrigerator approximately 10 minutes prior to rolling, enabling slight temperature adjustment for effortless manipulation.
Notes
- Keep butter ice-cold and cut into small cubes for ultimate flakiness.
- Use a pastry cutter or food processor to blend ingredients quickly without warming the butter.
- Minimal handling prevents gluten development, ensuring a tender crust.
- Replace part of the butter with vegetable shortening for an extra-crisp texture if desired.
- Prep Time: 15 minutes
- Cook Time: 0 minutes
- Category: Desserts
- Method: Rolling
- Cuisine: American
Nutrition
- Serving Size: 8
- Calories: 225
- Sugar: 1
- Sodium: 150 mg
- Fat: 17 g
- Saturated Fat: 11 g
- Unsaturated Fat: 6 g
- Trans Fat: 0.3 g
- Carbohydrates: 16 g
- Fiber: 1 g
- Protein: 2 g
- Cholesterol: 45 mg
Michael Thompson
Founder & Recipe Developer
Expertise
Education
Cascade Culinary Institute – Bend, OR
ServSafe Food Handler Certification – Portland, OR
Focus: Certified in core food safety and hygiene principles for both home and professional kitchens, with emphasis on ingredient handling, kitchen cleanliness, and safe preparation methods.
Mike’s kitchen journey began with a single goal: to make everyday meals feel like something worth celebrating.
After earning his Certificate in Culinary Arts from Cascade Culinary Institute, he spent years working with local farmers and small kitchens across Oregon, learning the beauty of seasonal, small-batch cooking.
Mike’s approach is simple, cook with what’s fresh, keep it approachable, and always leave room for a little creativity. When he’s not testing yogurt marinades or designing single-serving meals, you’ll find him hiking trails or hunting down the best berries at local markets.