Pinky Delight Dessert Recipe Everyone Will Enjoy Soon
Crafting a mouthwatering pinky delight brings unexpected joy to your kitchen adventure.
Sweet whispers of strawberry magic dance through every delicate bite.
Creamy textures promise pure indulgence with minimal effort.
Delightful ingredients blend seamlessly, creating a dessert that sparkles with charm.
Soft pink hues invite playful culinary exploration and sensory excitement.
Elegance meets simplicity in this delectable treat that surprises and enchants.
You’ll fall in love with how easily magic happens between mixing bowl and plate.
Dive into Dreamy Pinky Delight’s Sweet Charm
Ingredients that Make Dreamy Pinky Delight Stand Out
Crust Ingredients:Filling Ingredients:Topping and Decoration Ingredients:Crafting Dreamy Pinky Delight: Step-by-Step
Step 1: Prepare the Crunchy Base
Warm up the oven to 350F (175C). Crush graham crackers into fine crumbs and mix them with sugar and melted butter until everything sticks together perfectly. Press this delightful mixture into the bottom of a springform pan, creating a slightly raised edge. Pop it in the oven for 8-10 minutes until lightly golden, then let it cool completely.
Step 2: Craft Luscious Strawberry Sauce
Wash fresh strawberries and remove their leafy tops. Blend the berries until silky smooth in a blender. Strain the puree through a fine mesh sieve to remove any pesky seeds, creating a velvety liquid that’ll make your dessert sing with fruity flavor.
Step 3: Whip Up Creamy Cheesecake Filling
Lower the oven temperature to 325F (160C). In a large mixing bowl, whip cream cheese and sugar until they become impossibly smooth and creamy. Gently fold in:Add eggs one at a time, mixing softly to keep the mixture light and airy. Stir in one cup of strawberry puree, creating a blush-pink masterpiece. Optional: add a drop of food coloring for an extra vibrant pink.
Step 4: Bake with Water Bath Magic
Wrap the pan’s bottom in foil and place it in a larger pan. Pour hot water around the cheesecake pan to create a gentle steam bath. Bake for 55-70 minutes – the center should have a gentle wiggle when done. Turn off the oven, keep the door closed, and let the cheesecake rest for one hour.
Step 5: Cool and Set
Remove the cheesecake from the water bath. Run a knife around the edges to prevent cracking. Let it cool completely at room temperature, then refrigerate for at least 4 hours or overnight.
Step 6: Create Dreamy Decoration
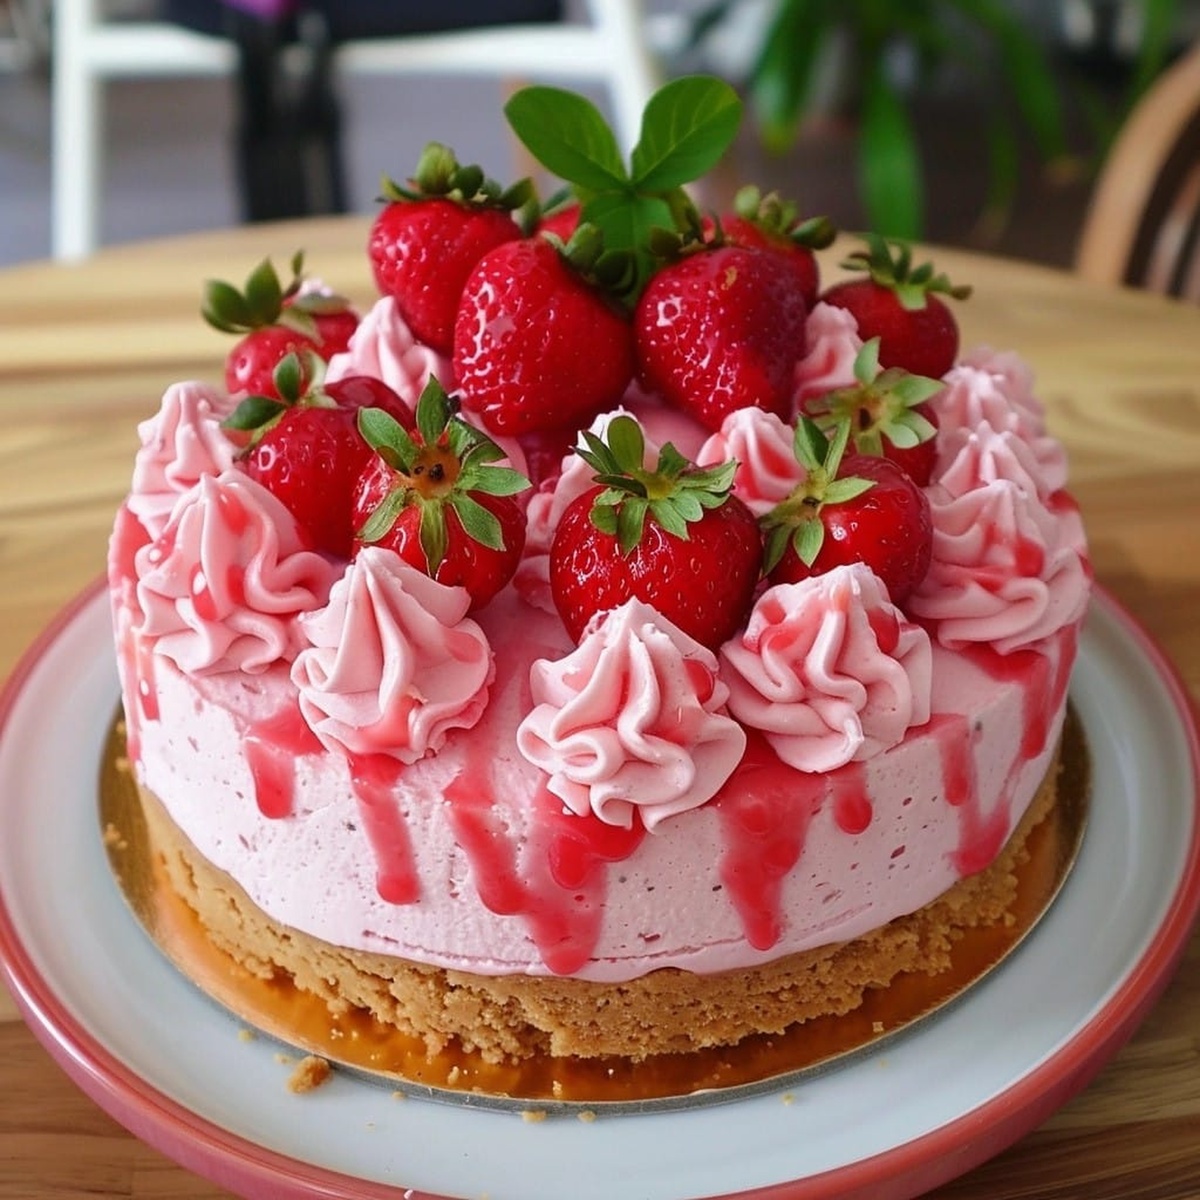
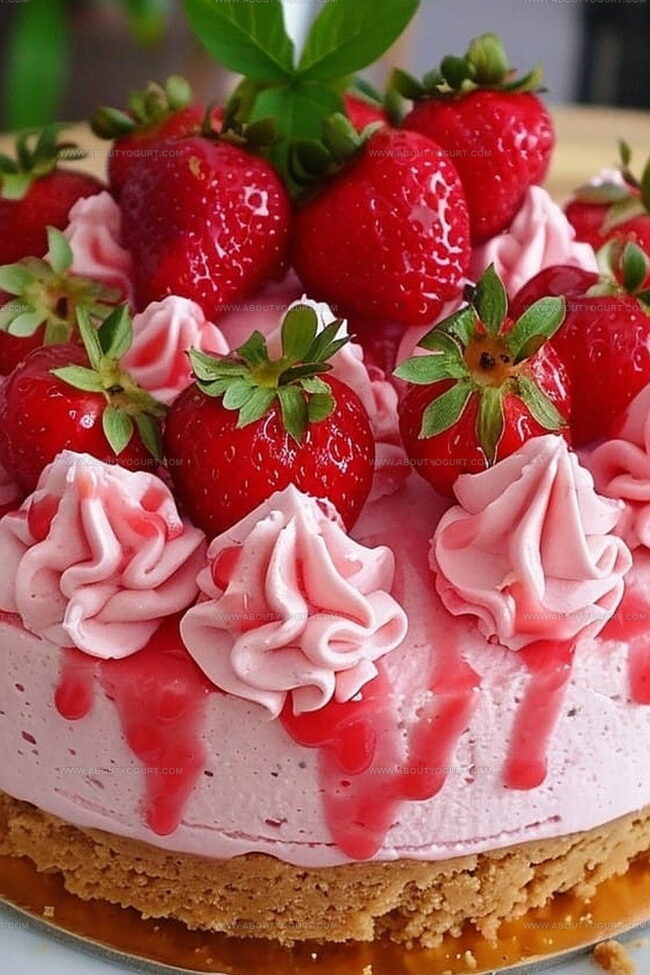
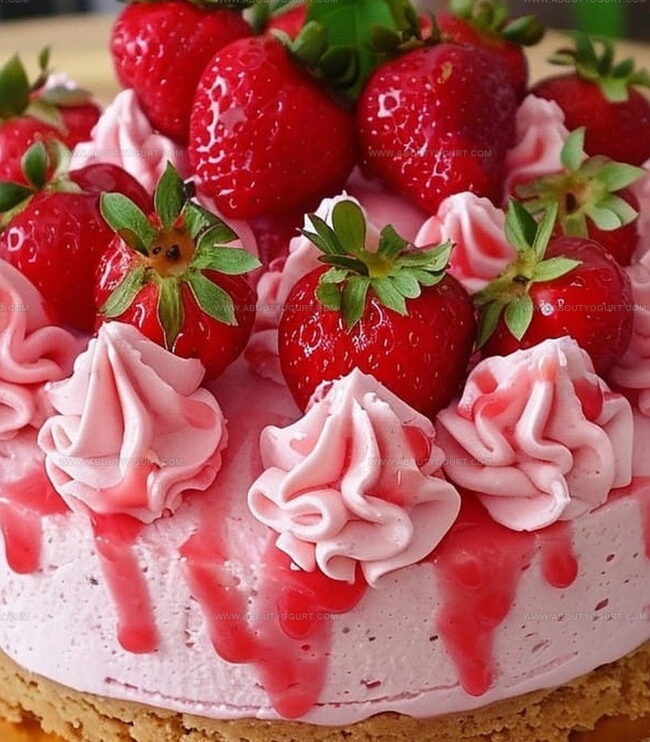
Whip heavy cream with powdered sugar until it forms perfect peaks. Add a hint of pink food coloring if desired. Pipe delicate cream dollops around the cake’s edges. Drizzle remaining strawberry puree over the top and garnish with fresh, juicy strawberries.
Step 7: Serve and Celebrate
Release the cheesecake from the springform pan. Slice with a warm knife for clean, beautiful cuts. Serve chilled and watch everyone fall in love with your spectacular strawberry creation!
Pro Tips to Perfect Your Dreamy Pinky Delight Every Time
Variations to Personalize Dreamy Pinky Delight
Pairing Ideas to Enhance Dreamy Pinky Delight
Storage Tips to Keep Dreamy Pinky Delight Fresh
FAQs to Help You Love Dreamy Pinky Delight More
Yes, thaw frozen strawberries completely and drain excess liquid before pureeing. Fresh strawberries provide the best flavor and texture for this recipe.
Use a water bath, avoid overmixing eggs, and don’t overbake. Let the cheesecake cool gradually in the oven with the door closed to minimize cracking.
Cold cream cheese can create lumps. Soften it by leaving it out for 30-45 minutes before mixing, or microwave briefly at low power for 10-15 seconds.
Print
Dreamy Pinky Delight Recipe
- Total Time: 6 hours 35-40 minutes
- Yield: 8 1x
Description
Pinky Delight brings a whimsical twist to dessert lovers with its enchanting blend of strawberry and rose flavors. Delicate layers of creamy mousse and light sponge cake create a romantic masterpiece that invites you to savor each blissful spoonful.
Ingredients
Main Ingredients:
Crust:
- 1.5 cups graham cracker crumbs
- 6 tablespoons (85 grams) unsalted butter
- 0.25 cup granulated sugar
Filling:
- 24 ounces (680 grams) cream cheese
- 1 pound (450 grams) fresh strawberries
- 1 cup (200 grams) granulated sugar
- 1 cup (240 grams) sour cream
- 4 large eggs
Topping and Decoration:
- 1 cup (240 milliliters) heavy whipping cream
- 0.25 cup (30 grams) powdered sugar
- 1 teaspoon pure vanilla extract
- Food coloring (red or pink, optional)
- Fresh strawberries
Instructions
- Preheat the oven to 350F (175C) and prepare a 9-inch springform pan for the graham cracker crust.
- Combine graham cracker crumbs with sugar and melted butter, pressing the mixture firmly into the pan’s base and slightly up the sides.
- Bake the crust for 8-10 minutes until lightly golden, then allow to cool completely.
- Thoroughly wash strawberries and remove stems, then transform into a silky puree using a blender or food processor.
- Strain the puree through a fine mesh sieve to eliminate seeds, ensuring a velvety smooth texture.
- Lower oven temperature to 325F (160C) for the cheesecake filling preparation.
- Cream together cream cheese and granulated sugar until achieving a luxurious, smooth consistency.
- Gently incorporate sour cream and vanilla extract into the cream cheese mixture.
- Introduce eggs one at a time, mixing on low speed to maintain a delicate texture.
- Fold 1 cup of strawberry puree into the filling, optional: enhance pink color with food coloring.
- Encase the springform pan’s bottom with aluminum foil and place within a larger pan filled with hot water to create a water bath.
- Pour the strawberry-infused filling over the prepared crust.
- Bake for 55-70 minutes, ensuring the center remains slightly jiggly.
- Switch off the oven, keep the door closed, and allow cheesecake to rest for 1 hour.
- Extract from oven and water bath, carefully run a knife around the edges to prevent cracking.
- Cool to room temperature, then refrigerate for minimum 4 hours or overnight.
- Whip heavy cream with powdered sugar until forming stiff peaks, optional: add pink food coloring.
- Artfully pipe whipped cream around the cheesecake’s perimeter.
- Drizzle remaining strawberry puree across the surface.
- Garnish with fresh whole and sliced strawberries for an elegant presentation.
- Release from springform pan, slice with a warm knife, and serve chilled for a decadent dessert experience.
Notes
- Ensure graham cracker crust is tightly packed to prevent crumbling and create a sturdy base for the creamy filling.
- Use room temperature cream cheese and eggs for smoother, lump-free mixing and even baking consistency.
- Create a perfectly smooth cheesecake by gently folding strawberry puree and avoiding overmixing to prevent air bubbles.
- For gluten-free option, substitute graham cracker crumbs with almond flour or gluten-free cookie crumbs without compromising texture.
- Prep Time: 30 minutes
- Cook Time: 1 hour 5-10 minutes
- Category: Mocktails
- Method: Baking
- Cuisine: American
Nutrition
- Serving Size: 8
- Calories: 426 kcal
- Sugar: 34 g
- Sodium: 250 mg
- Fat: 32 g
- Saturated Fat: 19 g
- Unsaturated Fat: 11 g
- Trans Fat: 0.5 g
- Carbohydrates: 28 g
- Fiber: 1.5 g
- Protein: 7 g
- Cholesterol: 110 mg
Sarah Mitchell
Content Specialist & Home Cooking Enthusiast
Expertise
Education
Asheville-Buncombe Technical Community College – Asheville, NC
American Fitness Professionals & Associates – Online
Sarah’s passion for food was sparked by weekend trips to the farmers’ market and her belief that healthy meals should never feel boring.
After earning her culinary diploma and becoming a certified Nutrition and Wellness Consultant, she set out to help others fall in love with simple, wholesome cooking.
She’s all about celebrating the small wins in the kitchen: a colorful yogurt bowl, a new twist on a classic dish, or a homemade snack that feels just a little extra special.
Outside the kitchen, Sarah is a gardener at heart, a yoga enthusiast, and a believer that fresh herbs can brighten any meal, and any day.