
3-Ingredient Sugar Cookies Recipe for Beginner Bakers
Whipping up delectable {3-ingredient} easy sugar cookies can turn an ordinary afternoon into a sweet celebration of simplicity.
Minimal ingredients mean maximum enjoyment without complex kitchen gymnastics.
Home bakers adore shortcuts that deliver delightful results.
Crisp edges and soft centers make these treats irresistible to everyone who tries them.
Butter, sugar, and flour dance together to create magic in just minutes.
No fancy equipment or culinary expertise required – just pure baking joy.
Grab your mixing bowl and let’s create something deliciously uncomplicated that will have people asking for seconds.
What Makes {3-Ingredient} Easy Sugar Cookies So Great
What You’ll Need For {3-Ingredient} Easy Sugar Cookies
Main Ingredients:Optional Flavor Enhancers:Coating and Decoration:How To Make {3-Ingredient} Easy Sugar Cookies Step-By-Step
Step 1: Prepare Baking Station
Preheat the oven to 325°F. Line two large baking sheets with parchment paper for easy cookie removal and cleanup.
Step 2: Cream Butter and Sugar
Use a handheld electric mixer to blend butter and sugar until the mixture becomes slightly gritty and well combined.
Step 3: Incorporate Flour
Mix flour into the butter-sugar mixture until everything is thoroughly combined. If using vanilla, blend it into the dough for extra flavor.
Step 4: Shape Cookie Dough
Roll the dough into small one-inch balls using a cookie scoop or your hands. This ensures uniform cookie size and even baking.
Step 5: Coat Cookies in Sugar
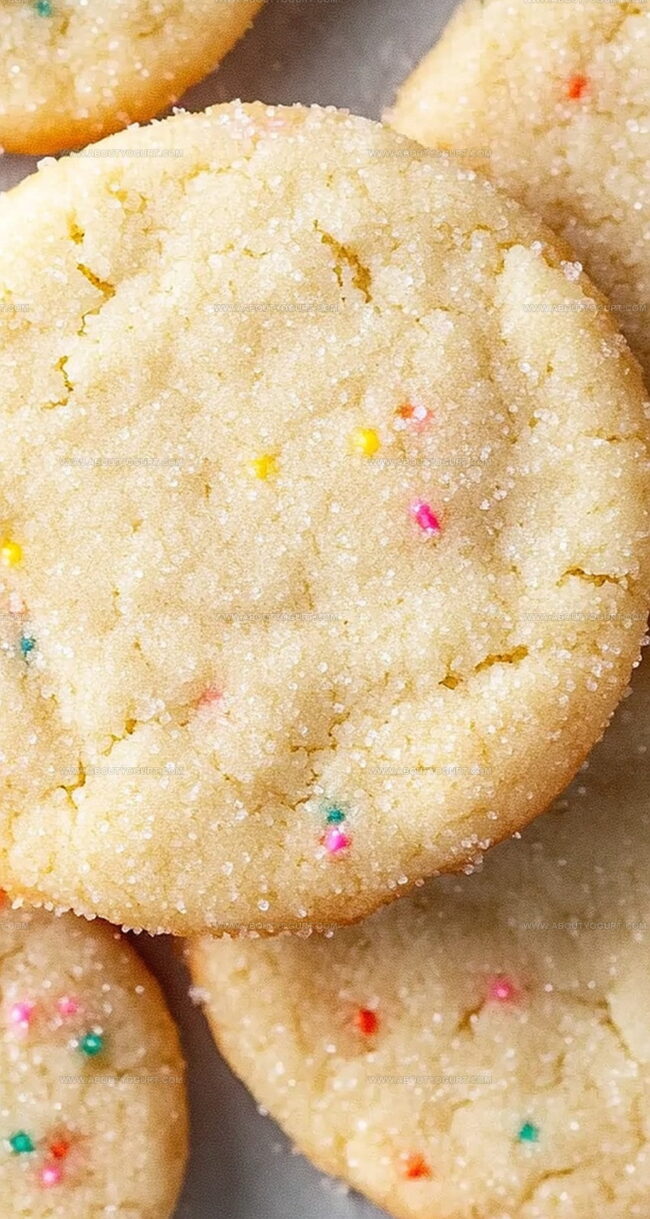
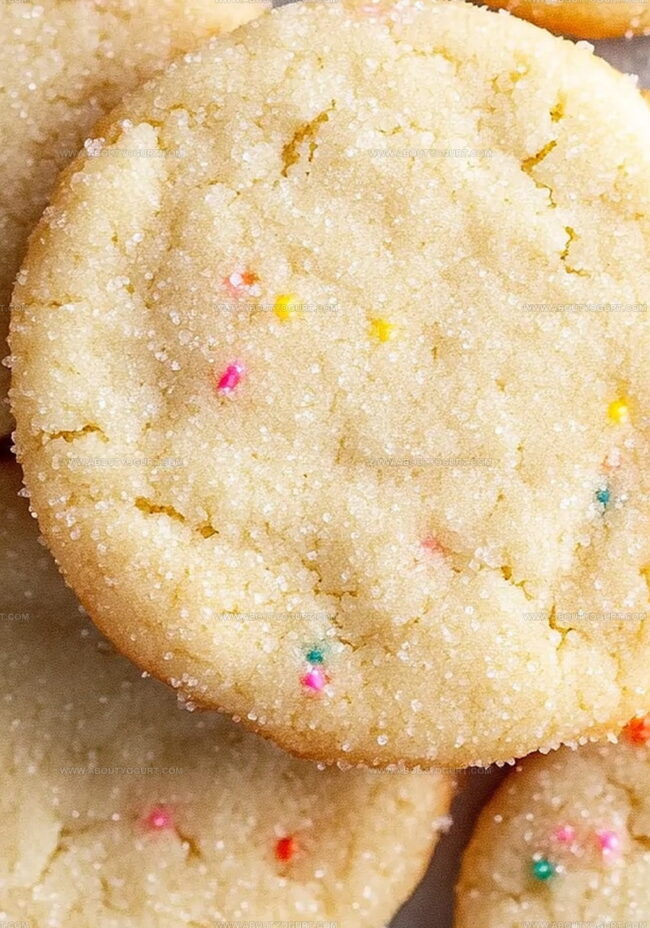
Roll each dough ball in additional sugar, creating a sweet and sparkly exterior. Place the coated balls on the prepared baking sheets, spacing them about 2 inches apart.
Step 6: Flatten and Decorate
Gently press down on each dough ball using the bottom of a measuring cup or glass. If desired, sprinkle decorative toppings and lightly press them into the surface.
Step 7: Bake to Golden Perfection
Slide the baking sheets into the preheated oven. Bake for 14-16 minutes until the cookie edges and bottoms turn a light golden color.
Step 8: Cool and Set
Remove cookies from the oven and let them rest on the baking sheets for 10-15 minutes. This helps them firm up and prevents breaking when transferred.
Step 9: Serve and Savor
Transfer cookies to a cooling rack. Enjoy these melt-in-your-mouth treats with a glass of milk or share with friends and family.
Quick Tips For {3-Ingredient} Easy Sugar Cookies
Simple Twists On {3-Ingredient} Easy Sugar Cookies
What Goes Well With {3-Ingredient} Easy Sugar Cookies
Best Way To Store {3-Ingredient} Easy Sugar Cookies
Your {3-Ingredient} Easy Sugar Cookies FAQ
Rolling the cookies in sugar creates a sweet, crispy exterior and adds a delightful sparkly texture to the cookie surface. This extra coating gives the cookies a professional bakery-like finish and enhances their overall sweetness.
Yes, you can use salted butter, but reduce or omit any additional salt in the recipe. Keep in mind that salted butter might slightly alter the cookie’s final taste and make them a bit more salty.
Look for light golden edges and bottoms. The cookies should appear set but not dark brown. They’ll be slightly soft when first removed from the oven and will firm up as they cool on the baking sheet.
Print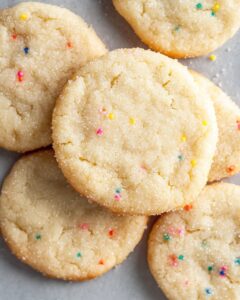
Easy 3-Ingredient Sugar Cookies Recipe
- Total Time: 29-31 minutes
- Yield: 12 1x
Description
Sweet simplicity shines in these 3-ingredient sugar cookies, masterfully blending minimal ingredients into delightful treats. Home bakers will savor each buttery, melt-in-your-mouth morsel that promises effortless baking pleasure.
Ingredients
Main Ingredients:
- 2 cups + 1 tablespoon (260 grams) all-purpose flour
- 1 cup (227 grams) unsalted butter, room temperature
- 2/3 cup + 3 tablespoons (165 grams) granulated sugar
Flavor and Decoration:
- 1 teaspoon vanilla extract
Topping:
- Rainbow sprinkles or nonpareils
Instructions
- Warm the oven to 325°F and prepare two baking sheets with parchment paper.
- Cream butter and sugar using an electric mixer until the texture becomes slightly granular.
- Incorporate flour into the butter mixture, blending thoroughly. Mix in vanilla if desired.
- Craft uniform dough spheres approximately 1 inch in diameter using a cookie scoop or hands.
- Gently roll each dough ball in remaining sugar, ensuring a delicate coating.
- Arrange sugar-coated balls on prepared sheets, spacing them 2 inches apart.
- Delicately press each ball flat using the bottom of a measuring cup, creating a thin disc roughly 3/16-inch thick.
- Optionally sprinkle decorative elements on top, gently pressing to secure.
- Slide sheets into preheated oven and bake for 14-16 minutes until edges turn subtly golden.
- After removing from oven, allow cookies to rest on baking sheets for 10-15 minutes.
- Transfer cookies to cooling rack to complete the setting process.
- Serve and savor these delightful treats.
Notes
- Softening butter is crucial; leave it at room temperature for 30-60 minutes before starting to ensure smooth mixing and perfect cookie texture.
- Chill the dough for 15-20 minutes if it feels too soft, which helps prevent spreading and maintains the cookies’ shape during baking.
- For gluten-free version, swap wheat flour with a 1:1 gluten-free baking flour blend, ensuring all ingredients are certified gluten-free.
- Customize flavor by adding a pinch of cinnamon, almond extract, or lemon zest to create unique taste variations without compromising the simple recipe structure.
- Prep Time: 15 minutes
- Cook Time: 14-16 minutes
- Category: Desserts, Snacks
- Method: Baking
- Cuisine: American
Nutrition
- Serving Size: 12
- Calories: 195 kcal
- Sugar: 8 g
- Sodium: 40 mg
- Fat: 11 g
- Saturated Fat: 7 g
- Unsaturated Fat: 4 g
- Trans Fat: 0.2 g
- Carbohydrates: 22 g
- Fiber: 0.3 g
- Protein: 2 g
- Cholesterol: 30 mg
Michael Thompson
Founder & Recipe Developer
Expertise
Education
Cascade Culinary Institute – Bend, OR
ServSafe Food Handler Certification – Portland, OR
Focus: Certified in core food safety and hygiene principles for both home and professional kitchens, with emphasis on ingredient handling, kitchen cleanliness, and safe preparation methods.
Mike’s kitchen journey began with a single goal: to make everyday meals feel like something worth celebrating.
After earning his Certificate in Culinary Arts from Cascade Culinary Institute, he spent years working with local farmers and small kitchens across Oregon, learning the beauty of seasonal, small-batch cooking.
Mike’s approach is simple, cook with what’s fresh, keep it approachable, and always leave room for a little creativity. When he’s not testing yogurt marinades or designing single-serving meals, you’ll find him hiking trails or hunting down the best berries at local markets.