
Sizzling Garlic Parmesan Cheeseburger Bombs Recipe for Foodies
Crafting the ultimate garlic Parmesan cheeseburger bombs requires some serious culinary magic that will make your taste buds dance.
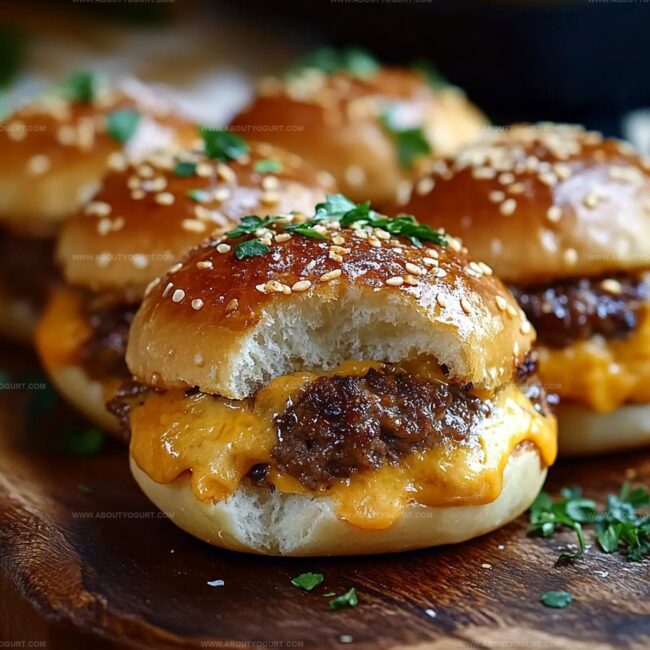
Bursting with melted cheese and savory ground beef, these delectable bites pack an incredible flavor punch.
Comfort food meets gourmet innovation in this crowd-pleasing recipe that screams indulgence.
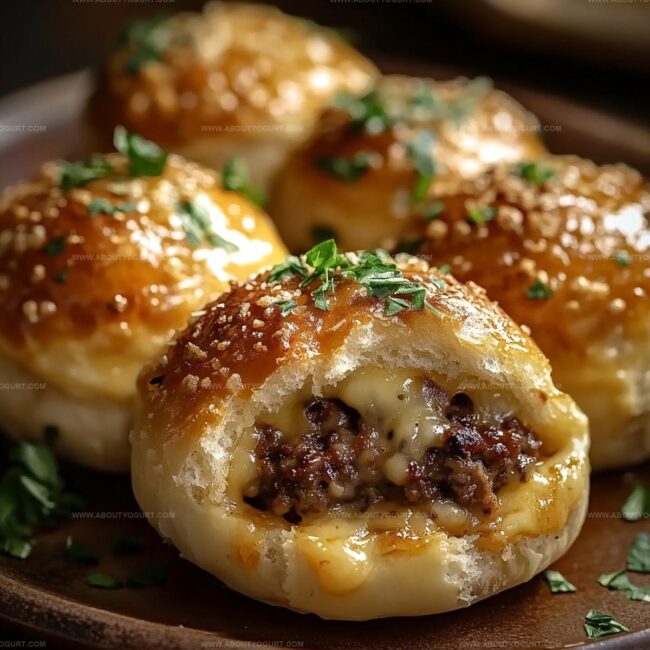
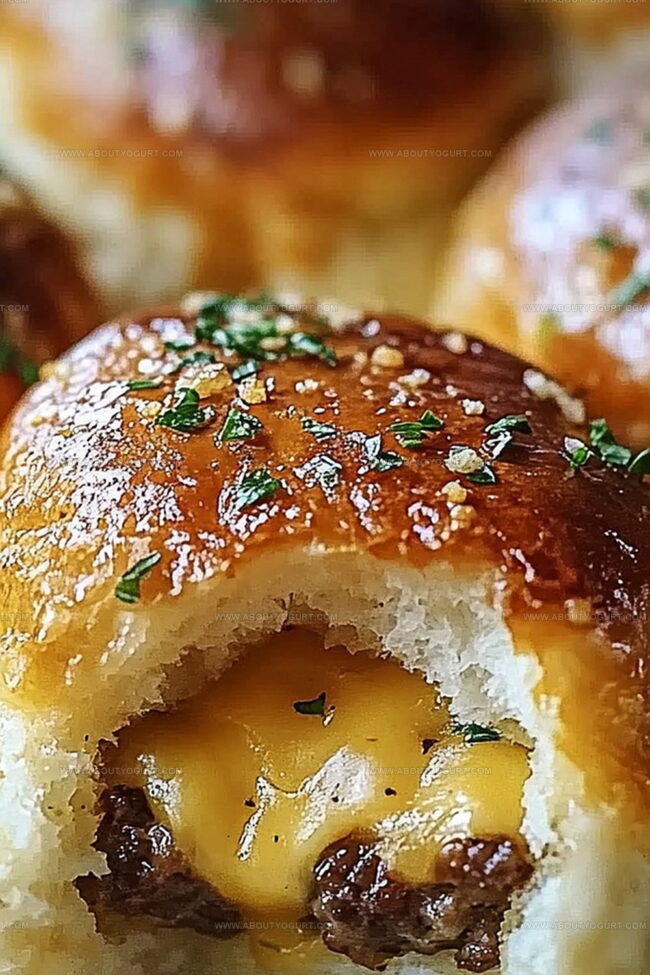
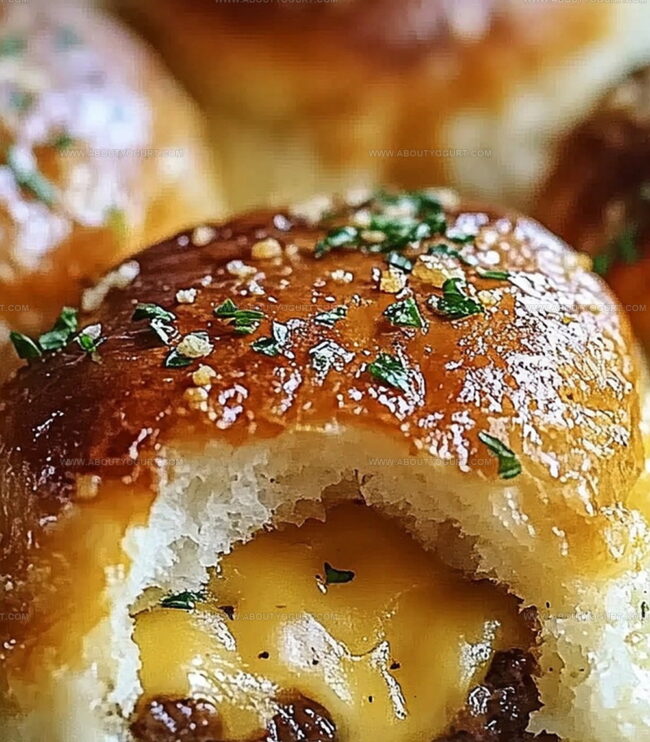
Crispy on the outside and oozing with cheesy goodness inside, each bomb delivers a perfect balance of textures.
Minimal ingredients combine to create maximum satisfaction, proving that simple cooking can yield spectacular results.
Packed with robust seasonings and a golden-brown exterior, these bombs promise to become your new favorite party snack.
You won’t be able to resist these irresistible morsels that turn an ordinary meal into an extraordinary experience.
Garlic Parmesan Cheeseburger Bombs Explored
Ingredients Needed To Make Cheeseburger Bombs
Main Protein:Dough and Cheese:Seasonings:Clear Steps To Prepare Garlic Parmesan Bombs
Step 1: Prepare Oven Temperature
Crank up your oven to a toasty 375°F (190°C) and get ready for some serious comfort food magic.
Step 2: Brown Beef and Garlic
Heat a skillet over medium flame and toss in:Cook until the meat transforms into a delicious golden-brown color, then drain away any extra fat.
Step 3: Add Cheesy Goodness
Stir into the beef mixture:Mix until the cheese melts and creates a gooey, flavor-packed filling.
Step 4: Shape the Bomb Bases
Grab your biscuit dough and gently flatten each piece into a wide circle, about 4 inches across.
Step 5: Fill and Seal the Bombs
Scoop two tablespoons of the beefy cheese mixture into the center of each biscuit circle. Carefully fold the edges over and pinch to seal, creating little pouches of deliciousness.
Step 6: Bake to Golden Perfection
Place the sealed bombs on a greased baking sheet and slide into the preheated oven. Bake for 12-15 minutes until they turn a gorgeous golden-brown color.
Step 7: Finish with Parmesan Sprinkle
Right before serving, shower these beauties with a generous sprinkle of parmesan cheese for an extra flavor kick.
Expert Tips To Nail Cheeseburger Bombs Every Time
Flavor Variations To Change Up Cheeseburger Bombs
Pairing Ideas To Serve With Cheeseburger Bombs
A robust Cabernet Sauvignon complements the rich, meaty flavors of these garlic parmesan cheeseburger bombs, cutting through the richness with its bold tannins.
Select an amber ale or hoppy IPA to enhance the savory beef and garlic notes, creating a delightful flavor harmony that amplifies the burger bombs’ complexity.
Grab a crisp hard cider to balance the heavy, cheesy texture, offering a light, slightly sweet counterpoint that cleanses the palate between bites.
Whip up a quick garlic aioli or herbed ranch dressing to serve alongside the bombs, providing an extra layer of creamy, tangy excitement for dipping.
Storage Tips To Maintain Cheeseburger Bombs Quality
FAQs
Ground beef, biscuits, crushed garlic, Italian seasoning, shredded cheese, and parmesan cheese are the main ingredients that create these delicious cheeseburger bombs.
Absolutely! Kids love these handheld cheeseburger bombs because they’re easy to eat, packed with cheesy flavor, and look fun on the plate.
Yes, you can assemble the cheeseburger bombs ahead of time and refrigerate them. Just add a few extra minutes to the baking time when you’re ready to cook.
Print
Garlic Parmesan Cheeseburger Bombs Recipe
- Total Time: 35 minutes
- Yield: 8 1x
Description
Garlic parmesan cheeseburger bombs deliver an explosive flavor experience that merges classic burger elements with irresistible cheesy goodness. Crispy golden exteriors give way to molten cheese and seasoned ground beef, promising a mouthwatering bite that satisfies deep comfort food cravings.
Ingredients
Main Protein:
- 1 pound ground beef (80/20)
Cheese:
- 1 cup shredded mozzarella cheese
- 1/2 cup grated parmesan cheese
Seasonings and Additional Ingredients:
- 4 garlic cloves, crushed
- 1 can (16 ounces) refrigerated biscuits
- 1 teaspoon Italian seasoning
Instructions
- Warm the oven to 375°F (190°C), preparing a greased baking sheet for the cheeseburger bombs.
- Heat a skillet over medium temperature and brown ground beef with minced garlic, thoroughly draining any accumulated fat.
- Incorporate Italian seasoning and shredded cheese into the meat mixture, stirring until cheese melts completely.
- Gently press each biscuit dough into a wide, thin circular shape approximately 4 inches in diameter.
- Position two tablespoons of seasoned beef mixture precisely in the center of each biscuit circle.
- Carefully fold the biscuit edges over the filling, creating a secure seal to prevent leakage during baking.
- Arrange the sealed bombs evenly on the prepared baking sheet, ensuring slight separation between each piece.
- Bake in the preheated oven for 12-15 minutes, watching for a uniform golden-brown exterior.
- Remove from oven and immediately sprinkle generously with grated parmesan cheese before serving hot.
Notes
- Customize meat selection by using ground turkey or plant-based alternatives for healthier protein options.
- Enhance flavor complexity by adding finely diced onions or bell peppers to the beef mixture for extra texture and nutrition.
- Control portion sizes by making smaller bombs for appetizers or larger ones for main course meals.
- Experiment with different cheese blends like mozzarella or sharp cheddar to create unique flavor profiles.
- Prep Time: 20 minutes
- Cook Time: 15 minutes
- Category: Lunch, Dinner, Snacks
- Method: Baking
- Cuisine: American
Nutrition
- Serving Size: 8
- Calories: 355 kcal
- Sugar: 1 g
- Sodium: 580 mg
- Fat: 27 g
- Saturated Fat: 12 g
- Unsaturated Fat: 13 g
- Trans Fat: 1 g
- Carbohydrates: 13 g
- Fiber: 0.5 g
- Protein: 19 g
- Cholesterol: 75 mg
Michael Thompson
Founder & Recipe Developer
Expertise
Education
Cascade Culinary Institute – Bend, OR
ServSafe Food Handler Certification – Portland, OR
Focus: Certified in core food safety and hygiene principles for both home and professional kitchens, with emphasis on ingredient handling, kitchen cleanliness, and safe preparation methods.
Mike’s kitchen journey began with a single goal: to make everyday meals feel like something worth celebrating.
After earning his Certificate in Culinary Arts from Cascade Culinary Institute, he spent years working with local farmers and small kitchens across Oregon, learning the beauty of seasonal, small-batch cooking.
Mike’s approach is simple, cook with what’s fresh, keep it approachable, and always leave room for a little creativity. When he’s not testing yogurt marinades or designing single-serving meals, you’ll find him hiking trails or hunting down the best berries at local markets.