
Kiwi Cheesecake Recipe with a Tropical Twist
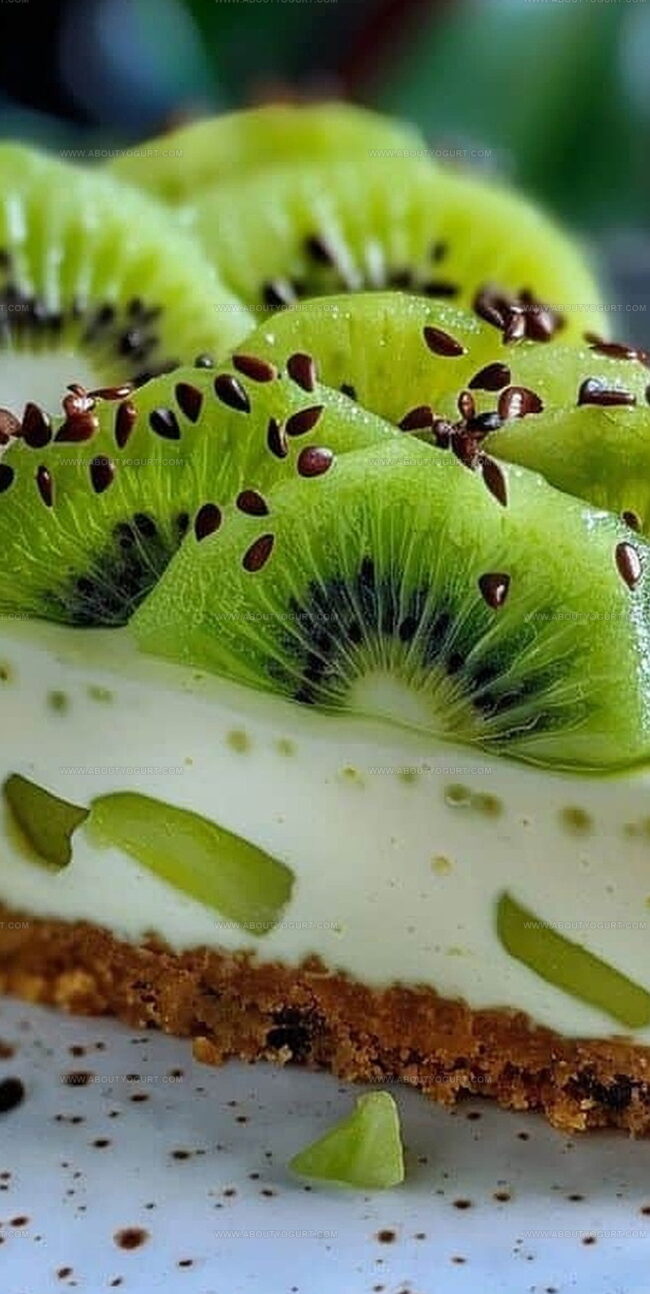
Sweet kiwi cheesecake beckons with its vibrant green charm and creamy allure.
Tropical fruits dance across smooth cream cheese landscapes, creating magic in every slice.
Dessert enthusiasts will adore this simple yet sophisticated treat that feels like a culinary adventure.
Layers of tangy kiwi merge seamlessly with rich, velvety filling, promising pure indulgence.
Delicate and refreshing, this cheesecake breaks traditional dessert boundaries with unexpected flavor combinations.
Summer memories might flood back as you savor each decadent bite.
Prepare to fall in love with a recipe that turns ordinary ingredients into an extraordinary experience.
Why Kiwi Cheesecake Is a Unique Delight
Ingredients Needed for Kiwi Cheesecake
Crust Base:Filling Ingredients:Kiwi Elements:Garnish:How to Prepare Kiwi Cheesecake
Step 1: Create Crumbly Crust Base
Grab a mixing bowl and combine graham cracker crumbs, sugar, and melted butter. Stir everything until the mixture looks like wet sand. Press this delightful blend firmly into the bottom of a springform pan, creating an even layer. Pop the pan into the refrigerator to chill while you prepare the creamy filling.
Step 2: Whip Up Cream Cheese Mixture
Take a large mixing bowl and beat the cream cheese until silky smooth. Add powdered sugar and vanilla extract, blending until the mixture becomes luxuriously creamy and free of lumps.
Step 3: Fold in Whipped Cream
In a separate bowl, whip the chilled heavy cream until it forms gorgeous stiff peaks. Gently fold the whipped cream into the cream cheese mixture, creating a light and airy texture. Be careful not to deflate the mixture while mixing.
Step 4: Incorporate Kiwi Goodness
Dice fresh kiwis and fold them into the cream cheese mixture. If desired, add kiwi puree for an extra burst of fruity flavor. Ensure the kiwi pieces are evenly distributed throughout the filling.
Step 5: Pour and Smooth Filling
Transfer the luscious filling over the chilled crust. Use a spatula to spread the mixture evenly, creating a smooth and inviting surface.
Step 6: Chill and Set
Cover the cheesecake and refrigerate for at least 4 hours. This allows the cheesecake to set and develop its rich, creamy texture.
Step 7: Garnish and Serve
Just before serving, decorate the top with fresh kiwi slices. Slice and enjoy this refreshing, tropical-inspired dessert!
Pro Tips for Kiwi Cheesecake
Flavor Variations for Kiwi Cheesecake
Pairing Ideas for Kiwi Cheesecake
Storage Recommendations for Kiwi Cheesecake
Common FAQs for Kiwi Cheesecake
Yes, you can substitute graham crackers with digestive biscuits, vanilla wafers, or even an Oreo cookie crust for a different flavor profile.
Choose kiwis that are slightly soft when gently pressed, indicating they’re ripe and will provide the best flavor and sweetness for the cheesecake.
Absolutely! You can prepare the cheesecake up to 2 days in advance and keep it refrigerated, which actually helps the flavors meld together better.
Print
Kiwi Cheesecake Recipe
- Total Time: 4 hours 20 minutes
- Yield: 8 1x
Description
Creamy kiwi cheesecake blends tangy fruit with rich, silky cream cheese in a delightful dessert. Refreshing kiwi slices crown this elegant treat, promising a perfect balance of sweet and zesty flavors you’ll absolutely adore.
Ingredients
Main Ingredients:
- 3 kiwis, peeled and diced
- 16 ounces (454 grams) cream cheese, softened
- 1 cup (240 milliliters) heavy cream, chilled
Crust Ingredients:
- 1 1/2 cups (180 grams) graham cracker crumbs
- 1/2 cup (113 grams) unsalted butter, melted
- 1/4 cup (50 grams) granulated sugar
Additional Flavor Ingredients:
- 1/2 cup (60 grams) powdered sugar
- 1 teaspoon vanilla extract
- 1/4 cup (60 milliliters) kiwi puree
- Fresh kiwi slices (for garnish)
Instructions
- Combine graham cracker crumbs, sugar, and melted butter into a cohesive mixture. Press firmly into the bottom of a springform pan, creating an even base. Refrigerate for 15 minutes to stabilize the crust.
- Using an electric mixer, whip cream cheese until silky and free of lumps. Incorporate powdered sugar and vanilla, blending until achieving a smooth, creamy consistency.
- Whip chilled heavy cream until it forms sturdy, defined peaks. Delicately integrate the whipped cream into the cream cheese mixture, maintaining a light, airy texture.
- Gently fold diced kiwis and kiwi puree throughout the cream cheese blend, ensuring even distribution of fruit pieces.
- Transfer the filling onto the chilled crust, using a spatula to spread uniformly and eliminate air pockets.
- Seal the cheesecake and refrigerate for 4-6 hours, allowing it to set completely and develop optimal flavor intensity.
- Prior to serving, artfully arrange fresh kiwi slices across the top for a vibrant, appetizing presentation.
Notes
- Swap graham crackers with gluten-free alternatives like almond flour or oat cookies for a celiac-friendly version.
- Use reduced-fat cream cheese and Greek yogurt to create a lighter, lower-calorie cheesecake without compromising texture.
- Prevent kiwi browning by adding a splash of lemon juice when dicing, which helps maintain the fruit’s vibrant green color and prevents oxidation.
- Ensure cream cheese is at room temperature before mixing to achieve a smoother, lump-free filling that blends seamlessly with other ingredients.
- Prep Time: 20 minutes
- Cook Time: 0 minutes
- Category: Desserts
- Method: Refrigerating
- Cuisine: Western
Nutrition
- Serving Size: 8
- Calories: 350 kcal
- Sugar: 22 g
- Sodium: 150 mg
- Fat: 27 g
- Saturated Fat: 16 g
- Unsaturated Fat: 10 g
- Trans Fat: 0.5 g
- Carbohydrates: 25 g
- Fiber: 2 g
- Protein: 5 g
- Cholesterol: 90 mg
Sarah Mitchell
Content Specialist & Home Cooking Enthusiast
Expertise
Education
Asheville-Buncombe Technical Community College – Asheville, NC
American Fitness Professionals & Associates – Online
Sarah’s passion for food was sparked by weekend trips to the farmers’ market and her belief that healthy meals should never feel boring.
After earning her culinary diploma and becoming a certified Nutrition and Wellness Consultant, she set out to help others fall in love with simple, wholesome cooking.
She’s all about celebrating the small wins in the kitchen: a colorful yogurt bowl, a new twist on a classic dish, or a homemade snack that feels just a little extra special.
Outside the kitchen, Sarah is a gardener at heart, a yoga enthusiast, and a believer that fresh herbs can brighten any meal, and any day.