Lemon Crumb Bars Recipe That Are Easy and Bright
Sweet and zesty lemon crumb bars dance between tangy brightness and buttery comfort.
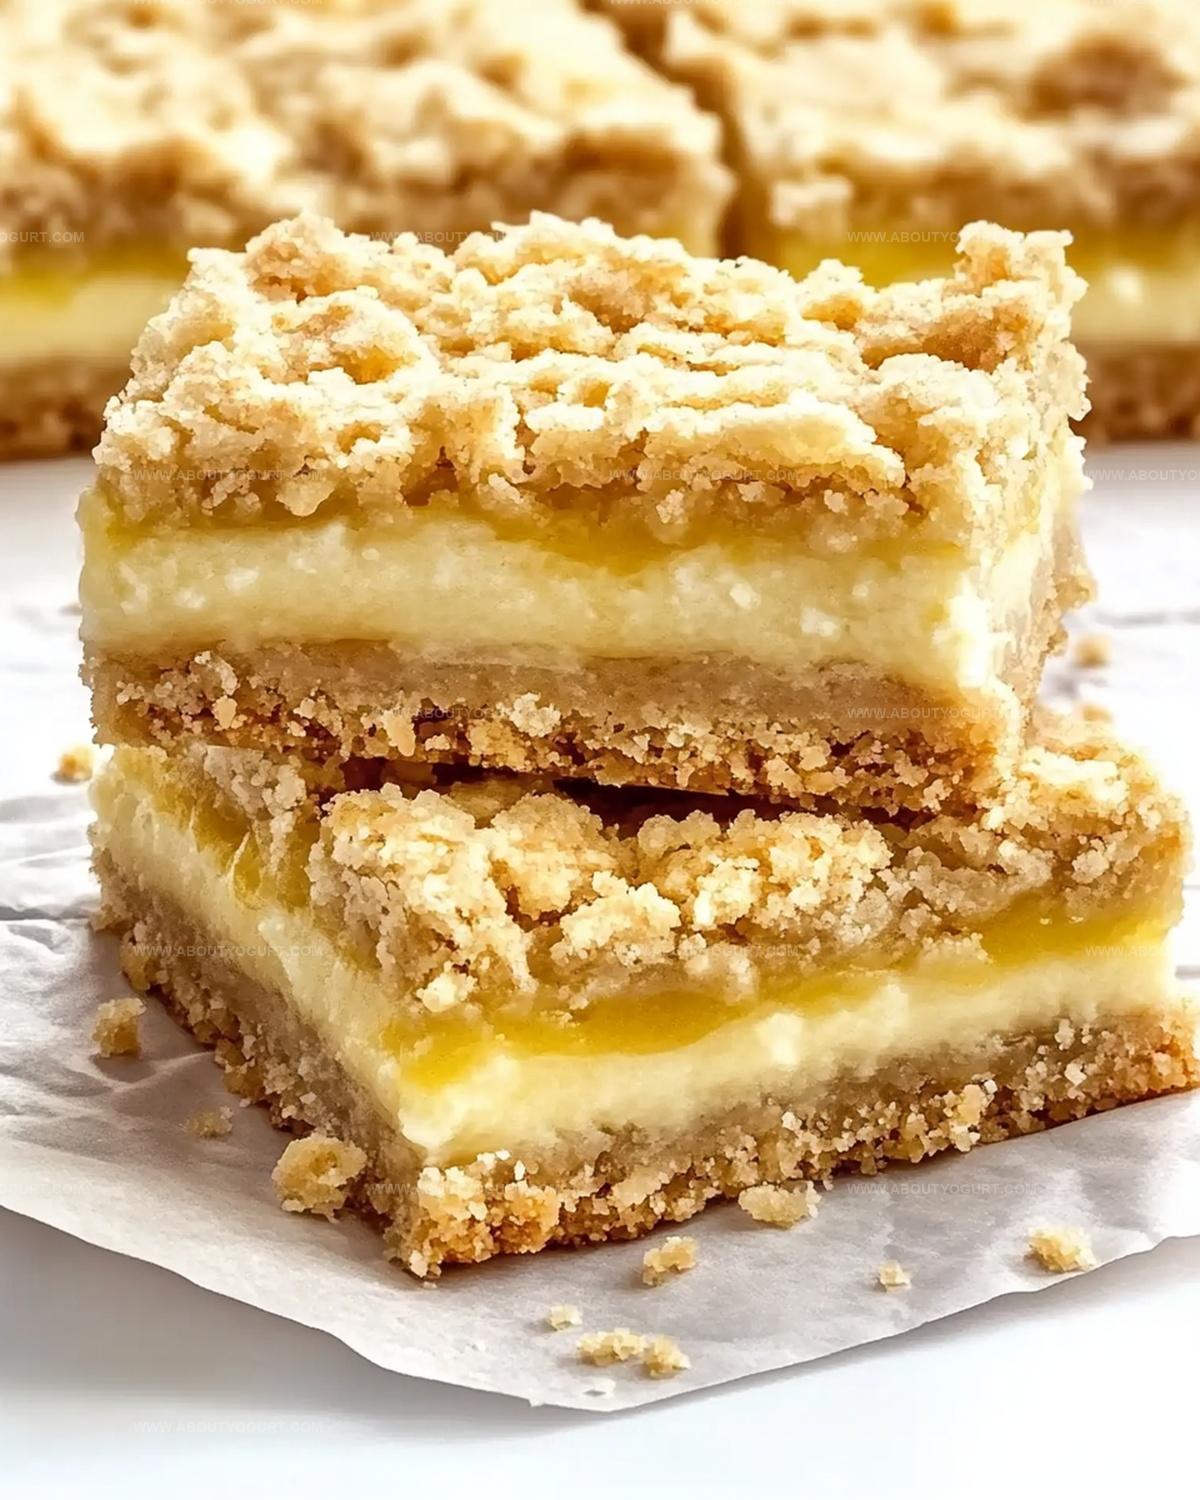
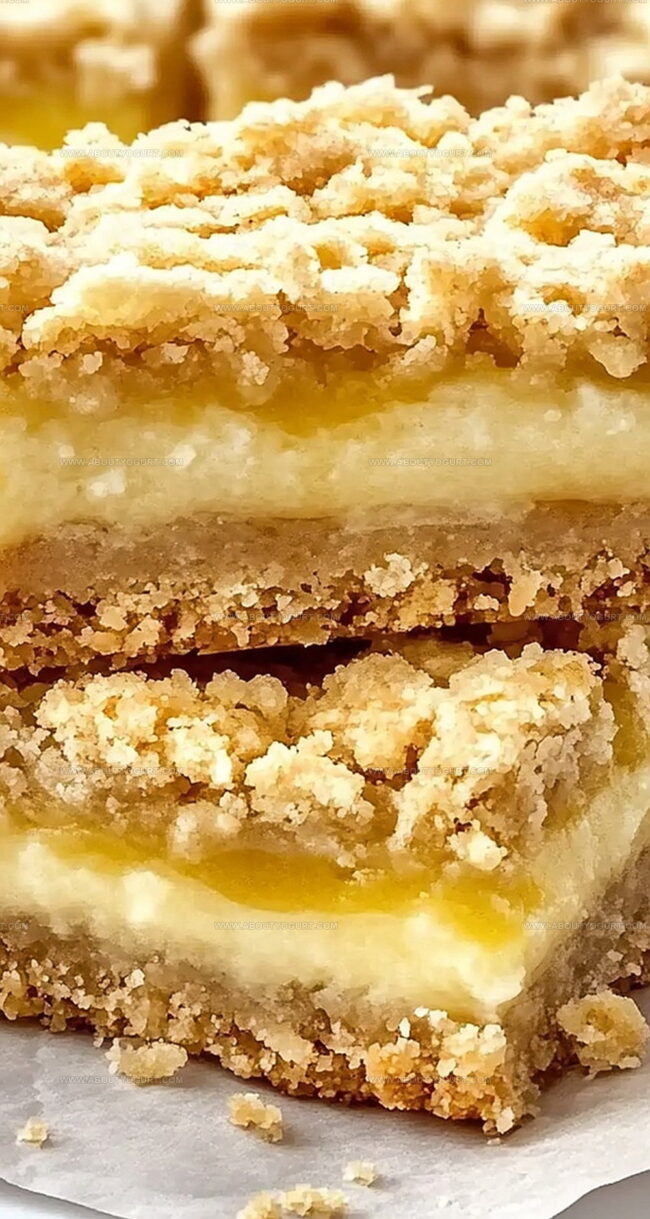
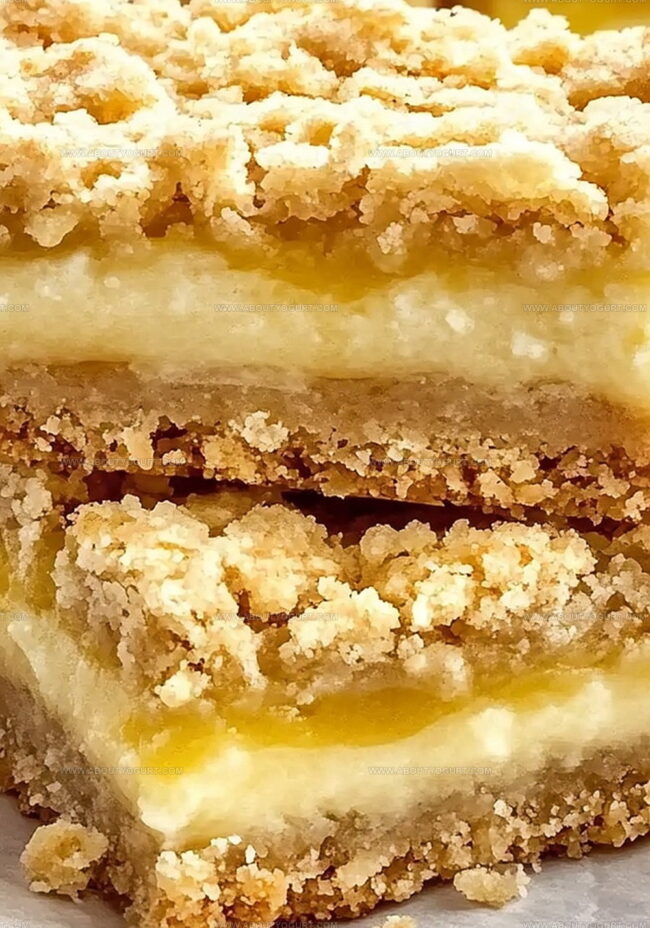
Crisp shortbread crusts provide the perfect foundation for these citrusy delights.
Delicate crumbles create a textural masterpiece that melts in your mouth.
Sunshine-infused flavors burst through each delectable bite, promising pure enjoyment.
Homemade desserts like these connect us to simple kitchen magic.
Baking brings pure joy, turning ordinary ingredients into extraordinary memories.
Whip up these bars and watch smiles bloom around your table.
What Makes Lemon Crumb Bars So Tasty
What You’ll Use For Lemon Crumb Bars
Base Ingredients:Wet Binding Ingredients:Flavor Enhancers:Preparation Ingredient:How To Bake Lemon Crumb Bars Without Fuss
Step 1: Prepare the Oven and Pan
Preheat your oven to 350°F. Grab a 9×9-inch baking pan and line it completely with parchment paper, ensuring the paper covers the bottom and sides for easy removal later.
Step 2: Create the Crumb Base
In a spacious mixing bowl, combine:Pour in melted butter and mix until the mixture transforms into a delightful, crumbly texture that resembles wet sand.
Step 3: Form the Crust
Press about two-thirds of the crumb mixture firmly and evenly into the prepared pan. Make sure to create a compact, even layer that will serve as the delicious foundation for your bars.
Step 4: Initial Baking
Slide the pan into the preheated oven and bake for 15 minutes. Watch for a light golden color to develop, which signals the crust is perfectly par-baked.
Step 5: Whip Up the Lemon Filling
In a separate large bowl, whisk together:Gradually pour in lemon juice, whisking continuously until the mixture becomes smooth and fully incorporated.
Step 6: Assemble the Bars
Pour the vibrant lemon filling over the hot crust, ensuring it spreads evenly across the surface.
Step 7: Add Crumb Topping
Sprinkle the remaining crumb mixture across the top of the lemon filling, creating a gorgeous, textured surface.
Step 8: Final Baking
Return the pan to the oven and bake for 15-20 minutes. Look for a golden-brown topping and a set filling that jiggles slightly when gently shaken.
Step 9: Cool and Chill
Allow the bars to cool completely at room temperature. Then transfer to the refrigerator and chill for at least 4 hours to help the bars set and develop their full flavor.
Step 10: Slice and Serve
Remove from the refrigerator, lift out using the parchment paper, and slice into beautiful squares. Serve chilled and enjoy the perfect balance of buttery crust and tangy lemon filling.
Tips That Help With Lemon Crumb Bars
Different Spins On Lemon Crumb Bars To Try
Perfect Pairings With Lemon Crumb Bars
How To Keep Lemon Crumb Bars Fresh
Lemon Crumb Bars FAQ Guide
Use cold butter and mix it with the dry ingredients until it resembles coarse, pea-sized crumbs. Don’t overmix, as this can make the crumb too dense and tough.
Fresh lemon juice is recommended for the best flavor and brightness. Bottled juice can work, but it might lack the vibrant citrus taste and can sometimes taste slightly metallic.
Chilling helps the bars set properly, allowing the filling to firm up and making them easier to cut into clean, neat squares. It also enhances the flavor and texture of the dessert.
Print
Lemon Crumb Bars Recipe
- Total Time: Approximately 4 hours 45 minutes
- Yield: 12 1x
Description
Zesty lemon crumb bars bring sunshine to your dessert table with buttery, crumbly layers of pure citrus delight. Creamy filling nestled between crisp shortbread crust and golden streusel topping promises a refreshing slice of sweet-tart perfection you’ll crave again and again.
Ingredients
Lemon Crumb Bars Ingredients:
Crumb Base and Topping:
- 2 1/3 cups (280 grams) all-purpose flour
- 1/2 cup (100 grams) granulated sugar
- 1/2 cup (100 grams) light brown sugar
- 12 tablespoons (170 grams) unsalted butter
- 3/4 teaspoon salt
- 1/4 teaspoon baking powder
Lemon Filling:
- 1 14-ounce (397 grams) can sweetened condensed milk
- 4 large egg yolks
- 2 tablespoons (30 milliliters) heavy cream
- 2/3 cup (160 milliliters) fresh lemon juice
- 1/8 teaspoon salt
Instructions
- Prepare oven to 350°F and position rack in center of oven.
- Create a parchment paper sling in a 9×9-inch baking pan for easy removal.
- Blend dry ingredients including flour, sugars, salt, and baking powder in a spacious mixing bowl.
- Drizzle melted butter over dry mixture and work with fingertips until achieving a sandy, crumbly consistency.
- Transfer ⅔ of crumb mixture into prepared pan, pressing firmly and evenly to create a compact base layer.
- Bake base for 15 minutes until edges turn pale golden and surface looks slightly set.
- Whisk condensed milk, egg yolks, heavy cream, and salt in a separate mixing bowl until smooth.
- Introduce fresh lemon juice gradually, stirring constantly to maintain a uniform texture.
- Carefully pour lemon filling over hot crust, ensuring even distribution.
- Scatter remaining crumb mixture across the surface in a gentle, uniform layer.
- Return pan to oven and bake 15-20 minutes until topping turns golden and filling appears slightly firm with a gentle wobble.
- Remove from oven and allow bars to cool completely at room temperature.
- Chill in refrigerator for minimum 4 hours to set and enhance flavor development.
- Cut into precise squares and serve chilled.
Notes
- Customize crumb texture by adjusting butter temperature, ensuring a perfectly sandy and crisp base.
- Experiment with different citrus juices like lime or grapefruit for unique flavor variations that complement the sweet base.
- Chill bars completely to achieve clean, precise cutting lines and allow flavors to develop and intensify.
- Use room temperature ingredients for smoother lemon filling and more consistent baking results.
- Prep Time: 15 minutes
- Cook Time: 30-35 minutes
- Category: Desserts, Snacks
- Method: Baking
- Cuisine: American
Nutrition
- Serving Size: 12
- Calories: 271 kcal
- Sugar: 19 g
- Sodium: 123 mg
- Fat: 14 g
- Saturated Fat: 8 g
- Unsaturated Fat: 5 g
- Trans Fat: 0.2 g
- Carbohydrates: 33 g
- Fiber: 1 g
- Protein: 3 g
- Cholesterol: 75 mg
Michael Thompson
Founder & Recipe Developer
Expertise
Education
Cascade Culinary Institute – Bend, OR
ServSafe Food Handler Certification – Portland, OR
Focus: Certified in core food safety and hygiene principles for both home and professional kitchens, with emphasis on ingredient handling, kitchen cleanliness, and safe preparation methods.
Mike’s kitchen journey began with a single goal: to make everyday meals feel like something worth celebrating.
After earning his Certificate in Culinary Arts from Cascade Culinary Institute, he spent years working with local farmers and small kitchens across Oregon, learning the beauty of seasonal, small-batch cooking.
Mike’s approach is simple, cook with what’s fresh, keep it approachable, and always leave room for a little creativity. When he’s not testing yogurt marinades or designing single-serving meals, you’ll find him hiking trails or hunting down the best berries at local markets.