
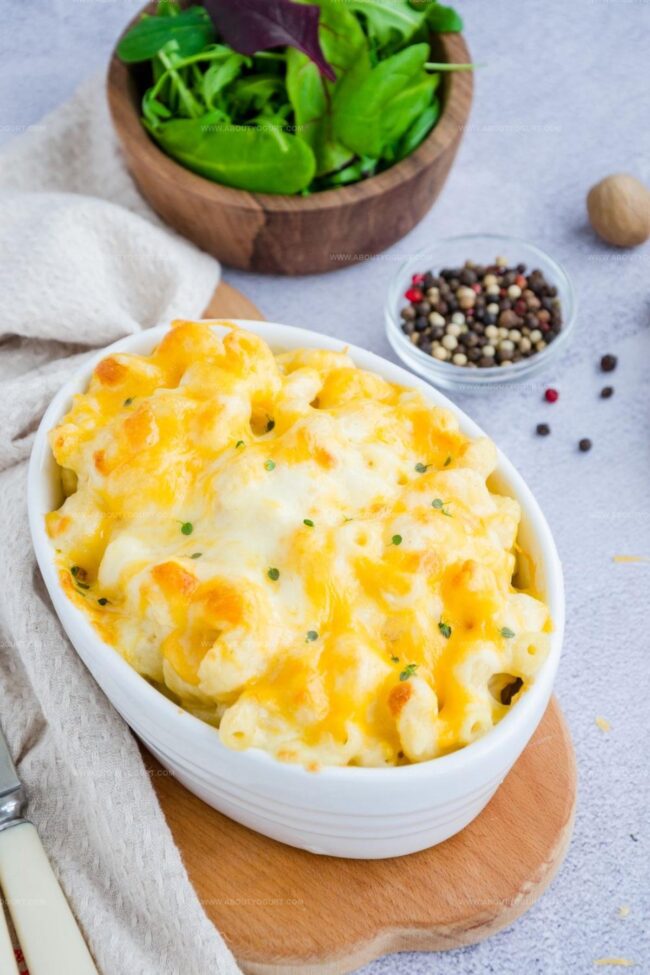
Mac and Cheese Recipe: Creamy Comfort in Every Bite
Creamy mac and cheese brings comfort to your dinner table like a warm culinary hug.
Pasta lovers will adore this classic dish that combines simple ingredients with rich, melted goodness.
Cheese lovers understand the magic of perfectly blended dairy and noodles.
Each bite promises a delightful blend of textures and flavors that dance across your palate.
Homemade versions always taste better than store-bought alternatives, offering more depth and personalization.
Smooth cheddar and sharp parmesan create a delectable symphony of cheesy deliciousness.
Hungry?
This recipe will make you the star of any gathering.
Why Mary Berry Mac And Cheese Is The Ultimate Comfort

What Goes Into Mary Berry Mac And Cheese
Main Ingredients:Sauce Components:Seasoning and Toppings:Simple Steps For Mary Berry Mac And Cheese
Step 1: Fire Up the Oven
Crank the oven to a toasty 325°F and lovingly coat your 9×13-inch baking dish with a light layer of grease.
Step 2: Cook Pasta to Perfection
Boil your pasta until it’s just shy of fully cooked (al dente). Drain and give it a quick toss with a splash of oil to prevent sticking.
Step 3: Craft the Creamy Roux
In a spacious pot, melt butter until it’s golden and bubbling. Sprinkle in flour and whisk with passion for about a minute, creating a smooth, fragrant base.
Step 4: Create Silky Sauce
Gradually pour in milk and half-and-half, whisking continuously. Keep stirring until the mixture transforms into a luxuriously thick and velvety sauce.
Step 5: Cheese Magic
Remove the pot from heat and introduce your spices and most of the cheese. Stir until the cheese melts into a gloriously smooth mixture.
Step 6: Assemble the Comfort Casserole
Fold the cooked pasta into the cheesy sauce. Transfer this delightful combination to the prepared baking dish, creating tempting layers of cheesy goodness.
Step 7: Final Cheese Crown
Sprinkle the remaining cheese on top, creating a golden, crispy blanket of deliciousness.
Step 8: Bake to Bubbly Perfection
Slide the dish into the preheated oven and bake for 15-20 minutes until the top turns a beautiful golden brown and the edges are bubbling with cheesy excitement.
Tips That Help With Mary Berry Mac And Cheese
Fun Ways To Change Mary Berry Mac And Cheese
Great Pairings For Mary Berry Mac And Cheese
How To Keep Mary Berry Mac And Cheese Fresh
Mary Berry Mac And Cheese FAQ Guide
Yes, you can mix cheeses like cheddar, gruyère, or monterey jack for more complex flavor profiles. Just maintain the total cheese quantity.
Use full-fat milk and half-and-half, don’t overcook pasta, and ensure sauce is creamy before mixing with noodles. The sauce should coat pasta generously.
Substitute regular flour with gluten-free flour blend and use gluten-free pasta. The rest of the recipe remains the same.
Replace half-and-half with equal parts whole milk and heavy cream to maintain the richness and consistency of the sauce.
Print
Mac And Cheese Recipe
- Total Time: 35 minutes
- Yield: 8 1x
Description
Creamy mac and cheese blends rich cheddar with velvety sauce, promising comfort in every forkful. Homemade goodness awaits you, delivering classic American comfort that satisfies deeply and deliciously.
Ingredients
Cheese Ingredients:
- 4 cups (454 grams) shredded medium sharp cheddar
- 2 cups (226 grams) shredded Gruyere
Pasta and Base Ingredients:
- 1 pound (454 grams) dried elbow pasta
- 1/2 cup (113 grams) unsalted butter
- 1/2 cup (60 grams) all-purpose flour
- 1 1/2 cups (360 milliliters) whole milk
- 2 1/2 cups (600 milliliters) half-and-half
Seasoning Ingredients:
- 1/2 tablespoon salt
- 1/2 teaspoon black pepper
- 1/4 teaspoon paprika
Instructions
- Warm the oven to a gentle 325°F and coat a 9×13-inch baking vessel with a light layer of grease.
- Cook pasta in rapidly boiling water until tender yet firm, then drain and lightly coat with oil to prevent sticking.
- Create a roux by melting butter in a large pot, then sprinkle flour and whisk continuously for one minute to eliminate raw flour taste.
- Gradually stream milk and half-and-half into the roux, whisking steadily to develop a silky, thickened sauce without lumps.
- Remove pot from heat and fold in seasonings and three-quarters of the cheese, stirring until completely melted and incorporated.
- Gently fold pasta into the creamy cheese sauce, ensuring each noodle is generously coated.
- Transfer the mixture to the prepared baking dish, creating even layers and distributing remaining cheese across the top surface.
- Slide into preheated oven and bake for 15-20 minutes until the top transforms into a golden, bubbling crust.
Notes
- Prevent pasta from sticking by stirring occasionally during boiling and using a tiny bit of oil after draining.
- Grate cheese fresh for maximum melting smoothness and richer flavor compared to pre-shredded varieties.
- Experiment with cheese combinations like sharp cheddar, gruyere, or monterey jack to create deeper, more complex taste profiles.
- Use whole milk or higher fat dairy for creamier, more luxurious texture that coats pasta perfectly without feeling grainy.
- Prep Time: 15 minutes
- Cook Time: 20 minutes
- Category: Lunch, Dinner, Snacks
- Method: Baking
- Cuisine: American
Nutrition
- Serving Size: 8
- Calories: 528
- Sugar: 2 g
- Sodium: 510 mg
- Fat: 25 g
- Saturated Fat: 15 g
- Unsaturated Fat: 9 g
- Trans Fat: 0.5 g
- Carbohydrates: 50 g
- Fiber: 2 g
- Protein: 23 g
- Cholesterol: 70 mg
Michael Thompson
Founder & Recipe Developer
Expertise
Education
Cascade Culinary Institute – Bend, OR
ServSafe Food Handler Certification – Portland, OR
Focus: Certified in core food safety and hygiene principles for both home and professional kitchens, with emphasis on ingredient handling, kitchen cleanliness, and safe preparation methods.
Mike’s kitchen journey began with a single goal: to make everyday meals feel like something worth celebrating.
After earning his Certificate in Culinary Arts from Cascade Culinary Institute, he spent years working with local farmers and small kitchens across Oregon, learning the beauty of seasonal, small-batch cooking.
Mike’s approach is simple, cook with what’s fresh, keep it approachable, and always leave room for a little creativity. When he’s not testing yogurt marinades or designing single-serving meals, you’ll find him hiking trails or hunting down the best berries at local markets.