Marshmallow Chocolate Poke Cake Recipe with Gooey Layers
Some marshmallow chocolate poke cakes bring pure magic to dessert tables with unexpected layers of sweetness.
Sweet surprises often emerge from simple kitchen experiments.
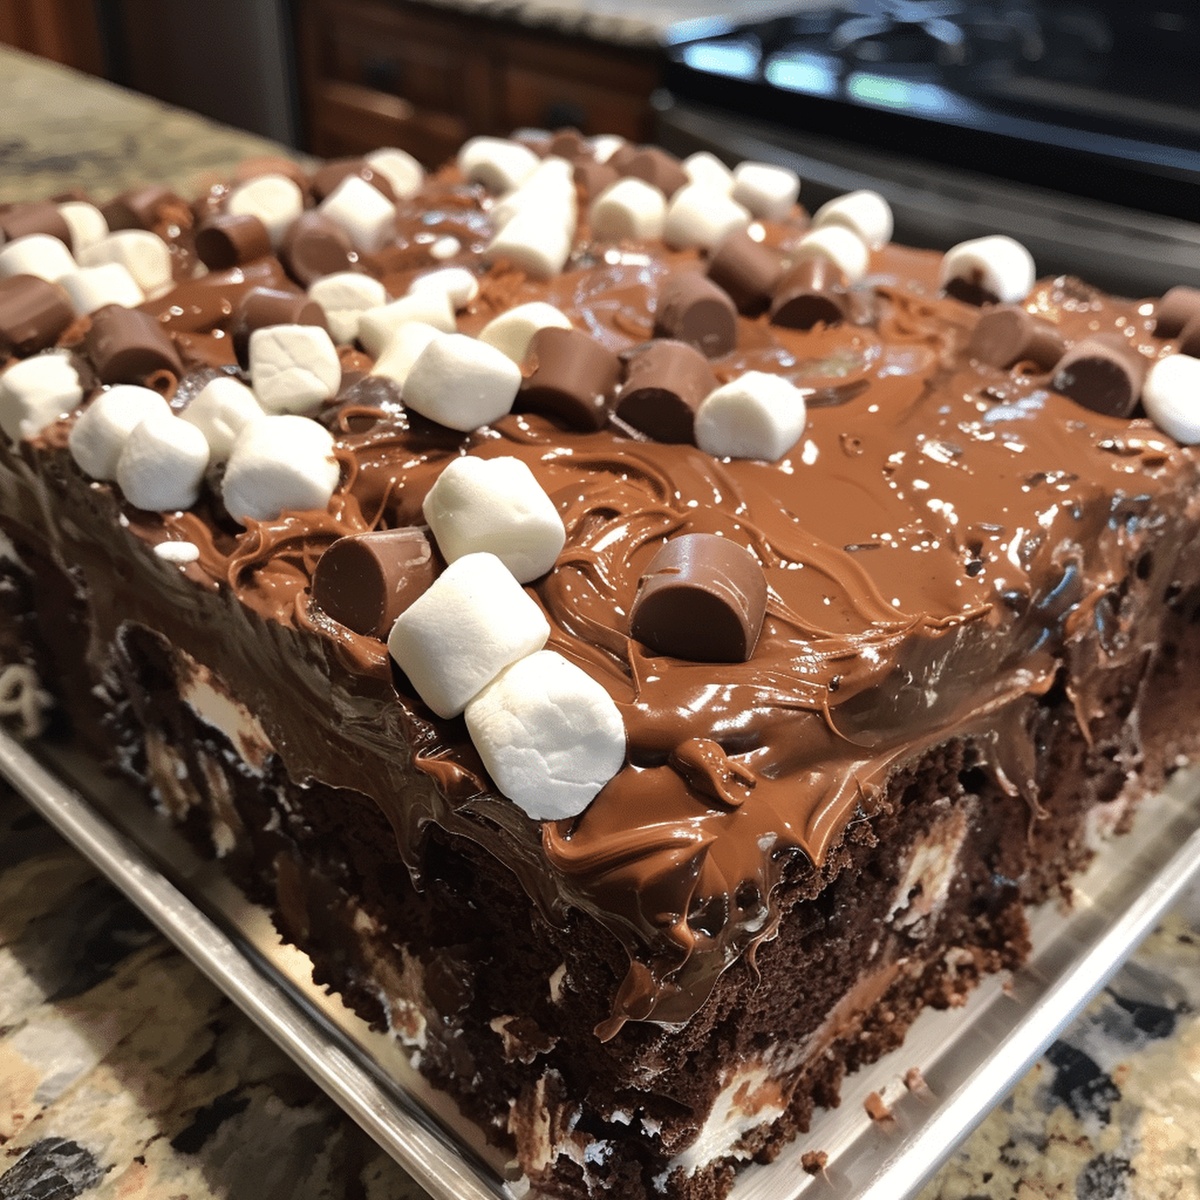
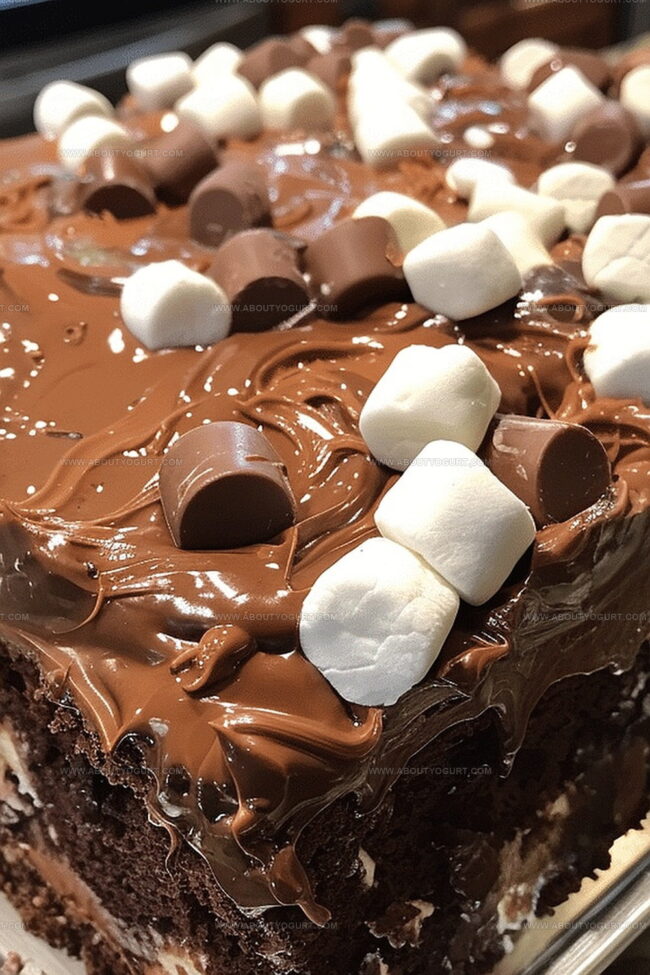
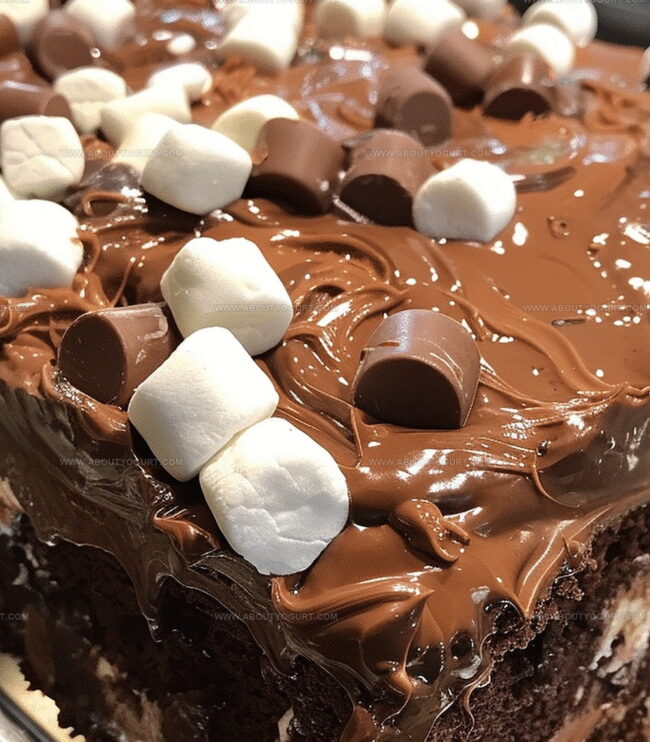
Chocolate swirls dance through soft cake landscapes, creating delightful texture contrasts.
Creamy marshmallow rivers flow between tender crumb valleys, promising indulgent moments.
Each slice delivers a playful blend of comfort and decadence.
Curious bakers can easily craft this delectable treat with minimal effort.
You will absolutely fall in love with how deliciously simple this recipe becomes.
Grab a fork and prepare for a delightful culinary adventure that beckons you closer.
Marshmallow Chocolate Poke Cake That Melts Hearts
Ingredients To Make Marshmallow Chocolate Poke Cake
Cake Base:Filling Ingredients:Topping Ingredients:Garnish Ingredients:Step-By-Step Marshmallow Chocolate Poke Cake
Step 1: Bake the Base Cake
Prepare the cake mix according to the box instructions. Use a 9×13 inch baking pan for the best results. Bake until a toothpick inserted comes out clean and the cake is golden brown.
Step 2: Create Cake Holes
While the cake is still warm, grab a wooden spoon handle. Gently poke holes all across the cake surface, creating little tunnels for the chocolate filling to seep into.
Step 3: Craft Chocolate Filling
Gather ingredients:Combine all ingredients in a microwave-safe bowl. Heat in 30-second intervals, stirring between each burst. Mix until the chocolate melts completely and the mixture becomes silky smooth. Pour the filling into the cake holes, spreading any remaining chocolate across the top.
Step 4: Chill and Set
Allow the cake to cool at room temperature for about an hour. Then transfer to the refrigerator to set completely.
Step 5: Prepare Fluffy Topping
Whip heavy cream until it starts to thicken. Gradually add powdered sugar and vanilla extract. Continue whipping until stiff peaks form. Gently fold in marshmallow fluff until well combined.
Step 6: Add Marshmallow Cream Layer
Spread the marshmallow cream mixture evenly over the cooled cake, creating a smooth and fluffy surface.
Step 7: Create Chocolate Ganache Swirls
Melt chocolate chips with a splash of heavy cream. Transfer the melted chocolate to a zip-lock bag. Snip a tiny corner of the bag. Pipe delicate chocolate swirls across the marshmallow cream layer. Use a toothpick or skewer to create elegant, artistic patterns.
Step 8: Final Chill
Refrigerate the cake for at least two hours before serving to allow all layers to set perfectly.
Pro Secrets For Marshmallow Chocolate Poke Cake
Fun Variations For Marshmallow Chocolate Poke Cake
Perfect Pairings For Marshmallow Chocolate Poke Cake
How To Store Marshmallow Chocolate Poke Cake Right
Marshmallow Chocolate Poke Cake FAQ
Use a 9×13 inch cake pan, which is the standard size for most box cake mixes and provides the perfect surface for creating poke holes.
Milk chocolate or dark chocolate chips work well, but semisweet chocolate chips are recommended for the best balanced flavor in this recipe.
Marshmallow fluff adds a unique texture and sweetness, but you can substitute it with marshmallow cream if needed. Without it, the topping will be a standard whipped cream.
The filling is done when it’s smooth and completely melted, with no visible chocolate chip chunks. Stir carefully and microwave in short intervals to prevent burning.
Print
Marshmallow Chocolate Poke Cake Recipe
- Total Time: 33 minutes
- Yield: 12 1x
Description
Creamy marshmallow chocolate poke cake delivers pure indulgence in every slice. Sweet chocolate layers infused with gooey marshmallow promise a delightful dessert experience you’ll savor with pure pleasure.
Ingredients
Main Ingredients:
- 15.25 ounces (432 grams) devils food chocolate cake mix
- 1 (14 ounces/397 grams) can sweetened condensed milk
- 12 ounces (340 grams) semi-sweet chocolate chips
Liquid and Creamy Ingredients:
- 1 cup (240 milliliters) heavy cream
- 1/3 cup (80 milliliters) heavy cream
- 1/3 cup (40 grams) powdered sugar
Flavoring and Additional Ingredients:
- 1 teaspoon vanilla extract
- 7 ounces (198 grams) marshmallow fluff
- 1/2 cup (85 grams) chocolate chips
- Additional ingredients for cake mix as specified on box packaging
Instructions
- Prepare the cake base according to package instructions in a 9×13 inch pan, ensuring even baking at the recommended temperature.
- While the cake is still warm, use a wooden spoon handle to create uniform holes across the entire surface, allowing for maximum chocolate filling absorption.
- Create the decadent chocolate filling by combining sweetened condensed milk, heavy cream, and chocolate chips in a microwave-safe bowl. Heat for 30-45 seconds, stirring until achieving a silky smooth consistency.
- Carefully pour the warm chocolate mixture into the prepared cake holes, ensuring complete coverage and spreading any remaining chocolate evenly across the top.
- Allow the cake to cool at room temperature for approximately 60 minutes, then transfer to the refrigerator to set completely.
- Prepare the luxurious marshmallow topping by whipping heavy cream until it begins to thicken, gradually incorporating powdered sugar and vanilla extract.
- Gently fold marshmallow fluff into the whipped cream mixture, creating a light and airy topping.
- Spread the marshmallow cream evenly over the chilled cake, creating a smooth and enticing surface.
- Craft the chocolate ganache swirls by melting chocolate chips with heavy cream until perfectly smooth.
- Transfer the ganache to a zip-lock bag, snip a small corner, and pipe delicate chocolate designs across the marshmallow topping.
- Use a toothpick or skewer to create elegant swirl patterns in the ganache, adding a decorative touch to the finished dessert.
Notes
- Wooden spoon technique helps create perfect, evenly distributed holes for maximum chocolate absorption without tearing the cake.
- Microwave chocolate mixture carefully, stirring frequently to prevent burning and achieve silky smooth consistency.
- Chill cake thoroughly to allow flavors to meld and chocolate filling to set completely, enhancing overall taste and texture.
- For gluten-free version, substitute boxed cake mix with gluten-free alternative while maintaining same mixing instructions.
- Prep Time: 30 minutes
- Cook Time: 3 minutes
- Category: Desserts
- Method: Baking
- Cuisine: American
Nutrition
- Serving Size: 12
- Calories: 419 kcal
- Sugar: 41 g
- Sodium: 178 mg
- Fat: 23 g
- Saturated Fat: 14 g
- Unsaturated Fat: 7 g
- Trans Fat: 0.3 g
- Carbohydrates: 52 g
- Fiber: 3 g
- Protein: 5 g
- Cholesterol: 66 mg
Sarah Mitchell
Content Specialist & Home Cooking Enthusiast
Expertise
Education
Asheville-Buncombe Technical Community College – Asheville, NC
American Fitness Professionals & Associates – Online
Sarah’s passion for food was sparked by weekend trips to the farmers’ market and her belief that healthy meals should never feel boring.
After earning her culinary diploma and becoming a certified Nutrition and Wellness Consultant, she set out to help others fall in love with simple, wholesome cooking.
She’s all about celebrating the small wins in the kitchen: a colorful yogurt bowl, a new twist on a classic dish, or a homemade snack that feels just a little extra special.
Outside the kitchen, Sarah is a gardener at heart, a yoga enthusiast, and a believer that fresh herbs can brighten any meal, and any day.