
Fresh Mint Aero Drip Cake Recipe: Sweet Chocolate Magic
Whipping up a mint aero drip cake brings pure chocolate bliss right to your kitchen counter.
Layers of moist, rich chocolate sponge create a dreamy foundation for this decadent dessert.
Cool mint notes dance through each delectable bite, promising a refreshing twist on classic chocolate indulgence.
Creamy frosting cascades dramatically between soft cake layers, hinting at the spectacular treat awaiting you.
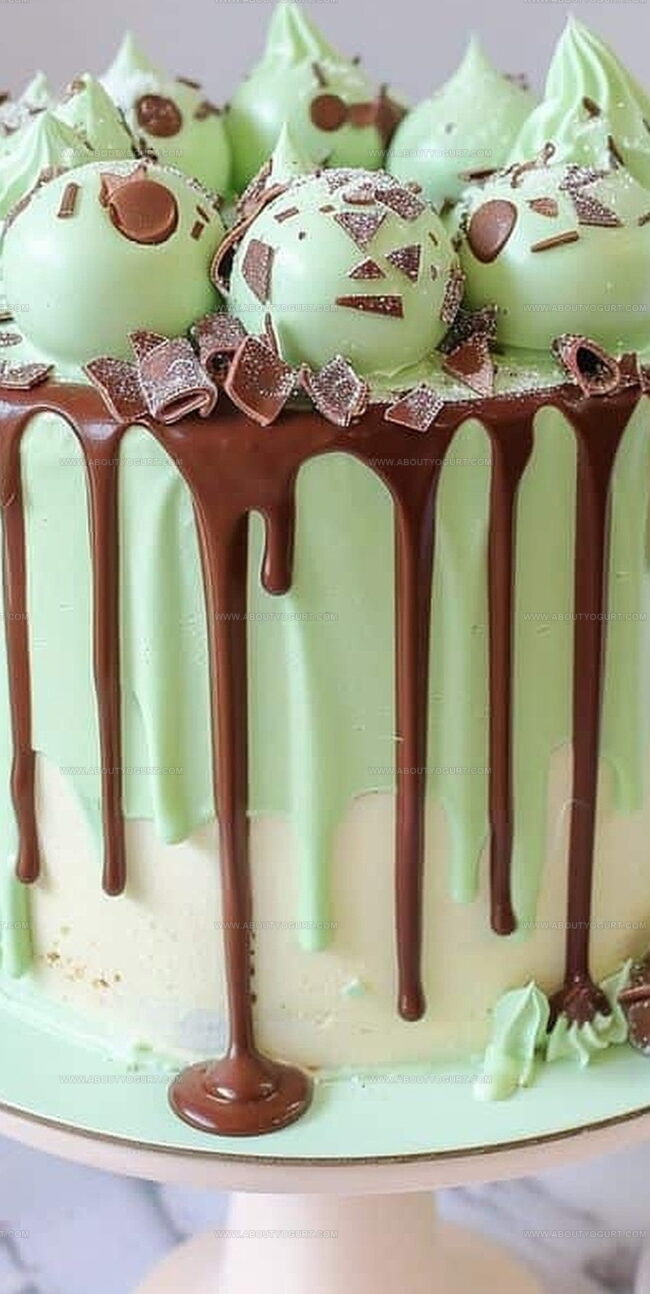
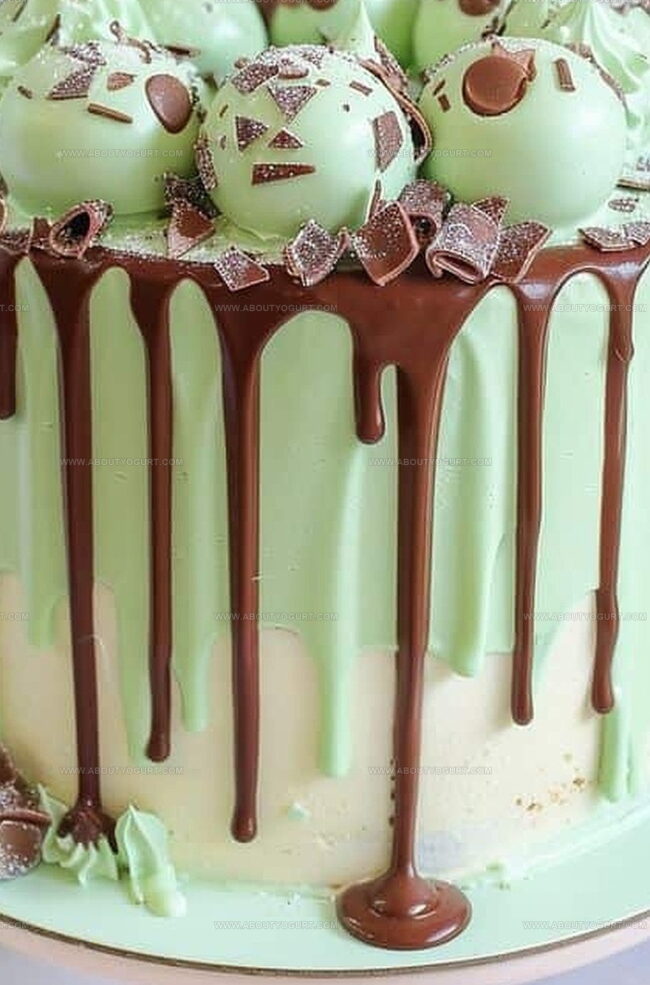
Delicate chocolate shards and crumbled mint aero bars crown this showstopping creation with irresistible texture and crunch.
Chocolate lovers will find themselves enchanted by this stunning masterpiece that delivers both visual drama and intense flavor.
One slice guarantees an unforgettable sweet experience that sparks pure joy.
Mint Aero Drip Cake Delight
Ingredients for Mint Aero Drip Cake
Cake Base:Mint Chocolate Elements:Frosting Components:Chocolate Ganache Drip:Decorative Elements:Step-by-Step Mint Aero Drip Cake Guide
Step 1: Warm Up the Oven
Get your oven toasty at 350F. Grab three round cake pans and give them a quick spray of cooking oil, then dust with flour to prevent sticking.
Step 2: Create the Cake Base
Ingredients for dry mix:Ingredients for wet mix:Combine dry ingredients in one bowl. In another bowl, cream butter and sugar until super fluffy. Add eggs one by one, mixing thoroughly. Stir in vanilla. Gently fold in dry ingredients, alternating with milk. Sprinkle in mint chocolate pieces for extra yumminess.
Step 3: Bake to Perfection
Pour batter evenly into prepared pans. Slide into the preheated oven and bake for 25-30 minutes. Check doneness by inserting a toothpick – it should come out clean. Let cakes rest in pans for 10 minutes, then transfer to a cooling rack.
Step 4: Whip Up Mint Buttercream
Beat butter until silky smooth. Gradually mix in powdered sugar. Add heavy cream, vanilla, and mint flavoring. Whip until light and cloud-like. Optional: Add a drop of green food coloring for a mint-inspired look.
Step 5: Layer and Frost
Spread a thin layer of buttercream over cooled cakes (this is your crumb coat). Chill for 30 minutes. Apply a second, more generous layer of frosting, smoothing it out beautifully.
Step 6: Create Chocolate Drip Magic
Heat heavy cream until it just starts to simmer. Remove from heat and add dark chocolate chips. Let sit for 5 minutes, then stir until glossy and smooth. Allow ganache to cool slightly before dramatically dripping over the cake.
Step 7: Final Flourish
Scatter broken Mint Aero chocolate pieces on top. Garnish with fresh mint leaves for an extra touch of elegance.
Serve and watch everyone’s eyes light up with delight!
Pro Tips for Mint Aero Drip Cake
Variations to Try with Mint Aero Drip Cake
Perfect Pairings for Mint Aero Drip Cake
Storage Tips for Mint Aero Drip Cake
Mint Aero Drip Cake FAQs
Yes, you can substitute Mint Aero with regular mint chocolate chips or chop up mint chocolate bars. The key is maintaining the mint flavor profile in the cake.
Not mandatory. If you don’t have mint extract, you can use mint syrup or increase the mint chocolate content to enhance the mint flavor. Some bakers also use peppermint extract as an alternative.
Use a kitchen scale to weigh the batter when dividing it into pans, or measure the batter using a measuring cup to distribute it equally. This helps create uniform cake layers.
Print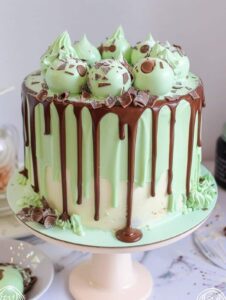
Mint Aero Drip Cake Recipe
- Total Time: 1 hour 10-15 minutes
- Yield: 8 1x
Description
Chocolate lovers rejoice with this mint aero drip cake, a luxurious dessert that blends rich chocolate layers with cool mint notes. Dripping with glossy chocolate ganache and crowned with crushed mint aero bars, this cake promises a delightful sensory experience you’ll savor with every indulgent bite.
Ingredients
Cake Ingredients:
- 2 1/2 cups all-purpose flour
- 1 3/4 cups granulated sugar
- 1 cup unsalted butter, softened
- 4 large eggs
- 1 cup whole milk
- 1/2 cup mint chocolate chips (or chopped Mint Aero chocolate)
Leavening and Seasoning Ingredients:
- 2 1/2 teaspoons baking powder
- 1/2 teaspoon salt
Flavoring Ingredients:
- 2 teaspoons vanilla extract
Instructions
- Prepare the kitchen workspace by setting the oven temperature to 350F (175C). Thoroughly grease and dust three 9-inch round cake pans with flour to prevent sticking.
- Create a dry mixture by whisking flour, baking powder, and salt in a medium bowl. Set this blend aside for later incorporation.
- In a large mixing bowl, cream butter and sugar until the mixture becomes light and airy. Incorporate eggs individually, ensuring thorough blending after each addition. Infuse vanilla extract for enhanced flavor profile.
- Gradually merge the dry flour mixture with the butter blend, alternating with milk. Gently fold mint chocolate chips throughout the batter to distribute evenly.
- Distribute the cake batter equally across the prepared pans. Slide into the preheated oven and bake for 25-30 minutes until a toothpick emerges clean when inserted into the center.
- Remove cakes from oven and allow a 10-minute cooling period within the pans. Transfer to a wire rack for complete cooling.
- Whip softened butter until smooth and creamy. Incrementally integrate powdered sugar, creating a silky texture. Introduce heavy cream, vanilla, and mint syrup, blending until the frosting becomes light and fluffy.
- Apply a preliminary thin frosting layer (crumb coat) across the cooled cakes. Refrigerate for 30 minutes to set the initial coating.
- Execute the secondary frosting layer, ensuring an even and smooth surface.
- Generate chocolate ganache by heating heavy cream until it reaches a gentle simmer. Remove from heat and combine with dark chocolate chips. Allow a 5-minute resting period before stirring to achieve a glossy consistency.
- Once ganache slightly cools, carefully pour over the cake’s summit, allowing elegant drips to cascade down the sides.
- Embellish the cake’s surface with strategically placed Mint Aero chocolate pieces and delicate mint leaves for visual appeal.
Notes
- Select high-quality mint chocolate chips or Mint Aero bars for intense flavor and authentic taste.
- Ensure butter and eggs are at room temperature to create a smoother, more uniform cake batter.
- Avoid overmixing the batter to prevent a tough, dense cake texture.
- Chill the cake layers before frosting to minimize crumbs and create cleaner frosting lines.
- Use gel food coloring for more vibrant green shade without altering frosting consistency.
- Cool ganache slightly before dripping to control thickness and prevent rapid running.
- For gluten-free version, substitute all-purpose flour with gluten-free blend and add xanthan gum.
- Create dairy-free alternative by using plant-based butter, milk, and cream substitutes.
- Reduce sugar content by using alternative sweeteners or decreasing overall sugar quantity.
- Prep Time: 45 minutes
- Cook Time: 25-30 minutes
- Category: Desserts
- Method: Baking
- Cuisine: British
Nutrition
- Serving Size: 8
- Calories: 335 kcal
- Sugar: 30 g
- Sodium: 180 mg
- Fat: 17 g
- Saturated Fat: 10 g
- Unsaturated Fat: 6 g
- Trans Fat: 0.5 g
- Carbohydrates: 42 g
- Fiber: 1.5 g
- Protein: 4 g
- Cholesterol: 75 mg
Sarah Mitchell
Content Specialist & Home Cooking Enthusiast
Expertise
Education
Asheville-Buncombe Technical Community College – Asheville, NC
American Fitness Professionals & Associates – Online
Sarah’s passion for food was sparked by weekend trips to the farmers’ market and her belief that healthy meals should never feel boring.
After earning her culinary diploma and becoming a certified Nutrition and Wellness Consultant, she set out to help others fall in love with simple, wholesome cooking.
She’s all about celebrating the small wins in the kitchen: a colorful yogurt bowl, a new twist on a classic dish, or a homemade snack that feels just a little extra special.
Outside the kitchen, Sarah is a gardener at heart, a yoga enthusiast, and a believer that fresh herbs can brighten any meal, and any day.