
Fluffy Homemade Parmesan Biscuits Recipe: Golden Savory Joy
Crispy, golden parmesan biscuits have become my weekend comfort secret.
Cheese lovers appreciate these savory delights for their incredible texture and rich flavor.
Small batches guarantee maximum enjoyment with minimal effort.
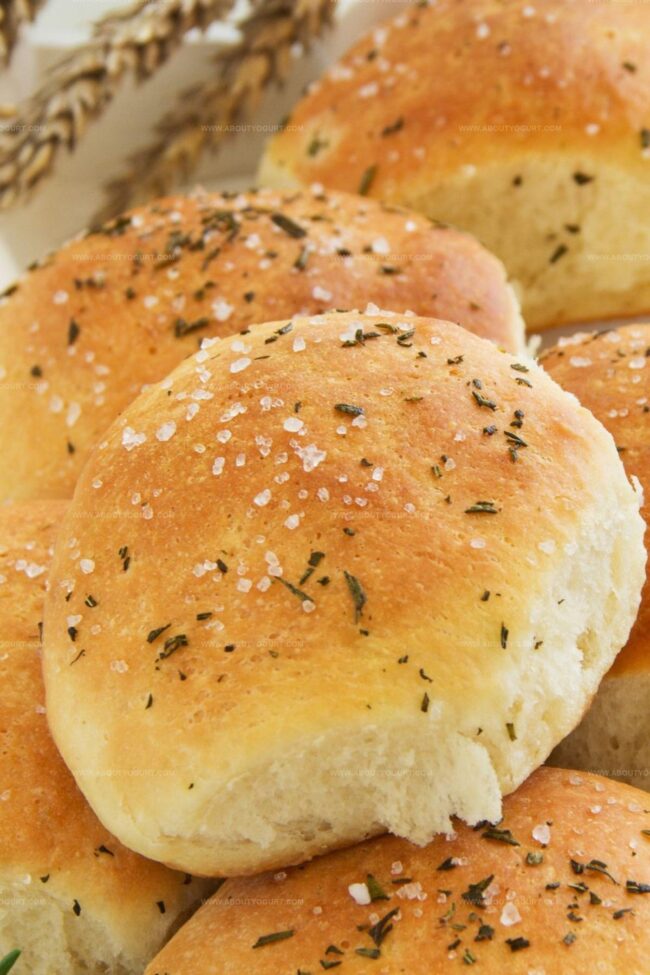
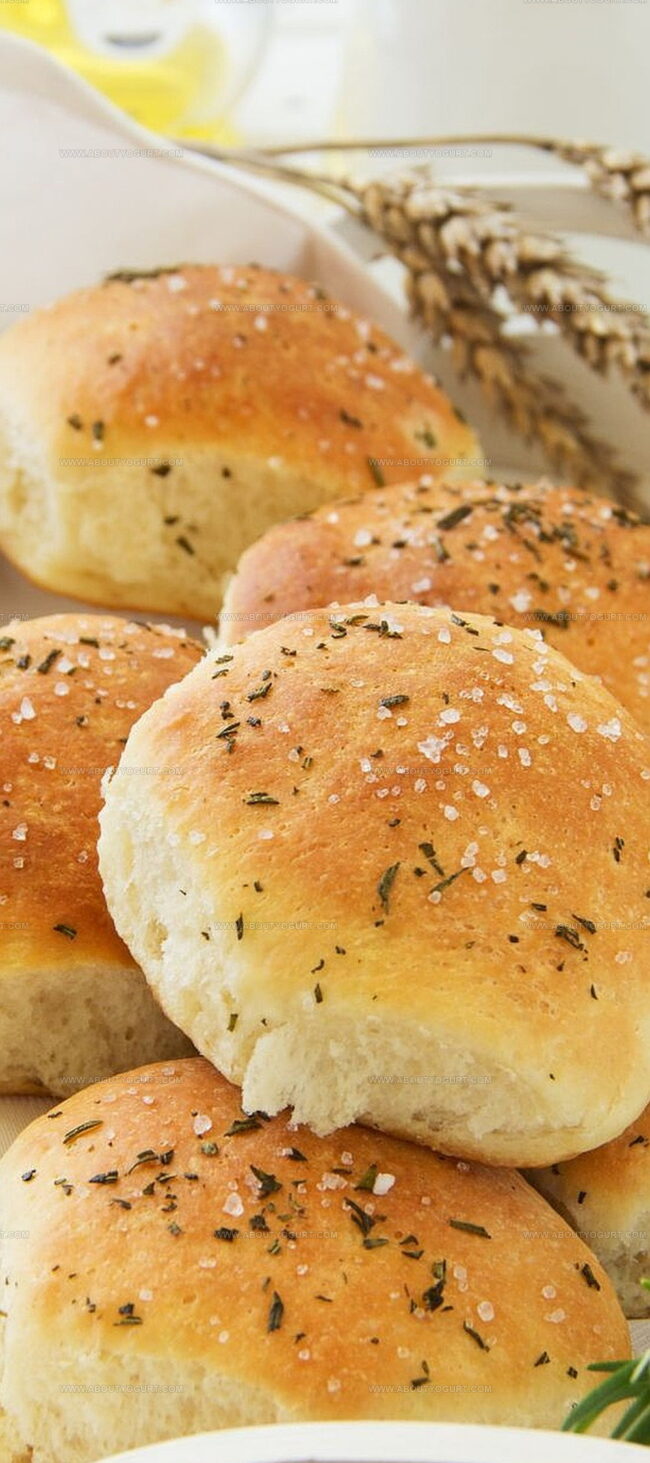
Salt and herbs complement the sharp parmesan perfectly.
Simple ingredients create extraordinary results in your kitchen.
Each bite promises a delightful crunch that surprises and satisfies.
You’ll want to share these irresistible treats with everyone around the table.
Why Nigella Parmesan Biscuits Are So Addictive

Everything In Nigella Parmesan Biscuits
Dry Ingredients:Dairy Ingredients:Preparation Ingredients:Steps To Make Nigella Parmesan Biscuits
Step 1: Prepare Baking Station
Warm up your oven to a toasty 450F (230C). Grab a baking sheet and line it with parchment paper or a silicone mat for easy cleanup.
Step 2: Create Dry Mixture
In a spacious mixing bowl, combine these dry ingredients:Whisk everything together until perfectly blended.
Step 3: Work in Butter
Take cold butter and either grate it or cut into tiny cubes. Scatter over the dry ingredients. Use your fingertips to massage and blend the butter into the flour mixture. Keep working until the texture resembles coarse breadcrumbs with small butter pebbles throughout.
Step 4: Form Soft Dough
Pour in buttermilk and gently mix until a soft, slightly sticky dough emerges. Don’t overmix – just combine until ingredients come together.
Step 5: Knead and Shape
Dust your work surface with flour. Transfer the dough and give it a gentle knead about 3-4 times. Roll out the dough to approximately 1/4 inch thickness. Use a round cookie cutter to create beautiful biscuit circles.
Step 6: Chill the Biscuits
Place the cut biscuits on the prepared baking sheet. Pop them into the freezer for 15 minutes to help them maintain their shape and create a flakier texture.
Step 7: Bake to Golden Perfection
Slide the baking sheet into the preheated oven. Bake for 15-18 minutes, watching for a gorgeous golden-brown color. The edges should look crisp and enticing.
Step 8: Serve and Enjoy
Remove biscuits from the oven and let them cool for just a moment. Serve warm and watch them disappear quickly!
Quick Tips For Nigella Parmesan Biscuits
New Takes On Nigella Parmesan Biscuits

Perfect Pairings For Nigella Parmesan Biscuits
How To Store Nigella Parmesan Biscuits Properly
FAQs About Nigella Parmesan Biscuits
Cold butter creates flaky, tender layers in biscuits by staying solid and creating pockets of steam during baking, which helps achieve a light, airy texture.
Not recommended. Buttermilk’s acidity helps activate baking soda and provides tanginess. If unavailable, mix milk with lemon juice or vinegar to create a buttermilk substitute.
Look for a golden-brown color on top and bottom. The edges should be crisp and the center should be slightly soft but not doughy.
Print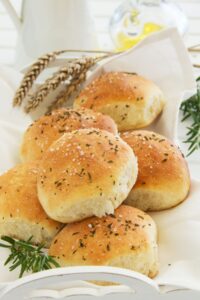
Parmesan Biscuits Recipe
- Total Time: 40-43 minutes
- Yield: 6 1x
Description
Savory Parmesan biscuits bring Italian countryside comfort to your kitchen, offering golden-brown delights packed with rich cheese flavor. Crisp edges and a tender crumb make these biscuits perfect for pairing with soups, salads, or enjoying as a standalone snack you’ll crave again and again.
Ingredients
Cheese:
- 3/4 cup (180 ml) Parmesan cheese, freshly grated
Dry Ingredients:
- 2 1/2 cups (300 g) all-purpose flour
- 1 tablespoon (15 ml) baking powder
- 1/2 teaspoon (2.5 ml) baking soda
- 1/2 teaspoon (2.5 ml) salt
Wet Ingredients:
- 6 tablespoons (85 g) unsalted butter, cold
- 1 cup (240 ml) buttermilk
Instructions
- Prepare the oven by heating to 450F (230C) and line a baking sheet with parchment paper for optimal baking results.
- Combine dry ingredients in a spacious mixing bowl, thoroughly blending flour, baking powder, baking soda, salt, and finely grated Parmesan cheese.
- Incorporate cold butter into the dry mixture using a grater or by cutting into small cubes, then use fingertips to massage butter into the flour until the texture resembles coarse breadcrumbs.
- Pour buttermilk into the crumbly mixture, gently stirring until a soft, cohesive dough forms without overmixing.
- Transfer dough onto a lightly floured surface and perform a gentle knead, approximately 34 turns, to ensure proper texture and minimal gluten development.
- Roll the dough to an even 1/4 inch thickness, then use a round cutter to create 2-inch biscuit shapes with clean edges.
- Place cut biscuits on the prepared baking sheet and transfer to the freezer for 15 minutes to help maintain their shape and enhance flakiness.
- Bake in the preheated oven for 15-18 minutes, watching for a golden-brown exterior that indicates perfect doneness. Serve immediately while warm for maximum flavor and texture.
Notes
- Chill ingredients beforehand to ensure maximum flakiness and create a tender, melt-in-your-mouth texture for your biscuits.
- Use freshly grated Parmesan cheese instead of pre-packaged for a more intense, authentic flavor that elevates the entire recipe.
- For a gluten-free version, swap regular flour with a cup-for-cup gluten-free flour blend and add an extra pinch of xanthan gum to maintain the biscuits’ structure.
- Experiment with herb variations by adding finely chopped rosemary, thyme, or chives directly into the dough for an extra layer of savory complexity.
- Prep Time: 25 minutes
- Cook Time: 15-18 minutes
- Category: Appetizer, Snacks
- Method: Baking
- Cuisine: American
Nutrition
- Serving Size: 6
- Calories: 180 kcal
- Sugar: 0.5 g
- Sodium: 310 mg
- Fat: 8 g
- Saturated Fat: 5 g
- Unsaturated Fat: 2.5 g
- Trans Fat: 0.1 g
- Carbohydrates: 22 g
- Fiber: 1 g
- Protein: 6 g
- Cholesterol: 25 mg
Michael Thompson
Founder & Recipe Developer
Expertise
Education
Cascade Culinary Institute – Bend, OR
ServSafe Food Handler Certification – Portland, OR
Focus: Certified in core food safety and hygiene principles for both home and professional kitchens, with emphasis on ingredient handling, kitchen cleanliness, and safe preparation methods.
Mike’s kitchen journey began with a single goal: to make everyday meals feel like something worth celebrating.
After earning his Certificate in Culinary Arts from Cascade Culinary Institute, he spent years working with local farmers and small kitchens across Oregon, learning the beauty of seasonal, small-batch cooking.
Mike’s approach is simple, cook with what’s fresh, keep it approachable, and always leave room for a little creativity. When he’s not testing yogurt marinades or designing single-serving meals, you’ll find him hiking trails or hunting down the best berries at local markets.