Homemade Pork Pie Recipe That’s Crispy and Savory
Crafting a delectable pork pie brings warmth and nostalgia to your kitchen adventure.
Savory aromas will soon fill the space with rich, comforting memories.
Traditional British culinary skills merge with simple ingredients to create something magical.
Layers of flaky pastry and tender meat promise a delightful experience.
Hearty and satisfying, this classic dish connects generations through shared meals.
Meat enthusiasts and home cooks alike will find joy in preparing this timeless recipe.
Let’s embark on a culinary journey that celebrates flavor and tradition.
Why Try Mary Berry Pork Pie At Home

Ingredients Used In Mary Berry Pork Pie
Pastry Base:Meat Filling:Jelly and Seasoning:Finishing Ingredients:How To Prepare Mary Berry Pork Pie Simply

Step 1: Craft Flaky Pastry Dough
Gently heat flour in a skillet to remove moisture. Melt lard in warm water, creating a smooth, pliable mixture. Combine the flour and lard mixture, kneading until a cohesive pastry dough forms. Work the dough carefully to ensure a tender, flaky texture.
Step 2: Prepare Pastry Shells
Roll out the dough and shape into round bases and matching lids for your pork pies. Place the pastry shells in the refrigerator to chill and firm up, which helps maintain their structure during baking.
Step 3: Develop Rich Jelly Stock
Combine stock ingredients in a large pot. Simmer slowly for several hours, allowing flavors to develop deeply. Carefully strain the liquid, removing any solids. Set the clear, flavorful jelly aside for later use.
Step 4: Assemble Savory Meat Filling
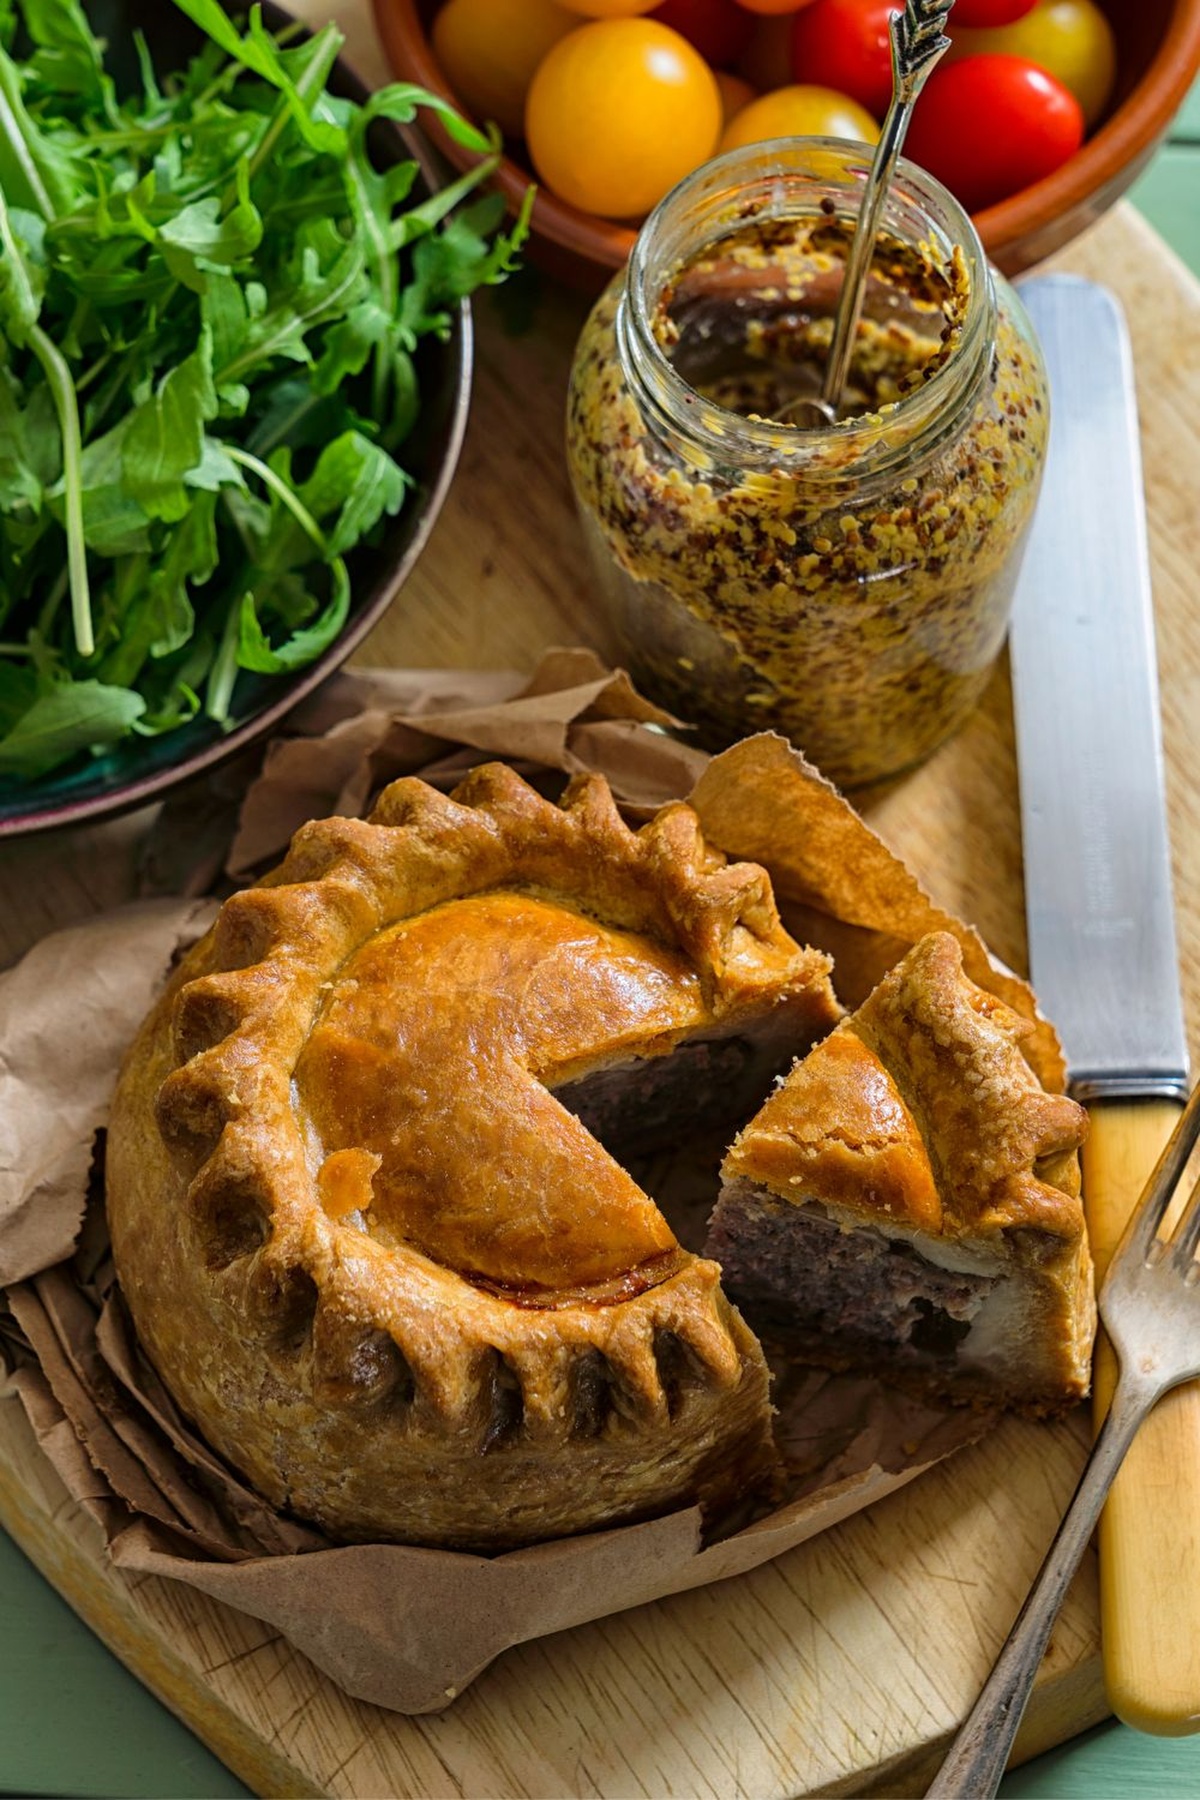
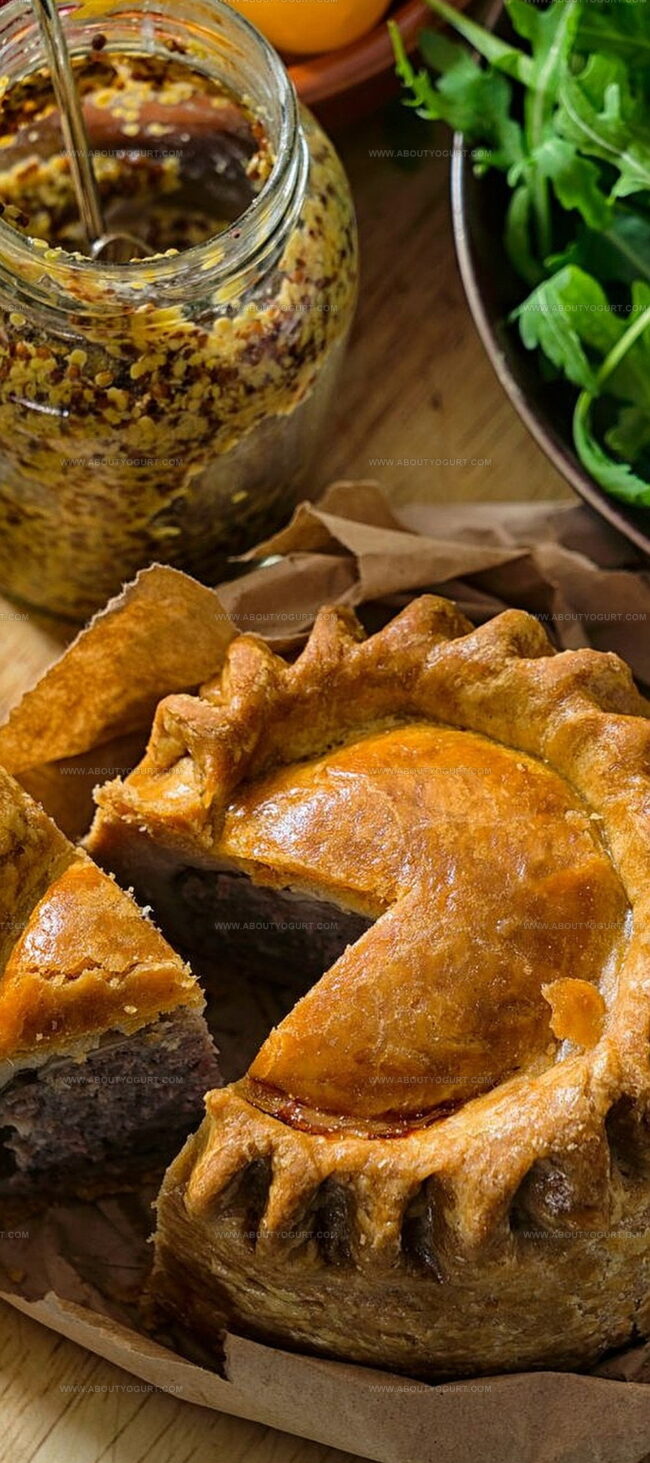
Season ground pork with a blend of herbs and spices. Fill the prepared pastry bases with the seasoned meat mixture. Cover each pie with its corresponding lid, crimping edges to seal completely. Use a small knife to create decorative venting holes on top.
Step 5: Bake to Golden Perfection
Brush the pie tops with beaten egg for a glossy, golden finish. Bake in a preheated oven, starting at a higher temperature to create a crisp crust, then reducing heat to cook the interior thoroughly. The two-stage baking ensures a perfectly cooked pie.
Step 6: Finish and Set
Allow the pork pies to cool completely at room temperature. Carefully pour hot jelly into the venting holes, filling the interior spaces. Refrigerate overnight to allow the jelly to set and flavors to meld together.
Step 7: Serve and Enjoy
Remove pies from the refrigerator. Slice into thick, hearty portions. Accompany with tangy pickles and sharp mustard for a traditional British-style meal. Best enjoyed chilled as a classic cold cut or picnic dish.
Top Tips For Mary Berry Pork Pie
Fresh Twists On Mary Berry Pork Pie

What To Pair With Mary Berry Pork Pie
How To Store And Reheat Mary Berry Pork Pie
Mary Berry Pork Pie FAQs Answered
The pastry uses hot water and melted lard, creating a unique hot water crust that’s sturdy and crisp, unlike regular pie pastry. This technique helps the crust hold its shape and provides a distinctive texture.
The holes allow steam to escape during baking and create a pathway for the hot jelly to be poured in later. These small vents prevent the pie from becoming soggy and help maintain the structural integrity of the pie.
The jelly (typically made from pork stock) serves as a preservative and adds moisture to the meat. When cooled, it creates a protective seal around the meat, keeping it fresh and enhancing the pie’s traditional flavor and texture.
Print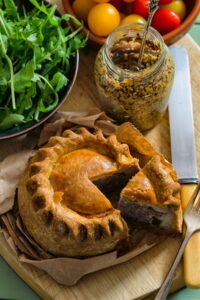
Pork Pie Recipe
- Total Time: 5 hours 40 mins
- Yield: 4 1x
Description
Hearty British Pork Pie celebrates classic culinary traditions with rich, savory flavors packed between buttery pastry layers. Cold cuts and herbed meat create a delightful midday meal you’ll savor with each traditional bite.
Ingredients
Meat and Protein:
- 500 grams (17.6 ounces) pork shoulder, diced
- 1 pig trotter
Spices and Seasonings:
- 1 teaspoon dried sage
- 2 teaspoons salt
- 1 teaspoon pepper
- 1 teaspoon white pepper
Flour and Pastry Ingredients:
- 350 grams (12.3 ounces) plain flour, sieved
- 110 grams (3.9 ounces) lard
- 140 milliliters (4.7 fluid ounces) water
- 1 egg, beaten
Additional Ingredients:
- 1 onion, halved
- 1 liter (33.8 fluid ounces) water
Instructions
- Create a tender, malleable pastry by gently heating flour and combining with melted lard-infused water until a smooth dough forms.
- Carefully roll out the pastry, crafting delicate bases and lids for the pie; refrigerate for 15-20 minutes to enhance structural integrity.
- Prepare a rich, gelatinous stock by simmering meat bones, vegetables, and aromatics for approximately 4 hours, then meticulously strain through a fine-mesh sieve.
- Layer seasoned pork meat into the pastry cases, ensuring even distribution and compact placement to prevent air pockets.
- Delicately position pastry lids over the meat, crimping edges to create a secure seal; use a skewer to create small ventilation holes for steam release.
- Apply a glossy egg wash across the entire surface to achieve a golden, lustrous finish.
- Roast in a preheated oven, first at 180°C for 20 minutes to set the structure, then reduce temperature to 160°C and continue baking for an additional 50 minutes.
- Allow the pie to cool completely at room temperature, ensuring structural stability.
- Gently pour warm, clarified stock through the ventilation holes, filling the interior spaces between meat layers.
- Refrigerate overnight to allow jelly to set and flavors to develop fully.
- Serve chilled, accompanied by tangy pickles and robust mustard for a traditional accompaniment.
Notes
- Keep flour warm to ensure smooth pastry texture and easy handling during mixing.
- Chill pastry briefly to maintain structural integrity and prevent shrinking during baking.
- Use high-quality pork with balanced fat content for maximum flavor and juicy filling.
- Create small air holes on pie lid to prevent pastry from cracking and allow steam release during cooking.
- Check internal temperature reaches 75°C for safe consumption of pork.
- Allow complete cooling before adding jelly to maintain pie’s structural stability.
- Refrigerate overnight for enhanced flavor development and firm jelly setting.
- Serve cold with tangy pickles and sharp mustard to complement rich meat flavor.
- Consider using gluten-free flour for alternative dietary needs.
- Store leftover pies wrapped tightly in refrigerator for up to 3 days.
- Prep Time: 30 mins
- Cook Time: 4 hours 1 hour 10 mins
- Category: Lunch, Dinner, Snacks, Appetizer
- Method: Baking
- Cuisine: British
Nutrition
- Serving Size: 4
- Calories: 644 kcal
- Sugar: 1 g
- Sodium: 1350 mg
- Fat: 42 g
- Saturated Fat: 15 g
- Unsaturated Fat: 25 g
- Trans Fat: 0.5 g
- Carbohydrates: 38 g
- Fiber: 2 g
- Protein: 37 g
- Cholesterol: 125 mg
Michael Thompson
Founder & Recipe Developer
Expertise
Education
Cascade Culinary Institute – Bend, OR
ServSafe Food Handler Certification – Portland, OR
Focus: Certified in core food safety and hygiene principles for both home and professional kitchens, with emphasis on ingredient handling, kitchen cleanliness, and safe preparation methods.
Mike’s kitchen journey began with a single goal: to make everyday meals feel like something worth celebrating.
After earning his Certificate in Culinary Arts from Cascade Culinary Institute, he spent years working with local farmers and small kitchens across Oregon, learning the beauty of seasonal, small-batch cooking.
Mike’s approach is simple, cook with what’s fresh, keep it approachable, and always leave room for a little creativity. When he’s not testing yogurt marinades or designing single-serving meals, you’ll find him hiking trails or hunting down the best berries at local markets.