
Red Velvet Brownies Recipe with Fudgy Sweet Layers
Sweet chocolate lovers, these decadent red velvet brownies bring a luxurious twist to classic dessert indulgence.
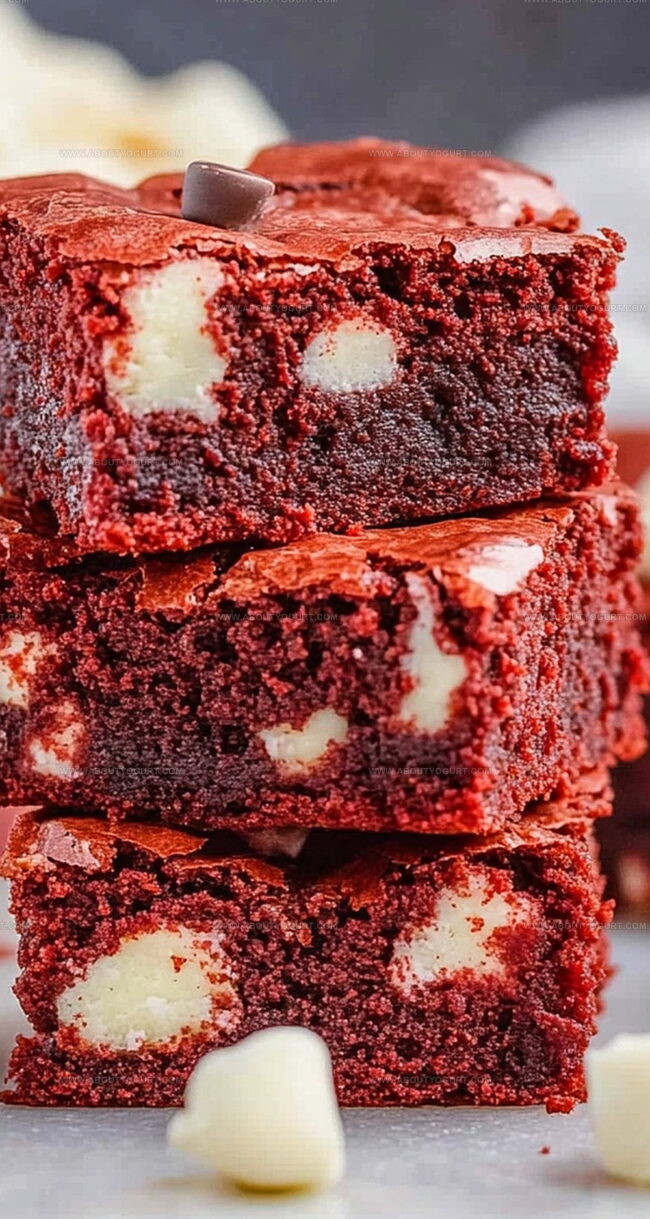
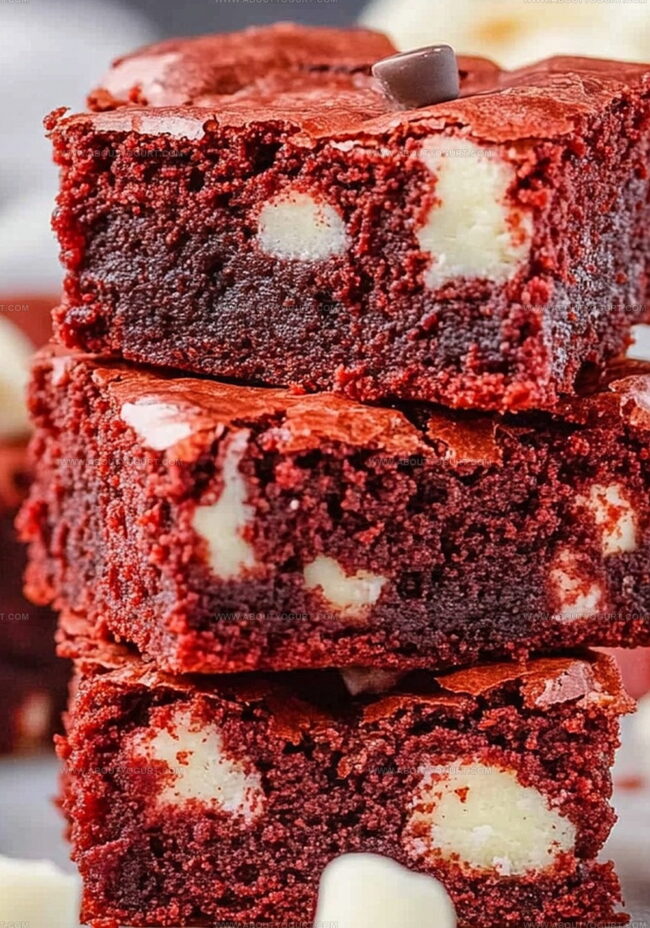
Crimson-hued batter swirls with rich cocoa undertones, creating a mesmerizing visual and taste experience.
Soft, fudgy textures melt perfectly on your tongue with every bite.
Cream cheese frosting adds a tangy complement that balances the deep chocolate notes.
Elegant yet simple, this recipe promises a show-stopping treat for any occasion.
Whip up these brownies and watch people’s eyes light up with pure delight.
What’s Great About Red Velvet Brownies
Ingredients In Red Velvet Brownies
Main Ingredients:Chocolate Components:Color and Flavor Enhancers:Baking Essentials:How To Make Red Velvet Brownies Easily
Step 1: Prepare Baking Space
Warm up the oven to 350°F. Line a 9×9-inch baking pan with parchment paper and give it a quick spray of nonstick cooking spray to prevent sticking.
Step 2: Blend Butter and Dry Ingredients
In a large mixing bowl, whisk together:Blend until everything is perfectly combined and smooth.
Step 3: Add Wet Ingredients
Introduce eggs, vanilla extract, and vinegar to the mixture. Stir until the batter becomes silky and uniform.
Step 4: Create Signature Red Color
Gently fold in flour. Before fully mixing, start adding red food coloring. Drop by drop, intensify the vibrant red hue until you reach the perfect shade of red velvet.
Step 5: Incorporate White Chocolate Chips
Fold white chocolate chips into the batter, ensuring they’re evenly distributed throughout.
Step 6: Prepare for Baking
Pour the batter into the prepared pan, smoothing the top to create an even surface. Sprinkle remaining white chocolate chips across the top.
Step 7: Bake to Perfection
Slide the pan into the preheated oven. Bake for 22-25 minutes. The brownies are ready when a toothpick inserted in the center comes out with a few moist crumbs.
Step 8: Cool and Serve
Let the brownies rest in the pan for at least one hour. This cooling time helps them set and makes cutting easier. Slice into delectable squares and enjoy!
Best Tips For Red Velvet Brownies
Ways To Remix Red Velvet Brownies
Tasty Pairings For Red Velvet Brownies
How To Store Red Velvet Brownies Properly
Red Velvet Brownies Q&A
Insert a toothpick into the center of the brownies. If it comes out with a few moist crumbs, they’re done. Avoid overbaking to keep them fudgy and soft.
White chocolate chips complement the red velvet flavor best. If you prefer, you can substitute with cream cheese chips or semisweet chocolate chips for a different taste profile.
Vinegar helps activate the cocoa powder and creates a deeper, richer chocolate flavor. It also contributes to the classic red velvet texture and helps the brownies stay moist.
Print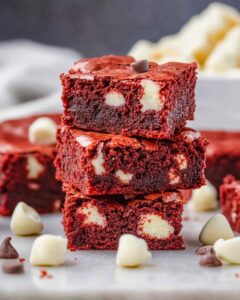
Red Velvet Brownies Recipe
- Total Time: Approximately 1 hour 40 minutes
- Yield: 9 1x
Description
Rich, chewy, and vibrant, these red velvet brownies blend classic cocoa flavor with a hint of tang and a fudgy texture, topped with a swirl of cream cheese or served plain.
Ingredients
Main Ingredients:
- 170 grams / 12 tablespoons unsalted butter (melted)
- 150 grams / 1¼ cups granulated sugar
- 3 eggs
- 125 grams / 1 cup all-purpose flour
- 10–12 drops Wilton red food coloring
- 170 grams / 1 cup white chocolate chips
Flavoring and Texture:
- 30 grams / 5 tablespoons unsweetened cocoa powder
- 3.7 milliliters / ¾ teaspoon vanilla extract
- 3.7 milliliters / ¾ teaspoon white vinegar
Seasoning:
- 2.5 grams / ½ teaspoon table salt
Instructions
- Preheat oven to 175°C (350°F). Line a 9×9-inch baking pan with parchment paper and lightly grease it.
- Combine melted butter, unsweetened cocoa powder, table salt, and granulated sugar in a large mixing bowl. Stir until the texture becomes glossy and uniform.
- Add eggs, vanilla extract, and white vinegar into the mixture. Whisk until the batter turns smooth and consistent.
- Gradually add all-purpose flour while mixing. Drop in red food coloring as you stir, adjusting the shade to your liking.
- Mix in half of the white chocolate chips until evenly distributed throughout the batter.
- Spread the batter into the prepared pan, using a spatula to level the surface.
- Scatter the remaining white chocolate chips over the top.
- Bake for 22 to 25 minutes, checking doneness with a toothpick—it should come out with a few moist crumbs.
- Let the brownies cool inside the pan for 1 hour to set properly before cutting into squares.
Notes
- Adjust the red food coloring gradually to control the color intensity.
- Do not overmix once the flour is added to avoid a dense texture.
- Let the brownies cool fully before slicing to maintain clean edges.
- Use parchment paper with overhang for easy removal from the pan.
- White chocolate chips can be swapped with dark or semi-sweet for a richer flavor.
- Prep Time: 15 minutes
- Cook Time: 22-25 minutes
- Category: Desserts, Snacks
- Method: Baking
- Cuisine: American
Nutrition
- Serving Size: 9
- Calories: 290 kcal
- Sugar: 22 g
- Sodium: 90 mg
- Fat: 17 g
- Saturated Fat: 10 g
- Unsaturated Fat: 7 g
- Trans Fat: 0.2 g
- Carbohydrates: 31 g
- Fiber: 1.5 g
- Protein: 3.5 g
- Cholesterol: 55 mg
Michael Thompson
Founder & Recipe Developer
Expertise
Education
Cascade Culinary Institute – Bend, OR
ServSafe Food Handler Certification – Portland, OR
Focus: Certified in core food safety and hygiene principles for both home and professional kitchens, with emphasis on ingredient handling, kitchen cleanliness, and safe preparation methods.
Mike’s kitchen journey began with a single goal: to make everyday meals feel like something worth celebrating.
After earning his Certificate in Culinary Arts from Cascade Culinary Institute, he spent years working with local farmers and small kitchens across Oregon, learning the beauty of seasonal, small-batch cooking.
Mike’s approach is simple, cook with what’s fresh, keep it approachable, and always leave room for a little creativity. When he’s not testing yogurt marinades or designing single-serving meals, you’ll find him hiking trails or hunting down the best berries at local markets.