Red Velvet Cheesecake Cake Recipe for Celebrations
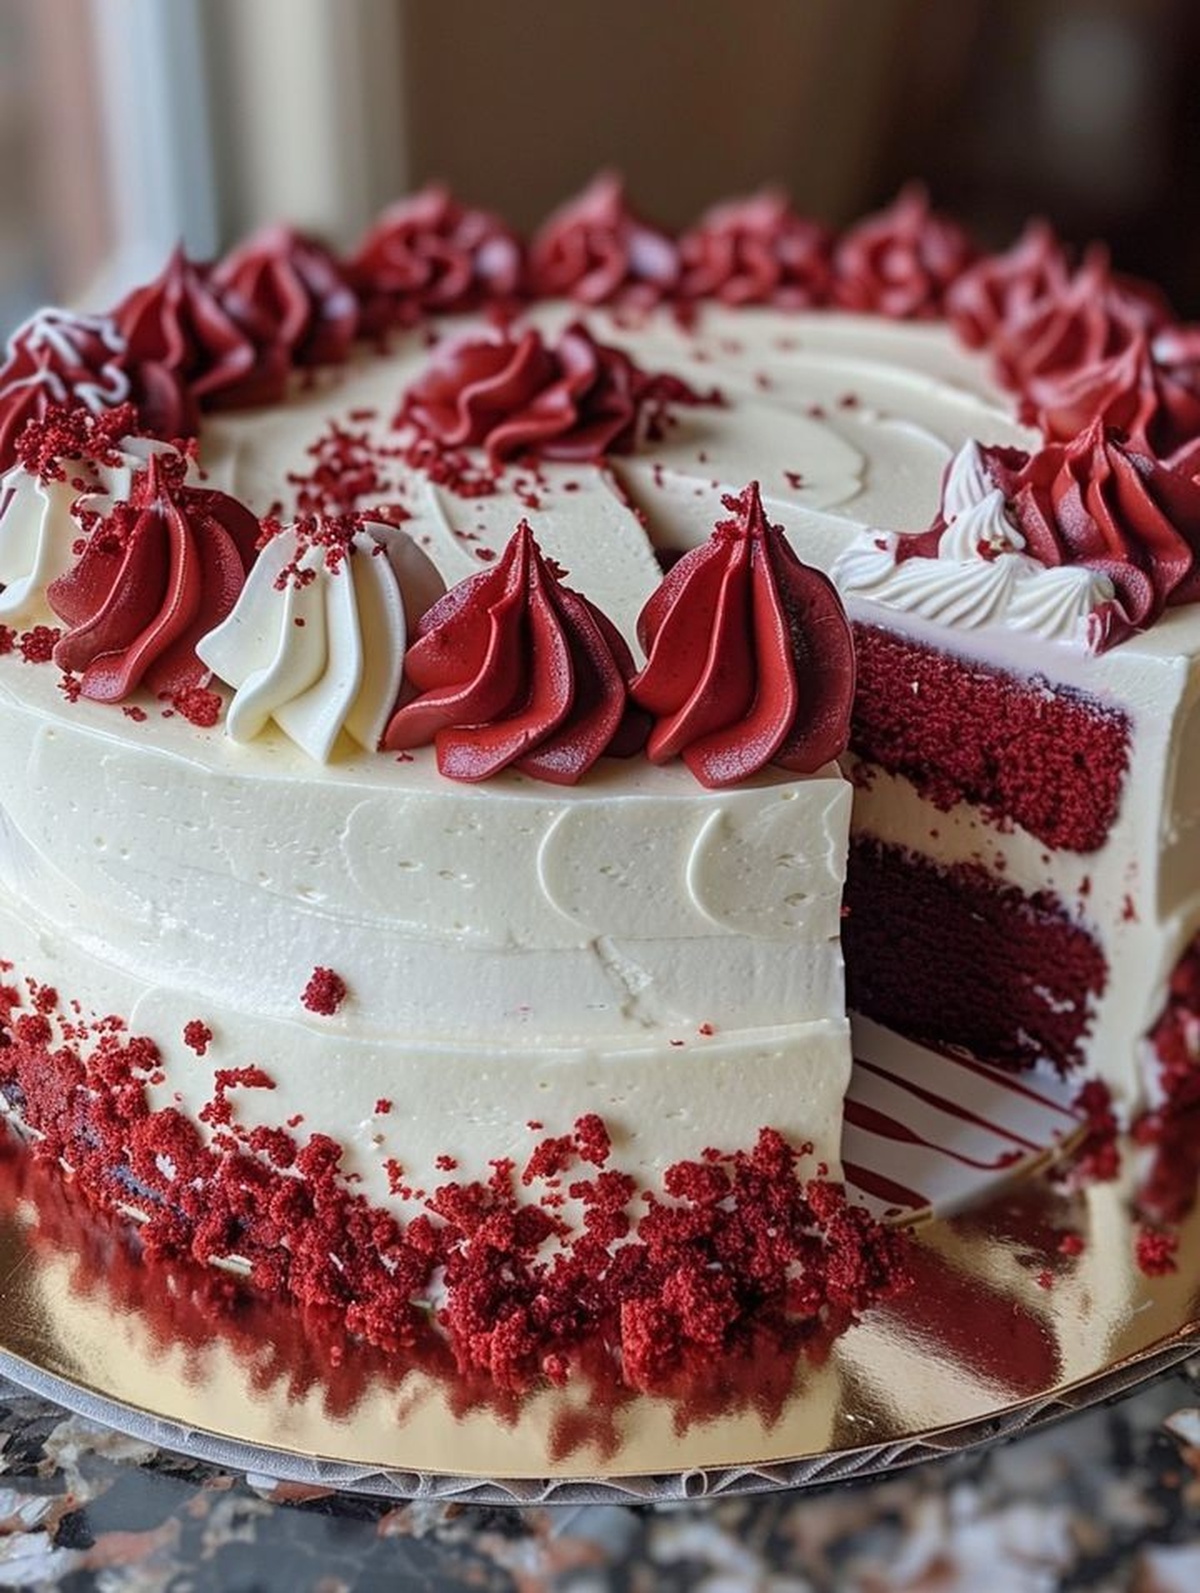
Indulging in a red velvet cheesecake cake brings pure magic to your dessert experience.
Layers of rich, velvety goodness await your taste buds.
Soft crimson cake meets creamy cheesecake in a delectable dance of flavors.
Each slice promises a symphony of textures that melt delightfully on your palate.
Cream cheese frosting adds a luxurious touch that elevates this dessert from ordinary to extraordinary.
Decadent and irresistible, this recipe combines classic comfort with elegant sophistication.
Prepare to be amazed by a sweet creation that will have everyone asking for seconds.
Why Red Velvet Cheesecake Cake Stands Out

Ingredients Needed for Red Velvet Cheesecake Cake
Cake Base:Cream Cheese Filling:Garnish and Assembly:How to Make Red Velvet Cheesecake Cake
Step 1: Create Velvety Cake Base
Whip up the red velvet cake mix following package guidelines. Let the cake cool completely, then gently crumble it into delicate, fine crumbs.
Step 2: Whip Creamy Cheesecake Filling
In a large mixing bowl, beat cream cheese until silky smooth. Incorporate sugar and vanilla extract, blending until perfectly combined and luscious.
Step 3: Fold in Fluffy Cream
Tenderly fold whipped heavy cream into the cream cheese mixture, creating a light and airy filling that’s irresistibly smooth.
Step 4: Prepare Springform Pan
Line the bottom of a 9-inch springform pan with parchment paper, ensuring a clean and easy release later.
Step 5: Build First Cake Layer
Gently press half of the red velvet cake crumbs into the pan’s bottom, forming a delectable first foundation.
Step 6: Spread Initial Cream Layer
Carefully spread half of the cream cheese mixture over the cake crumbs, creating a rich and creamy surface.
Step 7: Add Second Cake Crumb Layer
Sprinkle the remaining red velvet cake crumbs evenly over the cream cheese layer, adding texture and depth.
Step 8: Top with Final Cream Layer
Spread the remaining cream cheese mixture over the crumbs, smoothing the top to create a flawless finish.
Step 9: Chill and Set
Refrigerate the cake for a minimum of 4 hours or overnight, allowing it to set and develop its full, decadent flavor.
Step 10: Garnish and Serve
Before serving, optionally adorn with delicate white chocolate shavings or elegant curls for a stunning presentation.
Expert Tips for Red Velvet Cheesecake Cake

Delicious Variations for Red Velvet Cheesecake Cake
Pairing Ideas to Enjoy with Red Velvet Cheesecake Cake
Storage Advice for Red Velvet Cheesecake Cake
Frequently Asked Questions About Red Velvet Cheesecake Cake
Ensure cream cheese is at room temperature and beat it thoroughly before adding other ingredients. Use a hand mixer or stand mixer and scrape down the sides of the bowl to incorporate everything smoothly.
While you can use low-fat cream cheese, full-fat cream cheese provides better texture and richer flavor. Low-fat versions might result in a less creamy and less stable cheesecake.
Use your hands to break the cake into fine, even crumbs. Ensure the cake is completely cooled to prevent clumping and make crumbling easier.
Print
Red Velvet Cheesecake Cake Recipe
- Total Time: 4 hours 20 minutes
- Yield: 8 1x
Description
Red velvet cheesecake cake marries classic Southern charm with creamy indulgence, creating a dessert that mesmerizes taste buds. Layers of rich crimson cake and silky cream cheese filling promise a luxurious experience you’ll savor with pure delight.
Ingredients
Cake Base:
- 1 box (15.25 ounces/432 grams) red velvet cake mix
- 3 eggs
- 1/3 cup vegetable oil
- 1 cup water
Cheesecake Filling:
- 16 ounces (454 grams) cream cheese, softened
- 1/2 cup (100 grams) granulated sugar
- 1 teaspoon vanilla extract
Topping and Decoration:
- 2 cups (480 milliliters) heavy cream, whipped
- Red velvet cake crumbs
- White chocolate shavings or curls (optional)
Instructions
- Craft the red velvet cake according to package guidelines, ensuring complete cooling. Meticulously crumble the cake into fine, delicate fragments.
- Using an electric mixer, whip softened cream cheese until silky and uniform in texture. Gradually incorporate granulated sugar and vanilla extract, blending until harmoniously integrated.
- Gently introduce whipped heavy cream, folding with precision to create a luxurious, airy consistency.
- Prepare a 9-inch springform pan by lining the base with parchment paper, creating a non-stick foundation.
- Distribute approximately half of the crimson cake crumbs evenly across the pan’s bottom, establishing a robust base layer.
- Delicately spread a generous portion of the cream cheese mixture over the initial crumb foundation, ensuring complete coverage.
- Artfully scatter the remaining cake crumbs atop the cream cheese layer, creating a textural mosaic.
- Crown the dessert with the final cream cheese mixture, smoothing the surface to achieve a pristine, elegant finish.
- Refrigerate for a minimum of 4 hours, preferably overnight, allowing the cake to set and flavors to meld harmoniously.
- Prior to serving, optionally embellish with delicate white chocolate shavings for an elegant presentation.
Notes
- Crumble the cake while it’s completely cool to ensure easy, even texture without clumping or moisture issues.
- Use room temperature cream cheese for smoother, lump-free mixing that blends perfectly with other ingredients.
- Consider using low-fat cream cheese or Greek yogurt for a lighter, healthier version of the dessert without compromising taste.
- Freeze cake crumbs briefly before assembling to prevent them from becoming soggy and maintain their distinct red velvet flavor and texture.
- Prep Time: 20 minutes
- Cook Time: 0 minutes
- Category: Desserts
- Method: Chilling
- Cuisine: American
Nutrition
- Serving Size: 8
- Calories: 489
- Sugar: 35 g
- Sodium: 230 mg
- Fat: 37 g
- Saturated Fat: 22 g
- Unsaturated Fat: 12 g
- Trans Fat: 1.2 g
- Carbohydrates: 32 g
- Fiber: 1.2 g
- Protein: 6 g
- Cholesterol: 120 mg
Sarah Mitchell
Content Specialist & Home Cooking Enthusiast
Expertise
Education
Asheville-Buncombe Technical Community College – Asheville, NC
American Fitness Professionals & Associates – Online
Sarah’s passion for food was sparked by weekend trips to the farmers’ market and her belief that healthy meals should never feel boring.
After earning her culinary diploma and becoming a certified Nutrition and Wellness Consultant, she set out to help others fall in love with simple, wholesome cooking.
She’s all about celebrating the small wins in the kitchen: a colorful yogurt bowl, a new twist on a classic dish, or a homemade snack that feels just a little extra special.
Outside the kitchen, Sarah is a gardener at heart, a yoga enthusiast, and a believer that fresh herbs can brighten any meal, and any day.