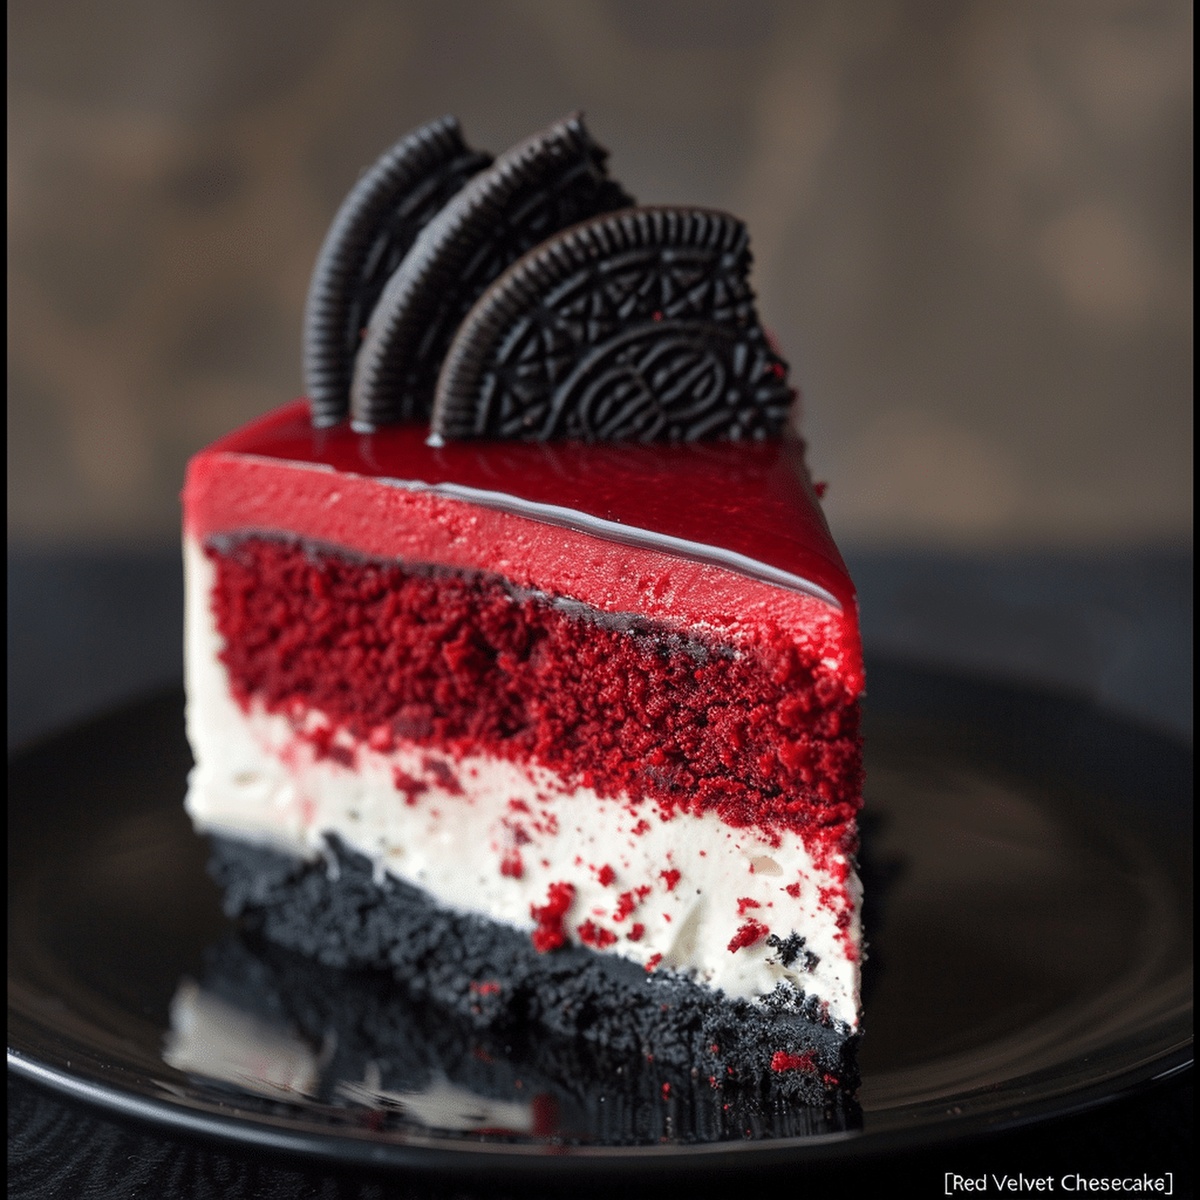
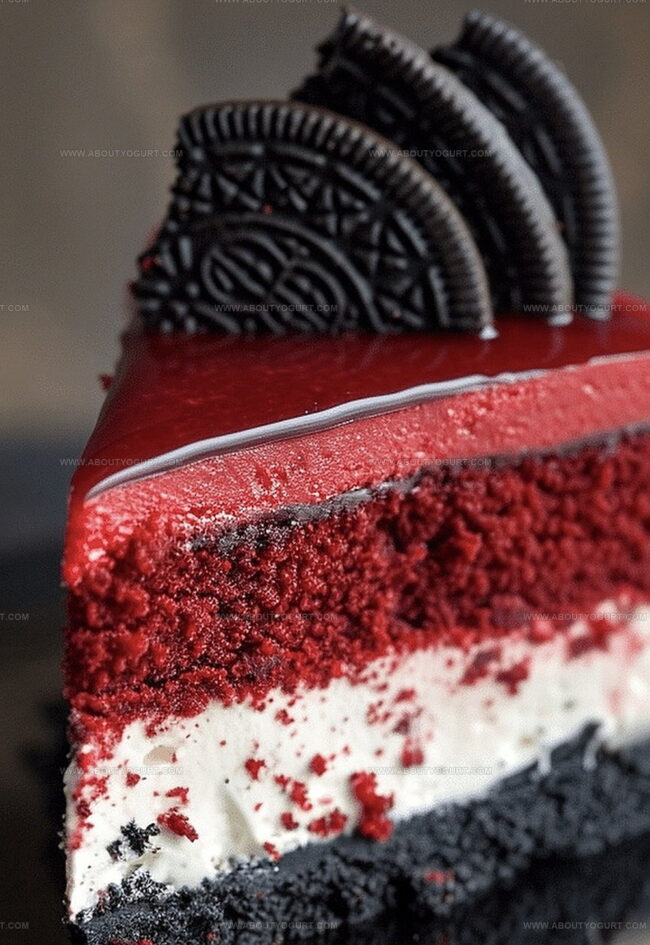
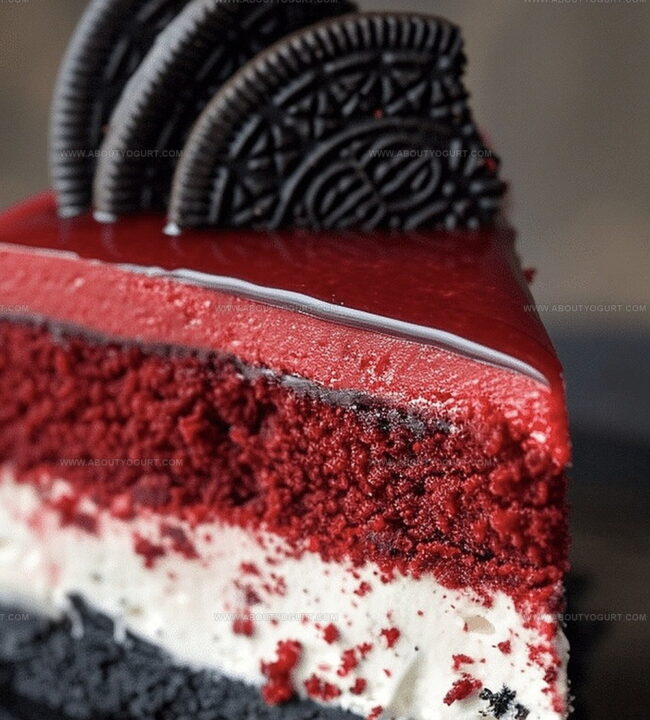
Red Velvet Oreo Cheesecake Recipe That’s Rich and Silky
A red velvet Oreo cheesecake brings decadence to dessert lovers seeking pure indulgence.
Creamy layers meld rich chocolate with tangy cream cheese.
Smooth textures create an irresistible combination that feels like pure magic.
Crumbled cookies add delightful crunch between silky filling and tender cake base.
Each slice promises a symphony of flavors dancing across your palate.
Sweet notes of vanilla and cocoa intertwine perfectly.
Come savor this delightful treat that will make every moment feel special.
Red Velvet Oreo Cheesecake: A Decadent Duo
Ingredients for Red Velvet Oreo Cheesecake Magic
Cake Base Ingredients:Cheesecake Filling Ingredients:Frosting and Decoration Ingredients:Instructions to Bake Red Velvet Oreo Cheesecake
Step 1: Warm Up the Oven
Turn the oven to 325°F. Grease a 9-inch springform pan and line the bottom with parchment paper to prevent sticking.
Step 2: Crush Those Cookies
In a food processor, transform Oreo cookies into fine crumbs. Drizzle melted butter and pulse until the mixture resembles wet sand.
Step 3: Create the Oreo Base
Press the cookie mixture firmly into the pan’s bottom, creating a compact crust. Slide the pan into the refrigerator to set while preparing the filling.
Step 4: Whip the Cheesecake Mixture
In a large bowl, blend cream cheese and sugar until silky smooth. Add eggs one at a time, mixing thoroughly after each addition.
Step 5: Color and Flavor the Batter
Incorporate these ingredients to create the signature red velvet flavor:Mix until the batter becomes a vibrant crimson and completely smooth.
Step 6: Build the Cheesecake Layers
Pour half the red velvet batter over the Oreo crust. Scatter chopped Oreo cookies across the layer. Top with remaining batter, spreading evenly.
Step 7: Bake to Perfection
Place the pan on a baking sheet to catch any drips. Bake for 45-50 minutes until edges are set and center has a gentle wiggle.
Step 8: Cool Down Slowly
Turn off the oven, leaving the cheesecake inside with the door slightly open for one hour. Transfer to a wire rack and cool completely.
Step 9: Chill and Set
Refrigerate the cheesecake for at least 4 hours or overnight to develop full flavor and texture.
Step 10: Whip Up the Frosting
Beat cream cheese and butter until creamy. Gradually add powdered sugar and vanilla, mixing until light and fluffy.
Step 11: Decorate with Flair
Remove the cheesecake from the springform pan. Pipe or spread the cream cheese frosting across the top in swirls or patterns.
Step 12: Serve and Celebrate
Slice the cheesecake and watch as your guests marvel at the beautiful layers. Enjoy the rich, decadent dessert that combines the classic red velvet flavor with the beloved Oreo cookie.
Pro Tips for That Perfect Red Velvet Oreo Cheesecake Texture
Variations to Make Red Velvet Oreo Cheesecake Unique
Pairing Ideas for Red Velvet Oreo Cheesecake
Storage Advice for Red Velvet Oreo Cheesecake Freshness
FAQs About Red Velvet Oreo Cheesecake
No, buttermilk provides a tangy flavor and helps create a tender texture that regular milk cannot replicate. If you don’t have buttermilk, you can make a quick substitute by adding 1 tablespoon of white vinegar or lemon juice to 1 cup of milk and letting it sit for 5 minutes.
Cocoa powder is essential for creating the classic red velvet flavor. It provides a subtle chocolate undertone that distinguishes red velvet from other desserts and helps balance the sweetness of the cheesecake.
To prevent cracks, avoid overmixing the batter, bake at a low temperature, and use the water bath method.
Print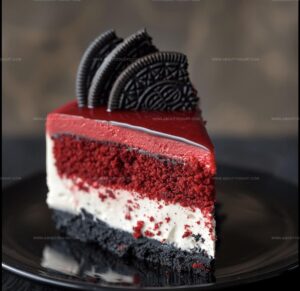
Red Velvet Oreo Cheesecake Recipe
- Total Time: 5 hours 40 minutes
- Yield: 12 1x
Description
Indulgent red velvet oreo cheesecake brings together classic American dessert flavors in a rich, creamy masterpiece. Chocolate cookie crust and silky cream cheese filling create an irresistible dessert slice that will satisfy your deepest sweet cravings.
Ingredients
Main Ingredients:
Cheesecake Base:
- 3 packages (8 ounces/226 grams) cream cheese, softened
- 1 cup granulated sugar
- 3 large eggs
- 1/2 cup sour cream
- 1/2 cup buttermilk
Crust and Cookie Layers:
- 24 oreo cookies
- 16 oreo cookies, coarsely chopped
Additional Ingredients:
- 1/4 cup (56 grams/2 ounces) unsalted butter, melted
- 1/4 cup (56 grams/2 ounces) unsalted butter, softened
- 2 teaspoons vanilla extract
- 1 teaspoon vanilla extract
- 2 tablespoons cocoa powder
- 1 tablespoon red food coloring
Frosting:
- 4 ounces (113 grams) cream cheese, softened
- 2 cups powdered sugar
Instructions
- Prepare the oven by heating to 325F (160C) and prepare a 9-inch springform pan with grease and parchment paper.
- Create the Oreo crust by grinding cookies in a food processor until fine, then blend with melted butter until well combined.
- Press the cookie mixture evenly into the pan’s bottom, then refrigerate while preparing the filling.
- Beat cream cheese and sugar in a large bowl until smooth and creamy.
- Incorporate eggs individually, mixing thoroughly after each addition and scraping bowl sides.
- Blend sour cream, buttermilk, vanilla extract, cocoa powder, and red food coloring until the mixture is uniform and vibrant.
- Pour half the red velvet cheesecake batter over the chilled Oreo crust.
- Distribute chopped Oreo cookies evenly across the first batter layer.
- Carefully pour remaining batter over the Oreo layer, ensuring even coverage.
- Position the springform pan on a baking sheet and bake for 45-50 minutes until edges are set and center remains slightly wobbly.
- Turn off oven, leaving cheesecake inside with door slightly open for one hour to prevent cracking.
- Remove from oven and cool completely on a wire rack.
- Refrigerate for minimum 4 hours or overnight to achieve perfect set.
- Whip cream cheese and butter until smooth, then gradually add powdered sugar and vanilla extract.
- Remove chilled cheesecake from pan and transfer to serving plate.
- Decorate top with piped or spread cream cheese frosting.
- Slice and serve this decadent dessert, showcasing its stunning layers and rich flavors.
Notes
- Soften cream cheese and eggs at room temperature for smoother, lump-free batter that blends perfectly.
- Crush Oreo cookies finely to create a compact, even crust that holds together beautifully when sliced.
- Prevent cheesecake cracking by using a water bath method or gradually cooling in the oven with the door slightly open.
- Swap food coloring with natural alternatives like beetroot powder for a healthier, vibrant red color option.
- Prep Time: 30 minutes
- Cook Time: 50 minutes
- Category: Desserts
- Method: Baking
- Cuisine: American
Nutrition
- Serving Size: 12
- Calories: 478 kcal
- Sugar: 38 g
- Sodium: 210 mg
- Fat: 32 g
- Saturated Fat: 19 g
- Unsaturated Fat: 12 g
- Trans Fat: 0.5 g
- Carbohydrates: 39 g
- Fiber: 1 g
- Protein: 7 g
- Cholesterol: 85 mg
Sarah Mitchell
Content Specialist & Home Cooking Enthusiast
Expertise
Education
Asheville-Buncombe Technical Community College – Asheville, NC
American Fitness Professionals & Associates – Online
Sarah’s passion for food was sparked by weekend trips to the farmers’ market and her belief that healthy meals should never feel boring.
After earning her culinary diploma and becoming a certified Nutrition and Wellness Consultant, she set out to help others fall in love with simple, wholesome cooking.
She’s all about celebrating the small wins in the kitchen: a colorful yogurt bowl, a new twist on a classic dish, or a homemade snack that feels just a little extra special.
Outside the kitchen, Sarah is a gardener at heart, a yoga enthusiast, and a believer that fresh herbs can brighten any meal, and any day.