
Crumbly Golden Rock Cakes Recipe: A Sweet British Classic
When baking rock cakes, you stumble upon a delightful British treat that promises pure comfort.
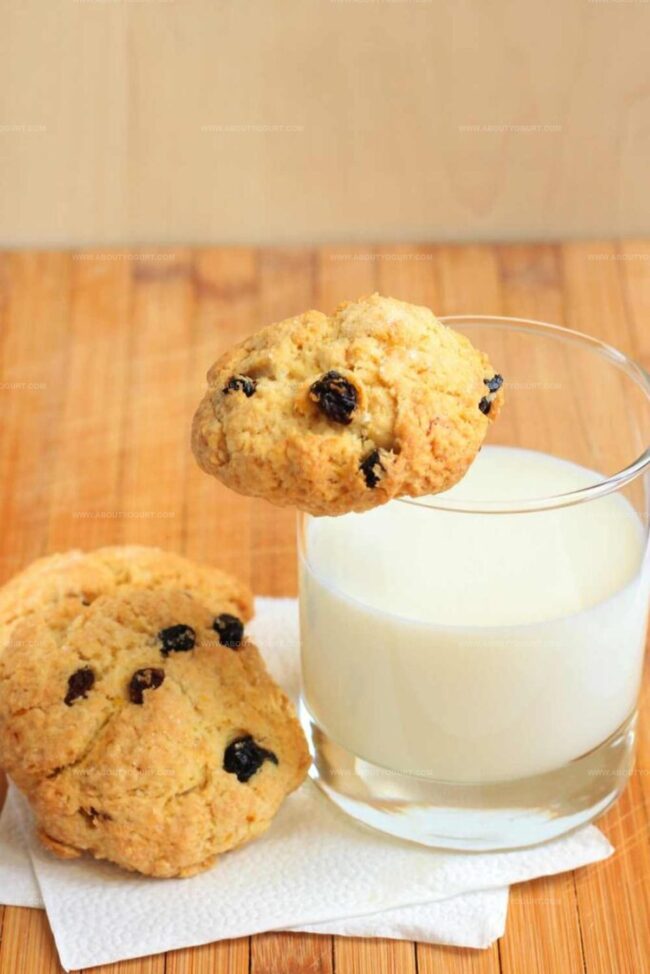
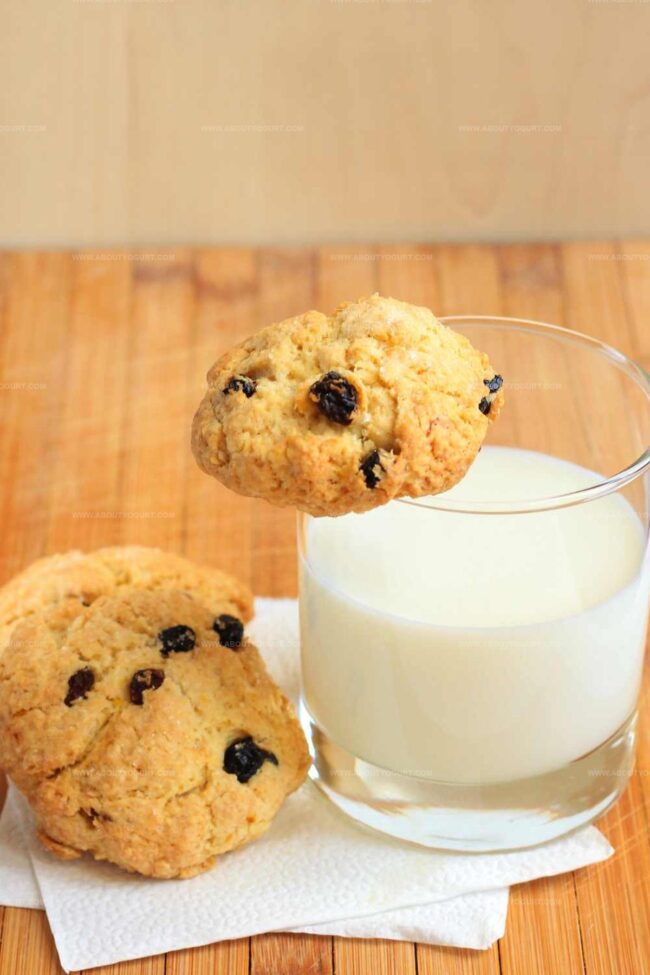
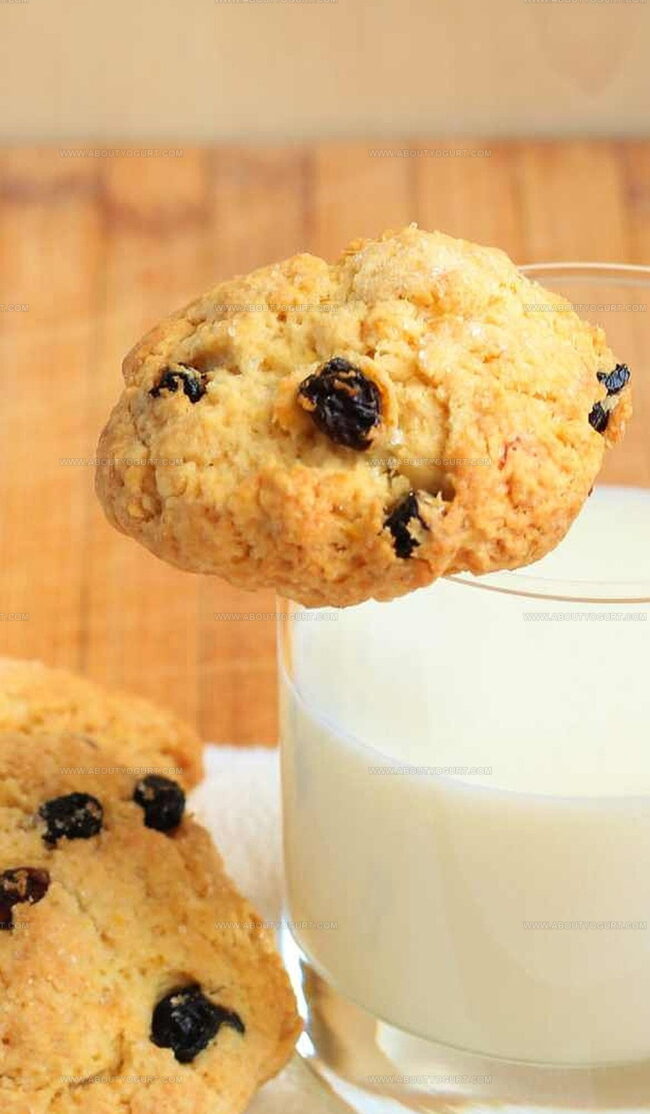
Crumbly edges and rustic charm define this classic pastry.
Soft centers hide within each irregular, bumpy surface.
Grandmothers across England have perfected these simple delicacies for generations.
Nutmeg and currants dance together, creating a warm, inviting aroma.
Small kitchen adventures like these connect us to traditional baking magic.
Mixing these ingredients becomes a joyful moment of culinary creativity that you’ll absolutely adore.
What Makes Mary Berry Rock Cakes So Comforting
Ingredients for Mary Berry Rock Cakes
Main Ingredients:Additional Ingredients:Finishing Ingredient:How to Make Mary Berry Rock Cakes Easily
Step 1: Warm Up the Oven
Set your oven to a toasty 200°C (180°C for fan ovens). Lightly coat two baking trays with a thin layer of butter or cooking spray to prevent sticking.
Step 2: Create Crumbly Base
In a large mixing bowl, combine flour and baking powder. Use your fingertips to gently rub cold butter into the dry ingredients. Continue until the mixture looks like coarse breadcrumbs with tiny butter lumps scattered throughout.
Step 3: Add Sweet and Fruity Goodness
Sprinkle in sugar and mixed dried fruits:Gently mix the ingredients until evenly distributed.
Step 4: Bring the Mixture Together
In a separate small bowl, whisk together egg and milk. Pour this liquid mixture into the dry ingredients. Stir until everything combines smoothly. If the dough seems too dry, add a splash more milk to create a soft, slightly sticky consistency.
Step 5: Shape Into Rustic Mounds
Using a spoon or your hands, drop rough mounds of the mixture onto the prepared baking trays. They should look pleasantly uneven and bumpy. Sprinkle a light dusting of sugar over the top of each cake.
Step 6: Bake to Golden Perfection
Place the trays in the preheated oven and bake for about 15 minutes. Watch for a beautiful golden-brown color and a slightly crisp exterior. Once done, transfer the rock cakes to a wire rack to cool completely.
Handy Tips for Mary Berry Rock Cakes

New Flavors for Mary Berry Rock Cakes
What to Enjoy with Mary Berry Rock Cakes
Storage Instructions for Rock Cakes
Mary Berry Rock Cakes FAQs
Rock cakes originated in the United Kingdom, particularly popular during wartime rationing when ingredients were scarce and baking needed to be quick and simple.
They get their name from their rough, uneven surface that resembles rocky terrain, created by dropping the dough in rustic mounds rather than smoothing it out.
Absolutely! While traditional recipes use mixed dried fruit, you can easily swap in raisins, currants, sultanas, or chopped dried apricots based on your preference.
Yes, rock cakes are an excellent beginner’s baking recipe. They’re simple, require minimal technical skill, and children can help with mixing and shaping the dough.
Print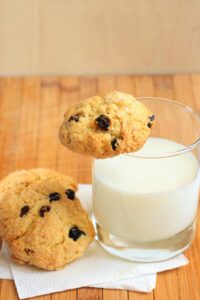
Rock Cakes Recipe
- Total Time: 30 minutes
- Yield: 12 1x
Description
Delightful rock cakes from British baking traditions bring nostalgic comfort with their crumbly texture and sweet dried fruit. Crisp edges and homemade charm invite you to savor these simple yet irresistible teatime treats perfect for sharing with friends.
Ingredients
Main Ingredients:
- 8 ounces (226 grams) self-raising flour
- 4 ounces (113 grams) butter, softened
- 1 egg
- 4 ounces (113 grams) mixed dried fruit
Supplementary Ingredients:
- 2 teaspoons baking powder
- 2 ounces (57 grams) sugar
- 2 ounces (57 grams) currants
Finishing Ingredients:
- 1 tablespoon milk (plus more if needed)
- Demerara sugar, to sprinkle
Instructions
- Heat oven to 200°C (180°C fan) and prepare two baking trays with a light grease coating.
- Combine flour and baking powder, then incorporate cold butter using fingertips until mixture resembles coarse breadcrumbs.
- Gently fold sugar and dried fruits into the crumbly mixture, ensuring even distribution.
- Whisk egg with milk, then pour into dry ingredients. Mix until a slightly sticky dough forms, adding extra milk if the mixture seems too dry.
- Using hands, create 12 rustic, uneven mounds directly onto the prepared baking trays, maintaining a rough and bumpy texture.
- Sprinkle additional sugar over the top of each rock cake to create a sweet, crispy exterior.
- Bake in the preheated oven for 15 minutes, watching for a golden-brown color and slightly crisp edges.
- Remove from oven and transfer rock cakes to a wire rack, allowing them to cool completely and firm up.
Notes
- Ensure butter is cold and cut into small cubes for the best crumbly texture when rubbing into flour.
- Use room temperature egg and milk to help bind the ingredients smoothly without overmixing the batter.
- Experiment with different dried fruits like cranberries, apricots, or mixed peel to add variety and personal flair to the classic recipe.
- For a gluten-free version, substitute regular flour with a good-quality gluten-free flour blend and add a pinch of xanthan gum to improve texture.
- Prep Time: 15 minutes
- Cook Time: 15 minutes
- Category: Breakfast, Snacks, Desserts
- Method: Baking
- Cuisine: British
Nutrition
- Serving Size: 12
- Calories: 181 kcal
- Sugar: 8 g
- Sodium: 135 mg
- Fat: 9 g
- Saturated Fat: 5 g
- Unsaturated Fat: 3 g
- Trans Fat: 0.2 g
- Carbohydrates: 24 g
- Fiber: 1.5 g
- Protein: 3 g
- Cholesterol: 27 mg
Michael Thompson
Founder & Recipe Developer
Expertise
Education
Cascade Culinary Institute – Bend, OR
ServSafe Food Handler Certification – Portland, OR
Focus: Certified in core food safety and hygiene principles for both home and professional kitchens, with emphasis on ingredient handling, kitchen cleanliness, and safe preparation methods.
Mike’s kitchen journey began with a single goal: to make everyday meals feel like something worth celebrating.
After earning his Certificate in Culinary Arts from Cascade Culinary Institute, he spent years working with local farmers and small kitchens across Oregon, learning the beauty of seasonal, small-batch cooking.
Mike’s approach is simple, cook with what’s fresh, keep it approachable, and always leave room for a little creativity. When he’s not testing yogurt marinades or designing single-serving meals, you’ll find him hiking trails or hunting down the best berries at local markets.