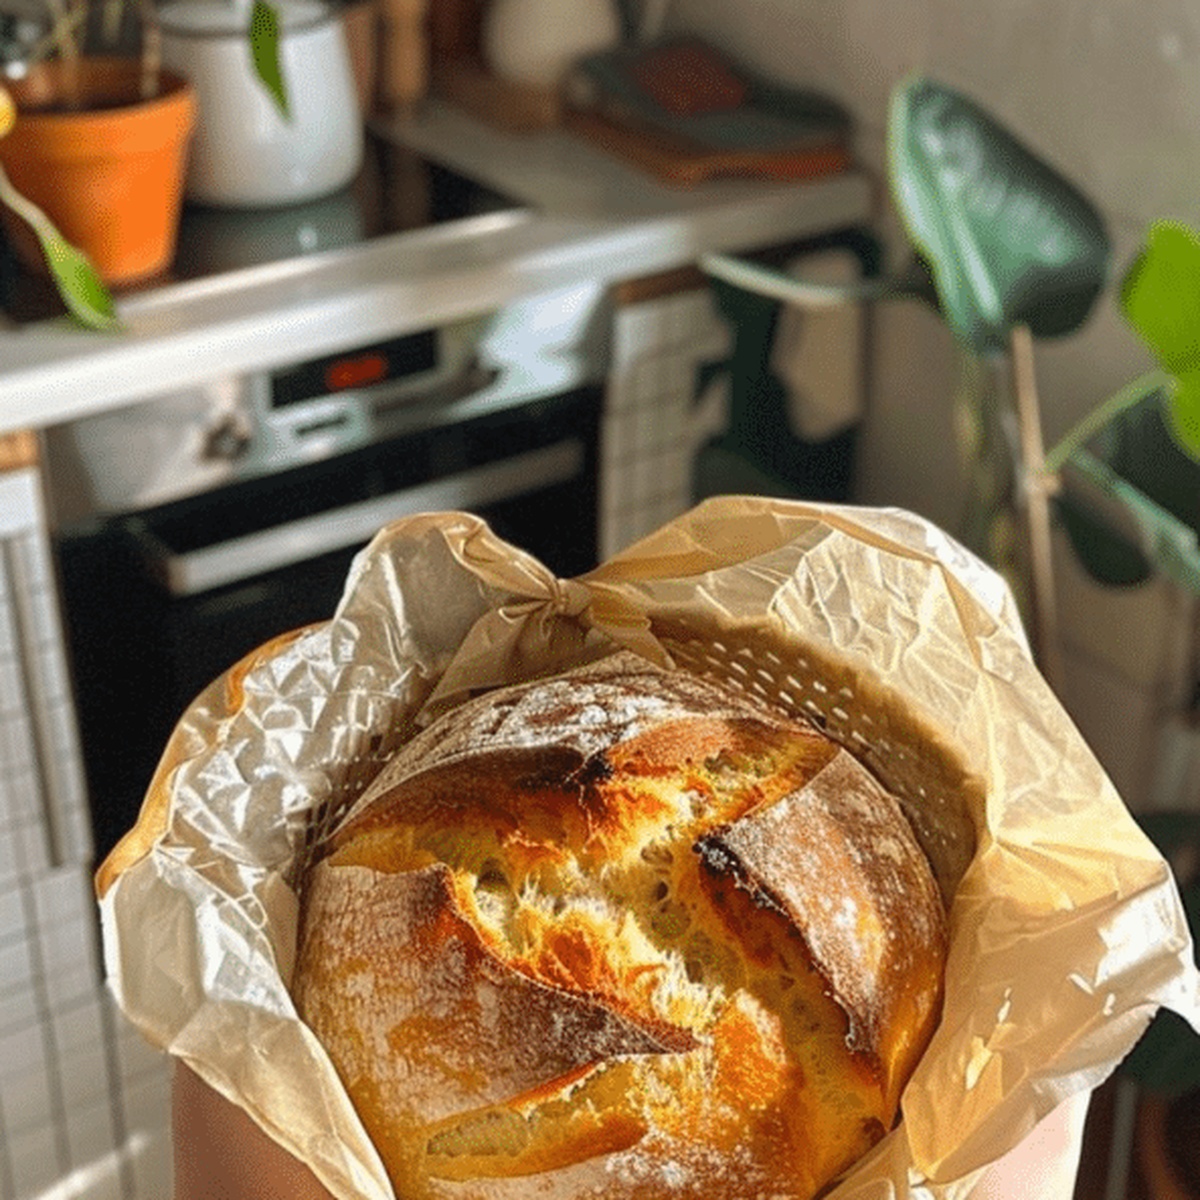
Rustic Sourdough Bread Recipe with Classic Flavor
Crafting a perfect sourdough bread requires patience and passion that will surprise even seasoned bakers.
Flour, water, and wild yeast combine in magical alchemy.
Each loaf tells a unique story of fermentation and technique.
Crispy crusts and tender crumbs emerge from careful technique and love.
Salt adds depth to the complex flavor profile.
Home kitchens become laboratories of delicious experimentation.
You can create something extraordinary with simple ingredients and careful attention.
Prepare to embark on a delightful baking adventure that connects you to ancient culinary traditions.
Reasons to Love Sourdough Bread
Ingredients for Sourdough Bread
Main Ingredients:Optional Ingredients:Baking Equipment:How to Prepare Sourdough Bread
Step 1: Blend Flour and Water
Mix the strong white bread flour with room temperature water in a large bowl until completely combined. Let the mixture sit quietly for half an hour, allowing the flour to absorb water and develop gluten.
Step 2: Introduce Sourdough Starter
Add the active, bubbly sourdough starter and salt to the dough mixture. Blend everything together until a rough, shaggy dough emerges.
Step 3: Transform Dough Through Kneading
Transfer the dough onto a lightly floured surface. Work the dough with your hands, pushing and folding for 10-15 minutes. The goal is creating a smooth, stretchy texture. Alternatively, use the stretch-and-fold technique if preferred.
Step 4: Nurture First Rise
Shape the dough into a round ball and place it in a lightly oiled bowl. Cover with a damp cloth and let it rest at room temperature for 4-6 hours. Watch for the dough to double in volume, indicating successful fermentation.
Step 5: Craft Loaf Shape
After rising, gently turn the dough onto a floured surface. Carefully mold it into a round loaf. Transfer the shaped dough into a floured banneton or a cloth-lined bowl dusted with rice flour.
Step 6: Develop Flavor Through Cold Fermentation
Wrap the dough and place it in the refrigerator overnight, allowing 12-18 hours for slow fermentation. This process intensifies the bread’s complex flavor profile.
Step 7: Fire Up the Oven
Heat the oven to 450F (230C), positioning a Dutch oven inside to ensure it becomes scorching hot before the dough enters.
Step 8: Create Signature Bread Marks
Remove the dough from the refrigerator. Gently turn it onto parchment paper. Using a sharp knife or razor blade, create decorative scoring marks across the surface.
Step 9: Generate Steam and Bake
Carefully slide the dough into the blazing hot Dutch oven. Cover with the lid and bake for 20 minutes. The enclosed environment creates essential steam for crust development.
Step 10: Finish with Golden Perfection
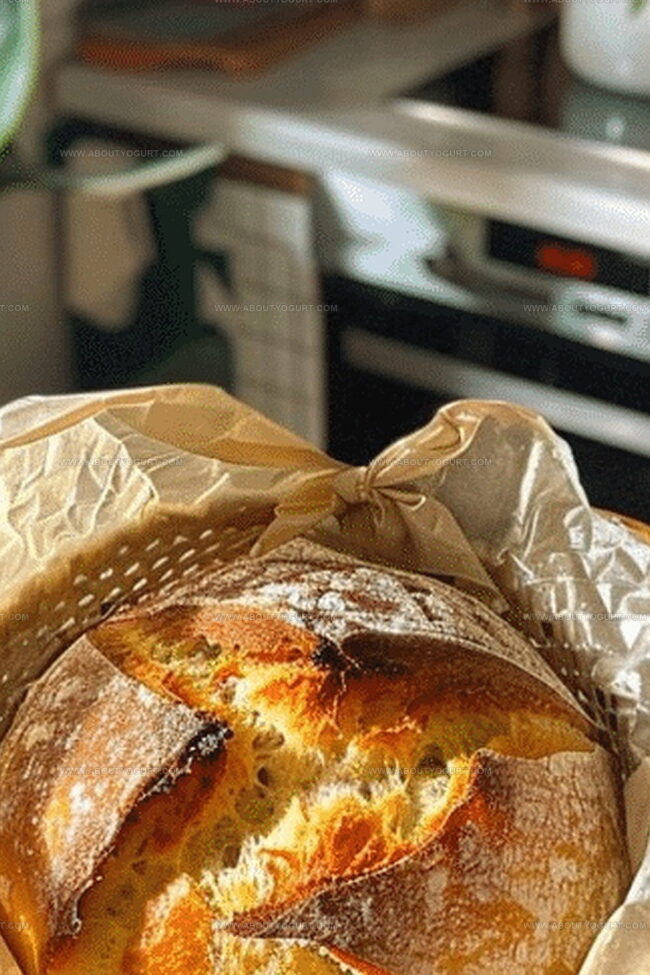
Remove the lid and continue baking for an additional 25-30 minutes. Watch for a deep, rich golden-brown crust that signals complete baking.
Step 11: Allow Bread to Rest
Transfer the freshly baked bread to a wire rack. Let it cool completely before slicing to ensure the interior crumb sets properly.
Pro Tips for Sourdough Bread
Variation Ideas for Sourdough Bread
Pairing Suggestions for Sourdough Bread
Storage Advice for Sourdough Bread
FAQs for Sourdough Bread
A good sourdough starter is active, bubbly, and has a pleasant tangy smell. Feed it consistently with equal parts flour and water, maintaining it at room temperature and discarding half before each feeding.
Your dough is well-kneaded when it becomes smooth, elastic, and passes the windowpane test. When you stretch a small piece, it should form a thin, translucent membrane without tearing.
Stretch-and-fold helps develop gluten strength without extensive kneading. It aligns protein strands, creates better structure, and improves the bread’s texture and rise.
Print
Sourdough Bread Recipe
- Total Time: 17 hours 25 minutes – 18 hours 35 minutes
- Yield: 2 1x
Description
Homemade sourdough bread emerges as a rustic masterpiece of culinary craft, blending simple ingredients with patient fermentation. Bakers discover pure comfort in this wholesome loaf that connects generations through its timeless, golden-crusted perfection.
Ingredients
Main Ingredients:
- 500 grams (17.6 ounces) strong white bread flour
- 300 grams (10.6 ounces) sourdough starter (fed and bubbly)
- 350 milliliters (11.8 fluid ounces) water (room temperature)
Seasoning:
- 10 grams (0.35 ounces) salt
Dusting:
- Rice flour (for dusting)
Instructions
- Hydrate flour and water together in a spacious mixing vessel, allowing the mixture to rest for half an hour. This crucial stage enables flour absorption and promotes gluten network development.
- Incorporate active sourdough culture and mineral salt into the rested mixture, blending until a rough, uneven texture emerges.
- Transfer dough onto a lightly dusted surface, applying rhythmic kneading techniques for 10-15 minutes. Aim for a silky, responsive consistency using traditional or stretch-and-fold methods.
- Mold the dough into a compact sphere, positioning it within a lightly greased container. Drape with a moisture-laden fabric, permitting fermentation at ambient temperature for 4-6 hours until volume doubles.
- Gently manipulate risen dough onto a flour-scattered workspace, crafting a rounded configuration. Nestle the shaped loaf into a specialized proofing basket or cloth-lined receptacle dusted with rice powder.
- Refrigerate overnight (12-18 hours), allowing slow fermentation to intensify flavor complexity.
- Heat oven to 450F, simultaneously warming a cast-iron vessel to ensure optimal baking environment.
- Extract dough from refrigeration, delicately inverting onto parchment. Execute precise surface incisions using a razor-sharp implement.
- Carefully slide dough into preheated vessel, securing lid to generate steam. Bake for 20 minutes to initiate crust development.
- Uncover and continue baking 25-30 minutes until achieving a rich, caramelized exterior.
- Transfer bread to wire cooling platform, allowing complete temperature stabilization before slicing to preserve internal structure.
Notes
- Starter Strength Matters: Choose a well-fed, active sourdough starter for optimal rise and tangy flavor.
- Temperature Control: Maintain consistent room temperature during fermentation to ensure proper dough development.
- Hydration Hack: Adjust water content slightly based on flour type and humidity for perfect dough consistency.
- Gluten-Free Adaptation: Substitute strong white bread flour with a gluten-free blend and add xanthan gum for structure.
- Prep Time: 40-45 minutes
- Cook Time: 45-50 minutes
- Category: Breakfast, Lunch, Dinner, Snacks
- Method: Baking
- Cuisine: American
Nutrition
- Serving Size: 2
- Calories: 271
- Sugar: 0.2g
- Sodium: 500mg
- Fat: 1.5g
- Saturated Fat: 0.3g
- Unsaturated Fat: 1.2g
- Trans Fat: 0g
- Carbohydrates: 55g
- Fiber: 2g
- Protein: 9g
- Cholesterol: 0mg
Sarah Mitchell
Content Specialist & Home Cooking Enthusiast
Expertise
Education
Asheville-Buncombe Technical Community College – Asheville, NC
American Fitness Professionals & Associates – Online
Sarah’s passion for food was sparked by weekend trips to the farmers’ market and her belief that healthy meals should never feel boring.
After earning her culinary diploma and becoming a certified Nutrition and Wellness Consultant, she set out to help others fall in love with simple, wholesome cooking.
She’s all about celebrating the small wins in the kitchen: a colorful yogurt bowl, a new twist on a classic dish, or a homemade snack that feels just a little extra special.
Outside the kitchen, Sarah is a gardener at heart, a yoga enthusiast, and a believer that fresh herbs can brighten any meal, and any day.