
Sweet Strawberry Icebox Pie Recipe: Summer’s Cool Treat
Sweet summer memories flood back when biting into a creamy strawberry icebox pie that feels like childhood comfort.
Memories of grandma’s kitchen dance through every cool, silky slice.
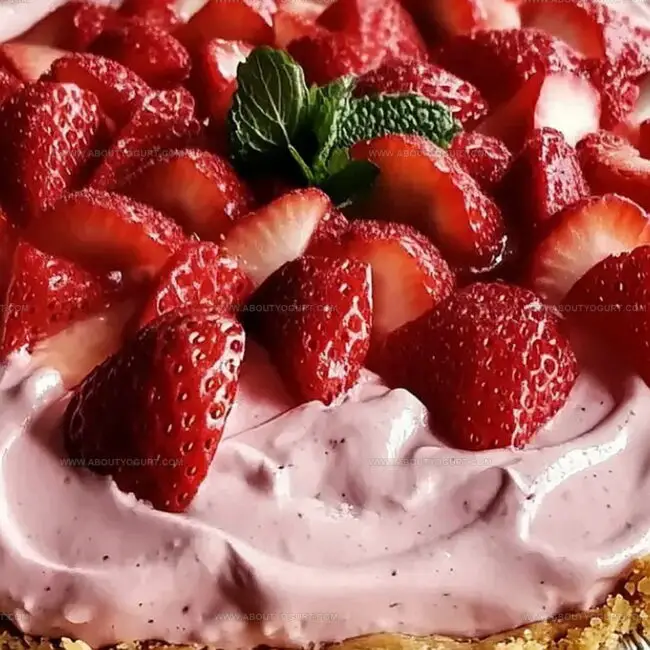
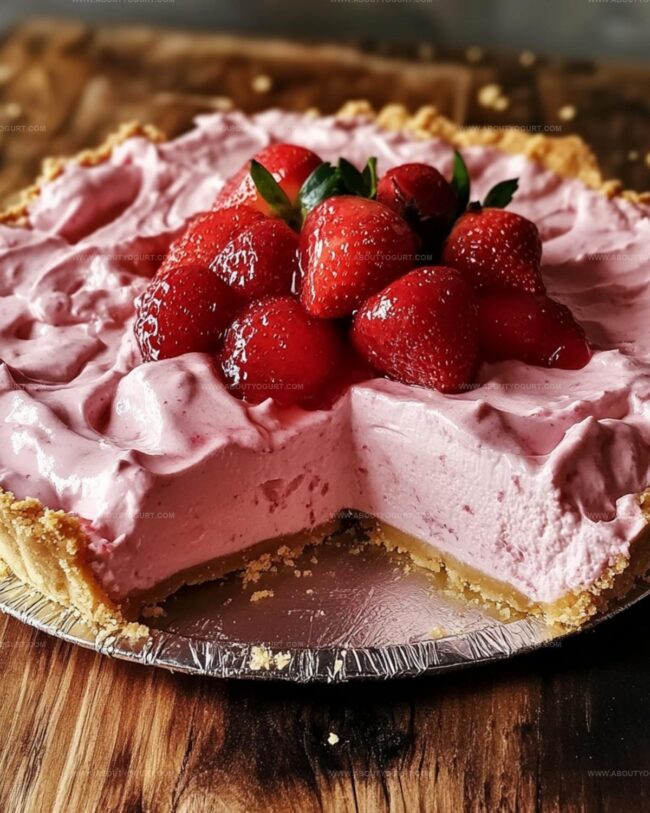
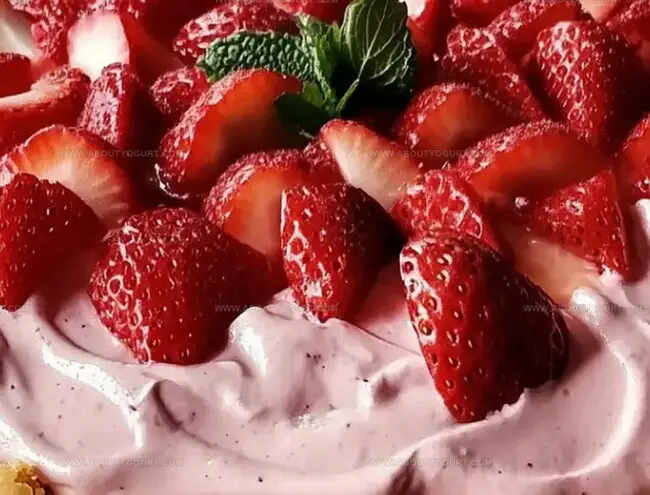
Delicate graham cracker crusts cradle luscious pink filling, promising pure refreshment.
Ripe strawberries blend seamlessly with velvety cream cheese, creating a dessert that whispers indulgence.
Chilled and light, this no-bake treat requires minimal effort but delivers maximum satisfaction.
Quick preparation means you can whip up this delightful dessert in minutes.
Chill, serve, and watch faces light up with pure dessert delight.
Classic Strawberry Icebox Pie
Ingredients for Strawberry Icebox Pie
For the Base:For the Dairy and Whipped Topping:For the Flavor and Fruit:How to Prepare Strawberry Icebox Pie
Step 1: Whip Up the Creamy Base
In a spacious mixing bowl, blend condensed milk and Cool Whip using a hand mixer. Whisk until the mixture becomes light and airy, creating a smooth, fluffy foundation for your pie.
Step 2: Infuse with Strawberry Flavor
Sprinkle in the strawberry Jello powder and thoroughly mix. Watch as the vibrant red color transforms your creamy base into a delightful strawberry-infused delight.
Step 3: Add Zesty Brightness
Pour in fresh lemon juice and stir carefully. The citrusy splash will enhance the mixture’s texture, making it even more voluminous and tangy.
Step 4: Fold in Fruity Goodness
Ingredients:Gently incorporate the strawberries into the mixture. Use a spatula to fold softly, ensuring the berries are evenly distributed without deflating the creamy base.
Step 5: Create the Pie Shell
Carefully spoon the luscious strawberry mixture into the graham cracker crust. Spread evenly, creating a smooth, inviting surface that promises delicious bites.
Step 6: Chill and Set
Transfer the pie to the refrigerator. Allow it to rest and firm up for a minimum of two hours, letting the flavors meld and the texture become perfectly set.
Step 7: Garnish and Serve
Decorate the top with fresh strawberry slices for an extra pop of color and flavor. Slice with a sharp knife and serve chilled to your eager guests.
Pro Tips for Creamy Icebox Pie
Variations on Strawberry Icebox Pie
Pairing Ideas for Icebox Pie
Storage Tips for Strawberry Icebox Pie
Keep the pie covered with plastic wrap or aluminum foil in the refrigerator for up to 3-4 days. This method preserves the pie’s texture and prevents it from absorbing other food odors.
Wrap the pie tightly in plastic wrap and aluminum foil, then store in the freezer for up to 2 months. Place in a freezer-safe container for extra protection against freezer burn.
Transfer the frozen pie to the refrigerator and let it thaw slowly overnight. This gradual thawing helps maintain the pie’s original creamy consistency and prevents texture separation.
For best results, consume the pie within 24 hours of thawing. Garnish with fresh strawberry slices just before serving to restore its vibrant appearance and fresh taste.
FAQs
Yes, you can use fresh strawberries. Just slice them and mix with a little sugar before adding to the pie mixture for best results.
Cool Whip helps create a light, fluffy texture. If unavailable, you can substitute with whipped cream, though the consistency might be slightly different.
The strawberry icebox pie will stay fresh for 3-4 days when stored in an airtight container in the refrigerator.
Absolutely! This pie is perfect for making in advance. Prepare it up to 2 days before serving, and it will maintain its delicious flavor and texture.
Print
Strawberry Icebox Pie Recipe
- Total Time: 2 hours 15 minutes
- Yield: 8 1x
Description
Delightful strawberry icebox pie brings summer’s sweetness to your dessert table with creamy layers and fresh berry charm. Cool, no-bake magic creates a luscious treat you’ll crave again and again.
Ingredients
Primary Ingredients:
- 1 Graham cracker crust (store-bought or homemade)
- 1 can Eagle Brand Condensed Milk
- 1 cup fresh diced strawberries or 1 can strawberry pie filling
- 3 1/2 teaspoons dry strawberry jello
Supporting Ingredients:
- 1/4 cup (4 tablespoons) lemon juice
- 1 regular-size container Cool Whip
Optional Addition:
- 1/4 cup sugar (if using fresh strawberries)
Instructions
- In a spacious mixing vessel, whisk condensed milk and whipped topping until achieving a light, airy consistency.
- Incorporate strawberry gelatin powder, stirring thoroughly to ensure complete integration and vibrant color distribution.
- Introduce fresh lemon juice, blending meticulously to enhance texture and create a slightly denser filling.
- Delicately fold prepared strawberry pie filling or macerated fresh strawberries into the creamy base, maintaining a gentle mixing technique.
- Transfer the luscious mixture into a pre-prepared graham cracker crust, spreading evenly to create a smooth surface.
- Refrigerate the assembled pie for minimum 2-3 hours, allowing the filling to set and flavors to meld completely.
- Before serving, optionally embellish with additional fresh strawberry slices for enhanced visual appeal and textural contrast.
- Slice chilled pie with a sharp knife, ensuring clean cuts through the creamy filling and crisp crust.
Notes
- Swap Cool Whip with homemade whipped cream for a fresher, less processed taste and healthier option.
- Use fresh strawberries and macerate them with a little sugar beforehand to enhance natural sweetness and intensify flavor profile.
- Experiment with different Jello flavors like raspberry or mixed berry to create unique variations of this easy dessert.
- For a gluten-free version, replace graham cracker crust with almond flour or gluten-free cookie crust to accommodate dietary restrictions.
- Prep Time: 15 minutes
- Cook Time: 2 hours
- Category: Desserts
- Method: Chilling
- Cuisine: American
Nutrition
- Serving Size: 8
- Calories: 270 kcal
- Sugar: 30 g
- Sodium: 150 mg
- Fat: 12 g
- Saturated Fat: 7 g
- Unsaturated Fat: 4 g
- Trans Fat: 0.5 g
- Carbohydrates: 38 g
- Fiber: 1 g
- Protein: 3 g
- Cholesterol: 20 mg
Michael Thompson
Founder & Recipe Developer
Expertise
Education
Cascade Culinary Institute – Bend, OR
ServSafe Food Handler Certification – Portland, OR
Focus: Certified in core food safety and hygiene principles for both home and professional kitchens, with emphasis on ingredient handling, kitchen cleanliness, and safe preparation methods.
Mike’s kitchen journey began with a single goal: to make everyday meals feel like something worth celebrating.
After earning his Certificate in Culinary Arts from Cascade Culinary Institute, he spent years working with local farmers and small kitchens across Oregon, learning the beauty of seasonal, small-batch cooking.
Mike’s approach is simple, cook with what’s fresh, keep it approachable, and always leave room for a little creativity. When he’s not testing yogurt marinades or designing single-serving meals, you’ll find him hiking trails or hunting down the best berries at local markets.