
Easy Sweet Chilli Sauce Recipe That Packs a Flavorful Punch
Whipping up a delightful sweet chilli sauce can turn an ordinary meal into a flavor explosion.
Bright, zesty ingredients dance together in this simple recipe that packs a punch.
Homemade condiments often sound complicated, but this version breaks down every step with ease.
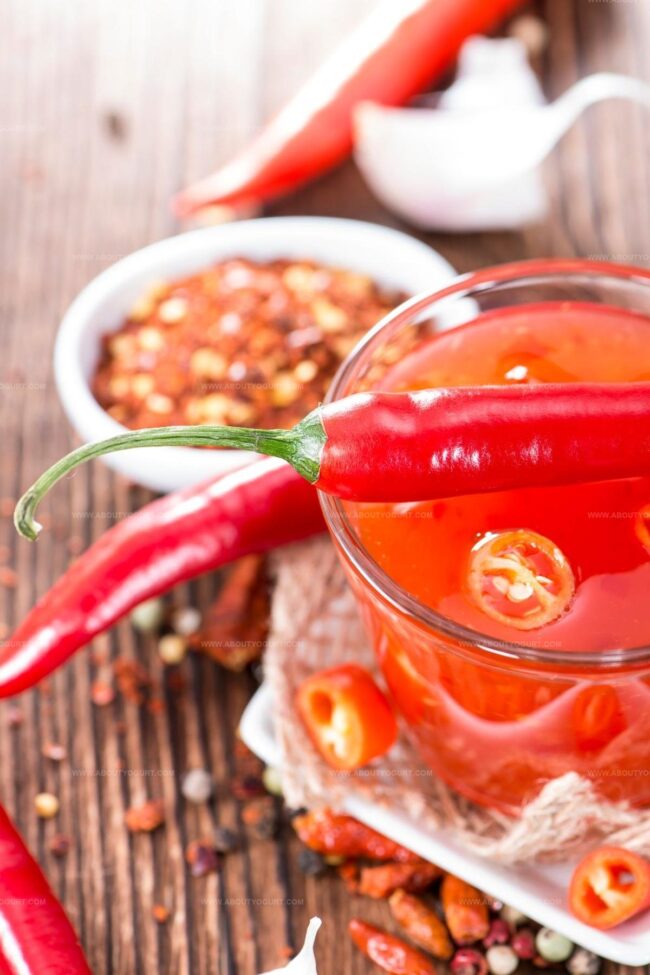
Vibrant red peppers and tangy vinegar create a magical blend that tingles your taste buds.
Most store-bought sauces pale in comparison to the fresh, zingy notes you’ll craft in your kitchen.
Professional chefs and home cooks alike adore this versatile sauce that complements everything from spring rolls to grilled meats.
Spice up your culinary repertoire and impress everyone with this irresistible condiment that takes just minutes to prepare.
Why Nigella Sweet Chilli Sauce Recipe Packs a Punch
Ingredients for Nigella Sweet Chilli Sauce Recipe
Base Ingredients:Liquid Ingredients:Thickening Agents:Flavor Enhancers:Instructions for Making Nigella Sweet Chilli Sauce

Step 1: Gather Cooking Essentials
Collect your sauce ingredients and kitchen tools. You’ll need a small saucepan, measuring tools, and a whisk for smooth mixing.
Step 2: Combine Flavor Base
Pour all ingredients except cornstarch mixture into the small saucepan. Blend the red chilies, garlic, vinegar, sugar, water, and salt together. This creates a vibrant and tangy foundation for your sweet chili sauce.
Step 3: Bring To Rolling Boil
Place the saucepan over medium-high heat. Stir the mixture frequently to prevent burning and ensure even heating. Watch for bubbles to form and sauce to start bubbling energetically.
Step 4: Prepare Cornstarch Slurry
In a separate small bowl, whisk cornstarch with a splash of cold water. Mix until the cornstarch dissolves completely, creating a smooth, lump-free liquid that will help thicken your sauce.
Step 5: Thicken The Sauce
Pour the cornstarch mixture into the boiling sauce. Continuously stir for about one minute. The sauce will gradually transform, becoming glossy and slightly more viscous.
Step 6: Cool And Store
Remove the saucepan from heat. Allow the sauce to cool completely at room temperature. Transfer the finished sweet chili sauce into a clean glass jar. Refrigerate and enjoy within two weeks.
Best Tips for Nigella Sweet Chilli Sauce Recipe
Ways to Switch Up Nigella Sweet Chilli Sauce
What to Pair with Nigella Sweet Chilli Sauce Recipe
How to Store Nigella Sweet Chilli Sauce Properly
Your Questions on Nigella Sweet Chilli Sauce Answered
Red jalapeños or red Thai chillies are ideal, providing authentic heat and vibrant color while maintaining a balanced sweet-spicy flavor profile.
Absolutely! Remove seeds from peppers to reduce heat, or add more chili peppers for extra spiciness. The cornstarch helps control the final consistency regardless of pepper quantity.
When stored in a sealed jar in the refrigerator, the sauce typically stays fresh for 2-3 weeks. Always check for any unusual smell or color changes before using.
Yes, the basic ingredients are naturally gluten-free. Just ensure your vinegar and other ingredients are certified gluten-free if you have strict dietary requirements.
Print
Sweet Chilli Sauce Recipe
- Total Time: 11 minutes
- Yield: 2 1x
Description
Homemade sweet chilli sauce brings zesty Korean flavors right into kitchen creations. Spicy, tangy, and perfectly balanced, this sauce delivers bold taste sensations you’ll crave on everything from grilled meats to fresh spring rolls.
Ingredients
Main Ingredients:
- 1/3 cup rice vinegar
- 1/3 cup water
- 1/3 cup + 2 tablespoons cane sugar
Chili and Spice Components:
- 1 tablespoon sambal oelek or 1/2 teaspoon dried red chilli flakes
- 1/2 teaspoon minced garlic
- 1 teaspoon minced ginger
Seasoning and Thickening Agents:
- 1 tablespoon rice wine (or dry sherry)
- 1 teaspoon tamari or soy sauce
- 2 teaspoons cornstarch dissolved in 1 tablespoon water
- 1/2 drops red food colouring (optional)
Instructions
- Place red chili peppers, garlic, sugar, rice vinegar, and water into a small saucepan over medium-high heat.
- Stir ingredients continuously while bringing the mixture to a rolling boil, ensuring even heat distribution.
- Whisk cornstarch and cold water separately until completely smooth and free of lumps.
- Gradually pour cornstarch slurry into the bubbling sauce, maintaining constant stirring to prevent clumping.
- Continue cooking and stirring for approximately 60-90 seconds, watching the sauce transform and thicken to a glossy consistency.
- Remove saucepan from heat source and allow sauce to cool completely at room temperature.
- Transfer the cooled sweet chili sauce into a clean glass jar with a tight-fitting lid.
- Refrigerate the sauce, which will further thicken as it chills, and consume within 1-2 weeks for optimal flavor and freshness.
Notes
- Adjust heat levels by adding more or less chili for personalized spiciness.
- Ensure cornstarch is fully dissolved to prevent lumpy sauce texture.
- Store homemade sauce in an airtight container for up to two weeks in the refrigerator.
- Experiment with different chili varieties like Thai bird’s eye or jalapeños for unique flavor profiles.
- Prep Time: 5 minutes
- Cook Time: 6 minutes
- Category: Appetizer, Snacks
- Method: Boiling
- Cuisine: Asian
Nutrition
- Serving Size: 2
- Calories: 57 kcal
- Sugar: 13 g
- Sodium: 210 mg
- Fat: 0 g
- Saturated Fat: 0 g
- Unsaturated Fat: 0 g
- Trans Fat: 0 g
- Carbohydrates: 15 g
- Fiber: 0.1 g
- Protein: 0.2 g
- Cholesterol: 0 mg
Michael Thompson
Founder & Recipe Developer
Expertise
Education
Cascade Culinary Institute – Bend, OR
ServSafe Food Handler Certification – Portland, OR
Focus: Certified in core food safety and hygiene principles for both home and professional kitchens, with emphasis on ingredient handling, kitchen cleanliness, and safe preparation methods.
Mike’s kitchen journey began with a single goal: to make everyday meals feel like something worth celebrating.
After earning his Certificate in Culinary Arts from Cascade Culinary Institute, he spent years working with local farmers and small kitchens across Oregon, learning the beauty of seasonal, small-batch cooking.
Mike’s approach is simple, cook with what’s fresh, keep it approachable, and always leave room for a little creativity. When he’s not testing yogurt marinades or designing single-serving meals, you’ll find him hiking trails or hunting down the best berries at local markets.