
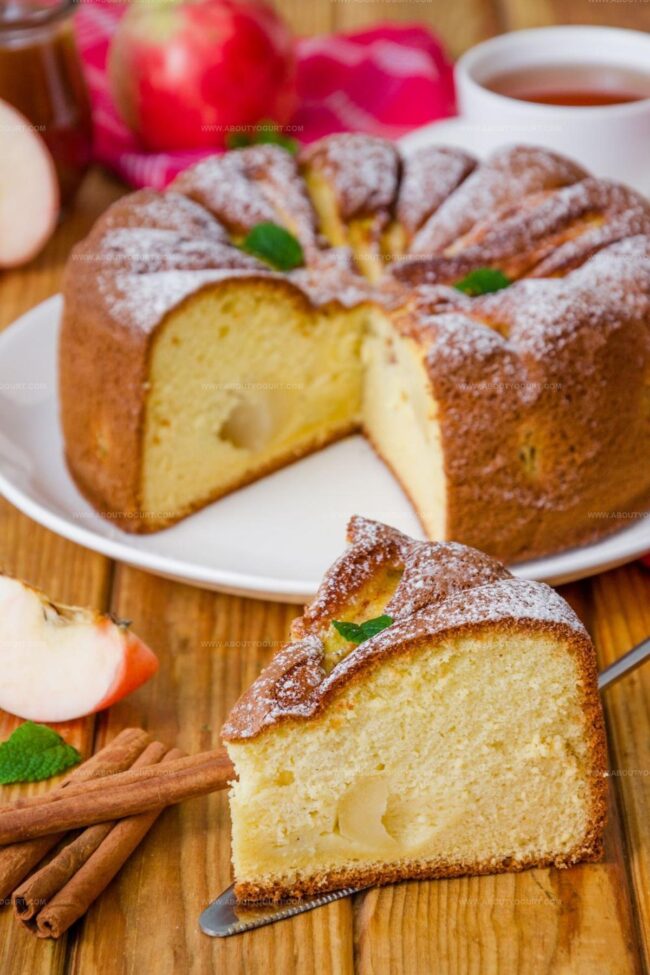
Fluffy Apple Sponge Cake Recipe: A Sweet Fall Delight
Crafting a delightful apple sponge cake brings pure culinary magic to your kitchen.
Sweet aromas will soon dance through every room.
Seasonal fruits create magical moments when transformed into delectable desserts.
Soft, fluffy textures promise incredible comfort with each delicate bite.
Baking becomes an art form when simple ingredients merge beautifully.
Rich flavors emerge from carefully selected apples and gentle mixing techniques.
Excitement builds as you prepare to surprise everyone with this incredible treat.
Why Nigella Apple Sponge Cake Is A Cozy Favorite

Everything Needed For Nigella Apple Sponge Cake
Main Ingredients:Spices and Flavoring:Finishing Touches:How To Bake Nigella Apple Sponge Cake
Step 1: Warm Up the Oven
Fire up your oven to 180°C (160°C fan) or Gas Mark 4. Grab a 20cm springform pan and give it a light coating of butter or cooking spray, then line the bottom with parchment paper.
Step 2: Whip Up the Base
In a large mixing bowl, blend together:Whisk until the mixture turns light and fluffy, creating a cloud-like texture.
Step 3: Introduce the Eggs
Add eggs one by one, mixing thoroughly after each addition. Ensure each egg is completely incorporated before adding the next.
Step 4: Fold in the Flour
Gently fold the flour into the batter, stirring carefully to keep the mixture smooth and avoid overmixing.
Step 5: Prepare the Cake Pan
Pour the batter into the prepared springform pan, smoothing the top with a spatula to create an even surface.
Step 6: Create Apple Topping
Arrange thin apple slices across the top of the cake in a decorative pattern.
Step 7: Add Final Touches
Sprinkle the cake with:Step 8: Bake to Perfection
Place the cake in the preheated oven and bake for 50-60 minutes. Check doneness by inserting a skewer – it should come out clean when the cake is ready.
Step 9: Cool and Rest
Let the cake cool in the pan for 10 minutes, then transfer to a wire rack to cool completely.
Step 10: Serve with Flair
Optional: Dust the top with a light sprinkle of powdered sugar before serving.
Helpful Tips For Nigella Apple Sponge Cake
Fun Twists On Nigella Apple Sponge Cake
Tasty Matches For Nigella Apple Sponge Cake
How To Store Nigella Apple Sponge Cake The Right Way
FAQs For Nigella Apple Sponge Cake
Yes, you can use any firm apple variety like Granny Smith, Honeycrisp, or Braeburn that holds its shape during baking.
No, you can leave the apple skin on for added texture and nutrition, just make sure to wash them thoroughly.
Insert a skewer or toothpick into the center of the cake – if it comes out clean with no wet batter, the cake is done.
Substitute the regular flour with a gluten-free all-purpose flour blend to create a gluten-free version of the apple sponge cake.
Print
Apple Sponge Cake Recipe
- Total Time: 65-75 minutes
- Yield: 8 1x
Description
Comforting apple sponge cake delights dessert enthusiasts with its classic European charm. Warm spices and tender fruit create a delectable treat you’ll savor slice after slice.
Ingredients
Fruits:
- 2 small apples, peeled, cored, sliced
Main Ingredients:
- 250 grams (8.8 ounces) unsalted butter
- 250 grams (8.8 ounces) golden caster sugar
- 250 grams (8.8 ounces) self-raising flour
- 4 eggs
Spices and Flavor Enhancers:
- 1 teaspoon vanilla extract
- 2 tablespoons demerara sugar
- 1/4 teaspoon ground cinnamon
Instructions
- Prepare the oven at 180C (160C fan) or Gas 4, ensuring even heat distribution by positioning the rack in the middle.
- Thoroughly coat a 20cm springform tin with butter and line with parchment paper for easy cake removal.
- Using an electric mixer, whip butter, sugar, and vanilla extract until the mixture transforms into a light, airy, and pale cream.
- Incorporate eggs individually, mixing thoroughly after each addition to maintain a smooth, cohesive batter.
- Gently fold flour into the mixture, creating a uniform consistency without overmixing.
- Transfer the batter to the prepared tin, carefully spreading and leveling the surface with a spatula.
- Artfully arrange thinly sliced apples across the top of the cake batter, creating an aesthetically pleasing pattern.
- Generously sprinkle demerara sugar and ground cinnamon over the apple layer for added texture and flavor.
- Place the cake in the preheated oven and bake for 50-60 minutes, checking doneness by inserting a skewer – it should emerge clean and dry.
- Allow the cake to rest in the tin for 10 minutes to stabilize its structure.
- Transfer to a wire rack and let cool completely to room temperature.
- Optional: Dust the surface with a delicate layer of powdered sugar just before serving for an elegant finish.
Notes
- Choose firm, slightly tart apples like Granny Smith or Braeburn for the best flavor and texture that holds up during baking.
- Slice apples thinly and evenly to ensure consistent cooking and an attractive presentation across the cake surface.
- Toss apple slices with a little lemon juice to prevent browning and add a subtle tangy brightness to the dessert.
- For a gluten-free version, substitute regular flour with a good quality gluten-free flour blend, ensuring to check the cake’s consistency and baking time.
- Prep Time: 15 minutes
- Cook Time: 50-60 minutes
- Category: Desserts
- Method: Baking
- Cuisine: British
Nutrition
- Serving Size: 8
- Calories: 490
- Sugar: 34 g
- Sodium: 120 mg
- Fat: 28 g
- Saturated Fat: 17 g
- Unsaturated Fat: 11 g
- Trans Fat: 0.5 g
- Carbohydrates: 55 g
- Fiber: 2 g
- Protein: 6 g
- Cholesterol: 110 mg
Michael Thompson
Founder & Recipe Developer
Expertise
Education
Cascade Culinary Institute – Bend, OR
ServSafe Food Handler Certification – Portland, OR
Focus: Certified in core food safety and hygiene principles for both home and professional kitchens, with emphasis on ingredient handling, kitchen cleanliness, and safe preparation methods.
Mike’s kitchen journey began with a single goal: to make everyday meals feel like something worth celebrating.
After earning his Certificate in Culinary Arts from Cascade Culinary Institute, he spent years working with local farmers and small kitchens across Oregon, learning the beauty of seasonal, small-batch cooking.
Mike’s approach is simple, cook with what’s fresh, keep it approachable, and always leave room for a little creativity. When he’s not testing yogurt marinades or designing single-serving meals, you’ll find him hiking trails or hunting down the best berries at local markets.