Cheesy Pull-Apart Garlic Bread Recipe for a Crowd
Craving a mouthwatering cheesy pull-apart garlic bread that melts hearts instantly?
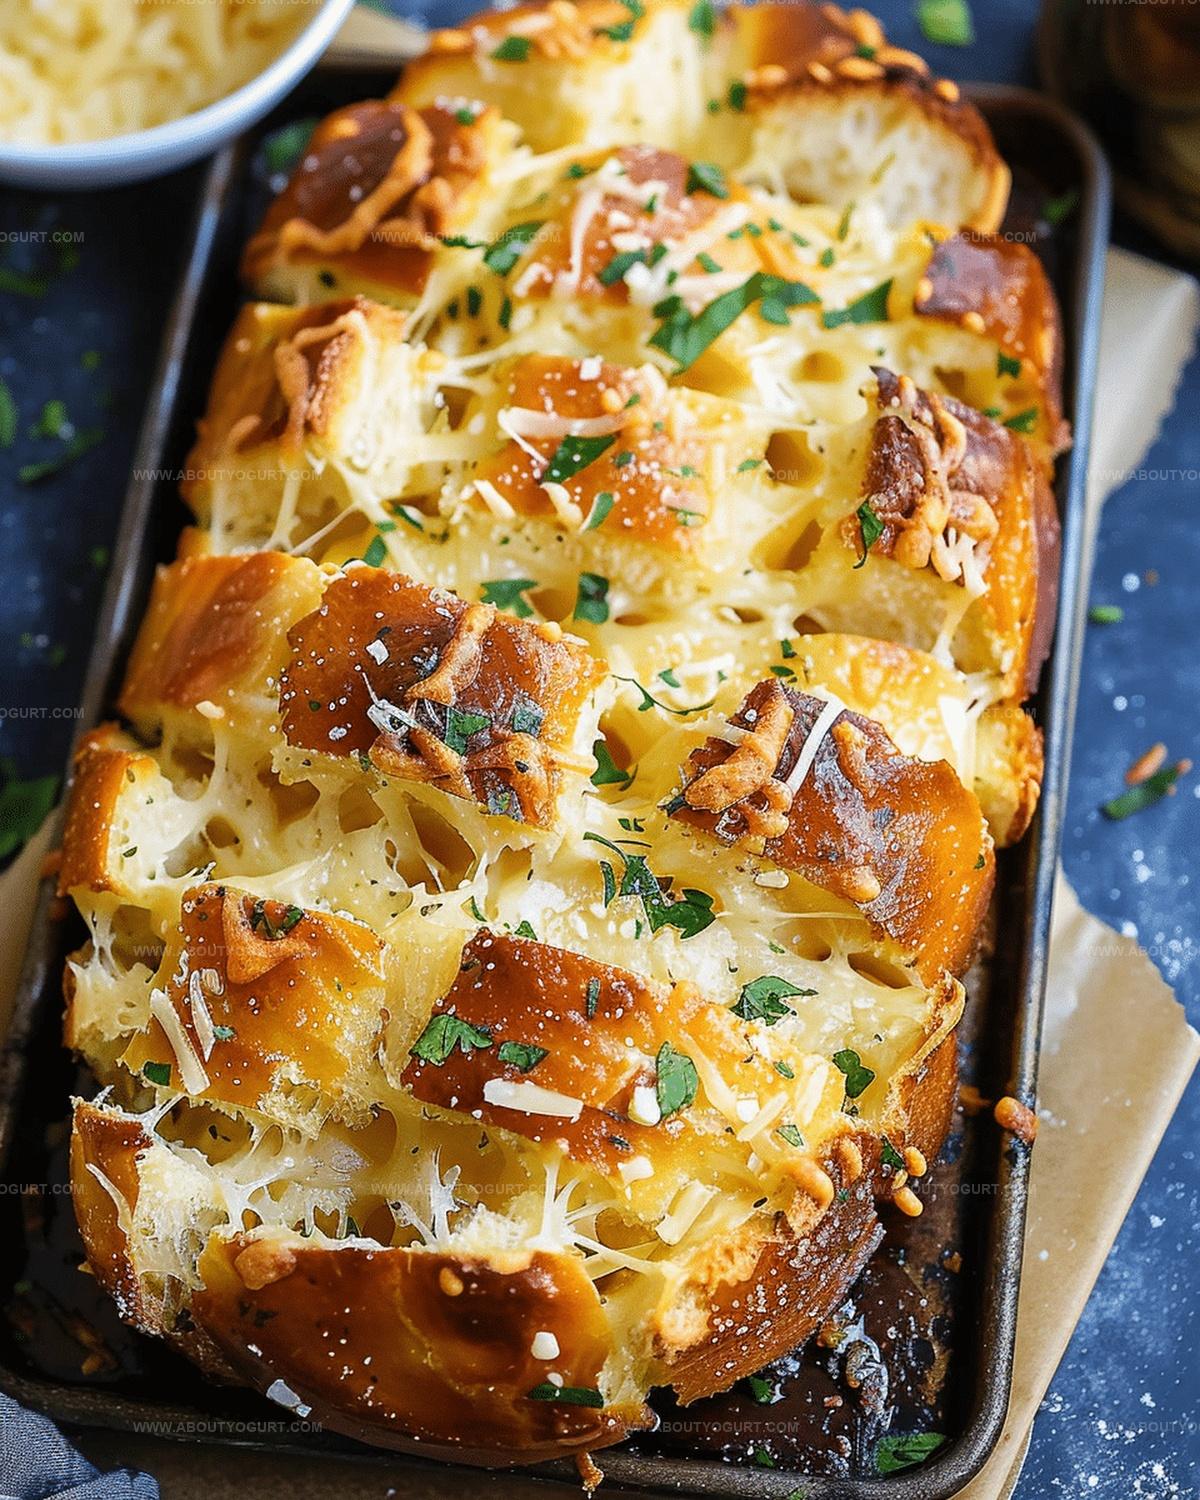
Warm, golden rolls infused with rich garlic and gooey cheese promise pure comfort.
Soft bread layers beckon with irresistible aromas wafting through kitchens everywhere.
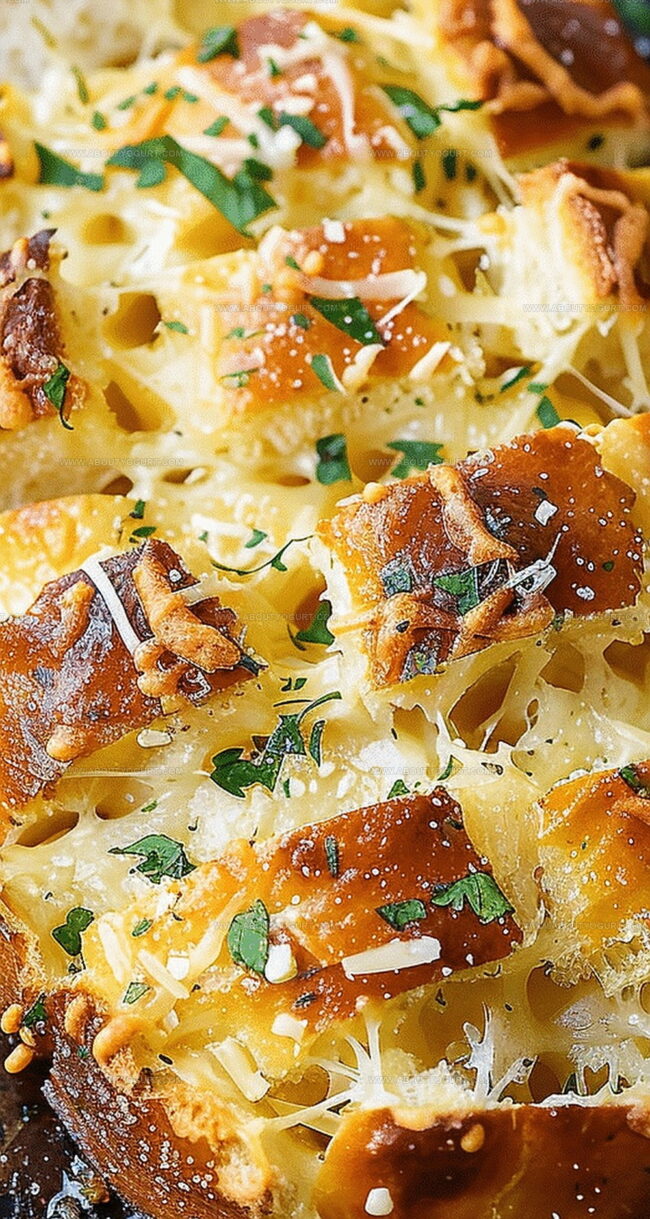
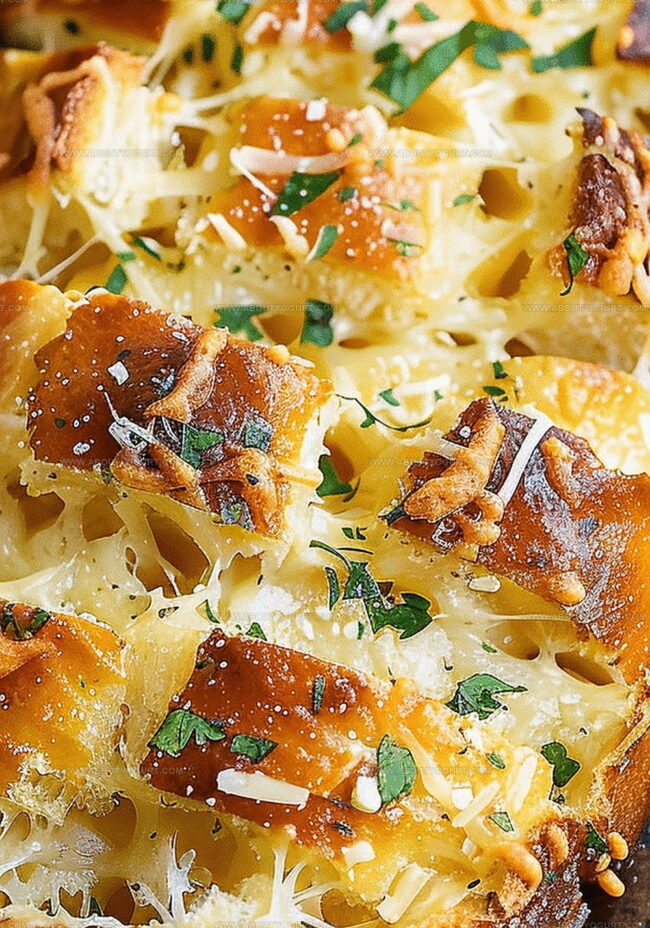
Butter, herbs, and melted cheese create magic in every delectable bite.
Simple ingredients combine to craft a side dish that steals the spotlight at dinner tables.
Friends and hungry guests will devour these incredible bread pieces faster than you can slice them.
Let’s unlock the secrets to making this crowd-pleasing sensation that transforms ordinary meals into memorable experiences.
What Makes Cheesy Pull-Apart Garlic Bread So Addictive
Ingredients for Cheesy Pull-Apart Garlic Bread
Bread Base:Core Flavoring Ingredients:Herb and Seasoning Blend:Cheese Ingredients:How to Prepare Cheesy Pull-Apart Garlic Bread
Step 1: Warm Up the Oven
Crank the oven to a toasty 375°F (190°C). Grab a baking sheet and line it with aluminum foil or parchment paper for easy cleanup.
Step 2: Create Bread Crosshatch Design
Carefully slice the bread in a crisscross pattern. Work your knife gently, keeping the bottom crust intact. The goal is to create deep cuts that will hold all the delicious cheese and garlic goodness.
Step 3: Whip Up Flavor-Packed Butter Blend
In a small mixing bowl, combine:Stir these ingredients until they become a fragrant, well-mixed mixture.
Step 4: Drench Bread with Garlic Butter
Pour the buttery mixture all over the bread, making sure it seeps into every single cut and crevice. Use a brush or spoon to spread the flavors evenly.
Step 5: Load Up with Cheesy Goodness
Generously stuff the bread cuts with:Push the cheese deep into the cuts to ensure a gooey, melty center in every bite.
Step 6: Bake to Perfection
Wrap the entire loaf loosely in foil and slide it into the preheated oven. Bake for 15 minutes to let the flavors meld and cheese start melting.
Step 7: Crisp and Brown
Unwrap the foil and return the bread to the oven. Bake for an additional 10 minutes until the cheese is completely melted and the top turns golden and crispy.
Step 8: Serve and Enjoy
Let the bread cool for a few minutes. Pull apart the cheesy, garlicky sections and serve while warm. This makes an amazing starter or side dish that’ll have everyone reaching for more.
Pro Tips for Cheesy Pull-Apart Garlic Bread
Variation Ideas for Cheesy Pull-Apart Garlic Bread
Pairing Suggestions for Cheesy Pull-Apart Garlic Bread
Storage Advice for Cheesy Pull-Apart Garlic Bread
FAQs for Cheesy Pull-Apart Garlic Bread
Carefully slice the bread in a crosshatch pattern, ensuring you don’t cut through the bottom crust. Use a sharp knife and gentle pressure to create even cuts without breaking the bread’s structure.
Absolutely! While mozzarella and Parmesan work great, you can experiment with cheddar, provolone, or Swiss cheese. Just ensure they melt well and complement the garlic butter flavor.
A soft, unsliced bread like sourdough, French bread, or Italian bread is ideal. The bread should be sturdy enough to hold the cheese and butter mixture without falling apart.
Print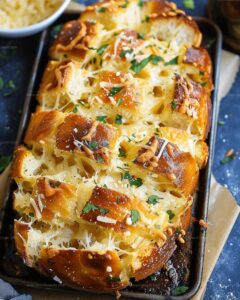
Cheesy Pull-Apart Garlic Bread Recipe
- Total Time: 35 minutes
- Yield: 8 1x
Description
Irresistible Cheesy Pull-Apart Garlic Bread delivers comfort and flavor in one simple side dish. Melted cheese, herbs, and warm bread create a mouthwatering experience you cannot resist pulling apart and savoring bite by delicious bite.
Ingredients
Main Cheese Ingredients:
- 2 cups shredded mozzarella cheese
- 1/2 cup grated Parmesan cheese
Bread Base:
- 1 large loaf of Italian bread or sourdough
Seasoning and Additional Ingredients:
- 1 cup unsalted butter, melted
- 4 cloves garlic, minced
- 2 tablespoons fresh parsley, chopped
- 1 teaspoon dried oregano
- Salt and pepper to taste
Instructions
- Preheat oven to 375F (190C) and prepare a baking sheet with aluminum foil or parchment paper.
- Carefully slice the bread in a crisscross pattern, ensuring not to cut through the bottom crust, creating deep interconnected sections.
- Create a fragrant garlic butter mixture by combining melted butter, minced garlic, chopped parsley, dried oregano, salt, and pepper in a small mixing bowl.
- Generously drizzle the aromatic garlic butter into every crevice and across the surface of the sliced bread, ensuring thorough coverage.
- Meticulously stuff shredded mozzarella and grated Parmesan cheese into each bread section, pushing some cheese deep into the internal cuts for maximum gooey texture.
- Encase the entire bread loaf with aluminum foil and bake for 15 minutes, allowing the cheese to begin melting and flavors to integrate.
- Remove foil and continue baking for an additional 10 minutes until cheese becomes completely molten and bread edges turn golden and crispy.
- Remove from oven and let rest for 2-3 minutes to allow cheese to set slightly.
- Pull apart sections and serve immediately while warm, presenting as a delectable appetizer or accompaniment to pasta dishes and salads.
Notes
- Slice the bread carefully to maintain its structural integrity, ensuring each cut is deep enough for cheese and butter but not through the bottom crust.
- Use room temperature butter for easier mixing and more even distribution of garlic and herbs throughout the bread.
- Choose a sturdy bread like sourdough or Italian loaf that can withstand heavy cheese and butter without falling apart during baking.
- For gluten-free options, substitute the bread with a gluten-free baguette or dense gluten-free bread to maintain similar texture and pull-apart experience.
- Prep Time: 10 minutes
- Cook Time: 25 minutes
- Category: Appetizer, Snacks
- Method: Baking
- Cuisine: Italian
Nutrition
- Serving Size: 8
- Calories: 426
- Sugar: 1 g
- Sodium: 310 mg
- Fat: 33 g
- Saturated Fat: 19 g
- Unsaturated Fat: 13 g
- Trans Fat: 0.5 g
- Carbohydrates: 23 g
- Fiber: 1.2 g
- Protein: 15 g
- Cholesterol: 65 mg
Sarah Mitchell
Content Specialist & Home Cooking Enthusiast
Expertise
Education
Asheville-Buncombe Technical Community College – Asheville, NC
American Fitness Professionals & Associates – Online
Sarah’s passion for food was sparked by weekend trips to the farmers’ market and her belief that healthy meals should never feel boring.
After earning her culinary diploma and becoming a certified Nutrition and Wellness Consultant, she set out to help others fall in love with simple, wholesome cooking.
She’s all about celebrating the small wins in the kitchen: a colorful yogurt bowl, a new twist on a classic dish, or a homemade snack that feels just a little extra special.
Outside the kitchen, Sarah is a gardener at heart, a yoga enthusiast, and a believer that fresh herbs can brighten any meal, and any day.