
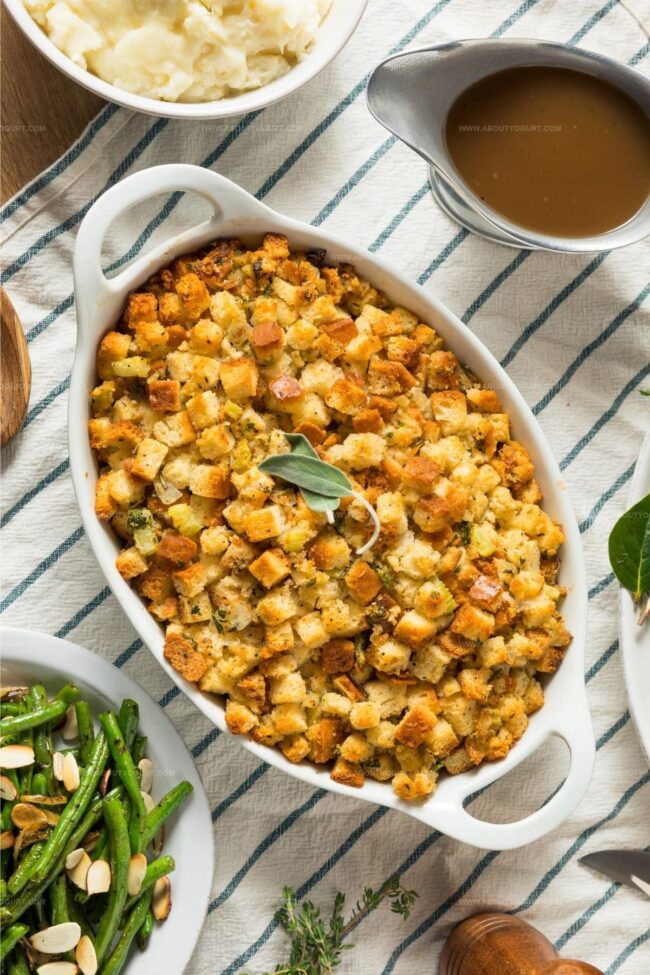
Chestnut Stuffing Recipe That Warms Holiday Tables
Crafting a delightful chestnut stuffing always brings warmth to my kitchen during festive seasons.
Nutty aromas fill the air as each ingredient blends seamlessly into a comforting dish.
Roasted chestnuts create a rich, earthy foundation that elevates traditional bread-based recipes.
Our simple approach ensures anyone can master this classic side without stress.
Seasonal herbs and careful seasoning make this stuffing something special for your holiday table.
Mediterranean influences add unexpected depth to this timeless comfort food.
You’ll want to savor every delicious spoonful of this incredible culinary creation.
Why Nigella Chestnut Stuffing Tastes Like The Holidays
What Ingredients Go In Nigella Chestnut Stuffing
Main Ingredients:Aromatics and Vegetables:Liquid and Fat Components:Herbs and Seasonings:How To Make Nigella Chestnut Stuffing

Step 1: Prepare Bread Cubes
Cut bread into uniform cubes and spread them on a baking sheet. Toast in the oven at 375F until golden brown and crispy, about 10-15 minutes. Remove and set aside. Lower oven temperature to 350F.
Step 2: Sauté Aromatic Vegetables
In a large skillet, melt butter and cook:With a pinch of salt. Sauté until vegetables become translucent and soft, approximately 5-7 minutes.
Step 3: Create Liquid Base
In a saucepan, combine:Warm the mixture until butter completely melts, creating a rich liquid foundation.
Step 4: Combine Bread and Vegetables
Add toasted bread cubes to the sautéed vegetables. Gently pour warm stock over the mixture, stirring carefully to ensure even moistening.
Step 5: Incorporate Remaining Ingredients
Fold in:Mix gently to distribute ingredients evenly without breaking bread cubes.
Step 6: Prepare for Baking
Transfer stuffing mixture to a greased baking dish. Dot the top with additional butter for extra richness.
Step 7: Bake to Perfection
Bake in preheated oven for 45-55 minutes. Look for a golden brown top and a set center. Remove when stuffing is heated through and edges are crispy.
Pro Tips For Nigella Chestnut Stuffing
Ways To Switch Up Nigella Chestnut Stuffing
Perfect Pairings For Nigella Chestnut Stuffing
How To Keep Nigella Chestnut Stuffing Fresh
FAQ About Nigella Chestnut Stuffing
Chestnuts add a rich, nutty flavor and creamy texture that’s traditional in many holiday stuffing recipes, but you can substitute with other nuts like pecans or almonds if desired.
Roast chestnuts, then carefully peel off the outer shell and inner skin. If using packaged roasted chestnuts, simply chop them into smaller pieces before adding to the stuffing mixture.
Yes, you can prepare the stuffing a day in advance. Mix all ingredients except eggs, refrigerate overnight, then add eggs and bake just before serving to maintain the best texture and freshness.
Print
Chestnut Stuffing Recipe
- Total Time: 69-84 mins
- Yield: 6 1x
Description
Chestnut stuffing brings warmth from traditional French kitchens, blending roasted chestnuts with aromatic herbs and rustic bread cubes. Rich seasonal flavors invite you to savor a classic holiday side dish that connects generations through culinary comfort.
Ingredients
Main Ingredients:
- 1 (16 ounces / 454 grams) loaf rustic bread, diced
- 12 ounces (340 grams) precooked chestnuts, quartered
- 2 cups chicken or vegetable stock
Vegetables and Aromatics:
- 2 small yellow onions, diced
- 2 celery stalks, diced
- 2 tablespoons fresh sage, chopped
- 2 tablespoons fresh thyme, chopped
- 2 tablespoons fresh rosemary, chopped
- 1 handful fresh parsley, chopped
Dairy and Binding Ingredients:
- 6 tablespoons unsalted butter
- 1 pint (473 milliliters) heavy cream, room temperature
- 2 eggs, lightly beaten
- 1.5 to 2 teaspoons salt
Instructions
- Prepare oven-safe dish and heat oven to 375F (190C). Scatter bread cubes across baking sheet, toasting until crisp and golden, approximately 10-15 minutes.
- While bread toasts, melt butter in large skillet over medium heat. Sauté chopped celery and onions with initial salt portion, cooking until vegetables become translucent and tender, roughly 5-7 minutes.
- In separate saucepan, combine remaining butter with stock, warming gently until butter completely dissolves and mixture is smooth.
- Transfer toasted bread cubes into skillet with sautéed vegetables, then gradually pour warm stock mixture, stirring carefully to ensure even distribution and prevent soggy texture.
- Incorporate cream into bread mixture, then gently fold in whisked eggs, chopped chestnuts, fresh herbs, and remaining salt, ensuring ingredients are evenly integrated.
- Transfer stuffing mixture into greased 9×13 inch baking dish, spreading evenly. Dot surface with small butter pieces to enhance browning and richness.
- Reduce oven temperature to 350F (175C), then bake stuffing for 45-55 minutes until top turns golden brown and center becomes firm and set.
Notes
- Customize bread type for dietary needs, using gluten-free, whole wheat, or sourdough options to match personal preferences and nutritional goals.
- Toast bread cubes until perfectly golden for enhanced crunch and deeper flavor development, ensuring even texture throughout the stuffing.
- Chop chestnuts finely to distribute flavor evenly and prevent large chunks that might disrupt the smooth, cohesive texture of the stuffing.
- Adjust butter quantities for lighter versions by substituting olive oil or using less butter, making the recipe more heart-healthy without sacrificing rich taste.
- Prep Time: 20-22 mins
- Cook Time: 49-62 mins
- Category: Lunch, Dinner, Appetizer, Snacks
- Method: Baking
- Cuisine: American
Nutrition
- Serving Size: 6
- Calories: 335 kcal
- Sugar: 3 g
- Sodium: 500 mg
- Fat: 20 g
- Saturated Fat: 10 g
- Unsaturated Fat: 8 g
- Trans Fat: 0.2 g
- Carbohydrates: 30 g
- Fiber: 4 g
- Protein: 7 g
- Cholesterol: 80 mg
Michael Thompson
Founder & Recipe Developer
Expertise
Education
Cascade Culinary Institute – Bend, OR
ServSafe Food Handler Certification – Portland, OR
Focus: Certified in core food safety and hygiene principles for both home and professional kitchens, with emphasis on ingredient handling, kitchen cleanliness, and safe preparation methods.
Mike’s kitchen journey began with a single goal: to make everyday meals feel like something worth celebrating.
After earning his Certificate in Culinary Arts from Cascade Culinary Institute, he spent years working with local farmers and small kitchens across Oregon, learning the beauty of seasonal, small-batch cooking.
Mike’s approach is simple, cook with what’s fresh, keep it approachable, and always leave room for a little creativity. When he’s not testing yogurt marinades or designing single-serving meals, you’ll find him hiking trails or hunting down the best berries at local markets.