
Festive Christmas Gooey Butter Cookies Recipe That Melts Hearts
Sweet memories of holiday magic dance through kitchens when christmas gooey butter cookies emerge from warm ovens.
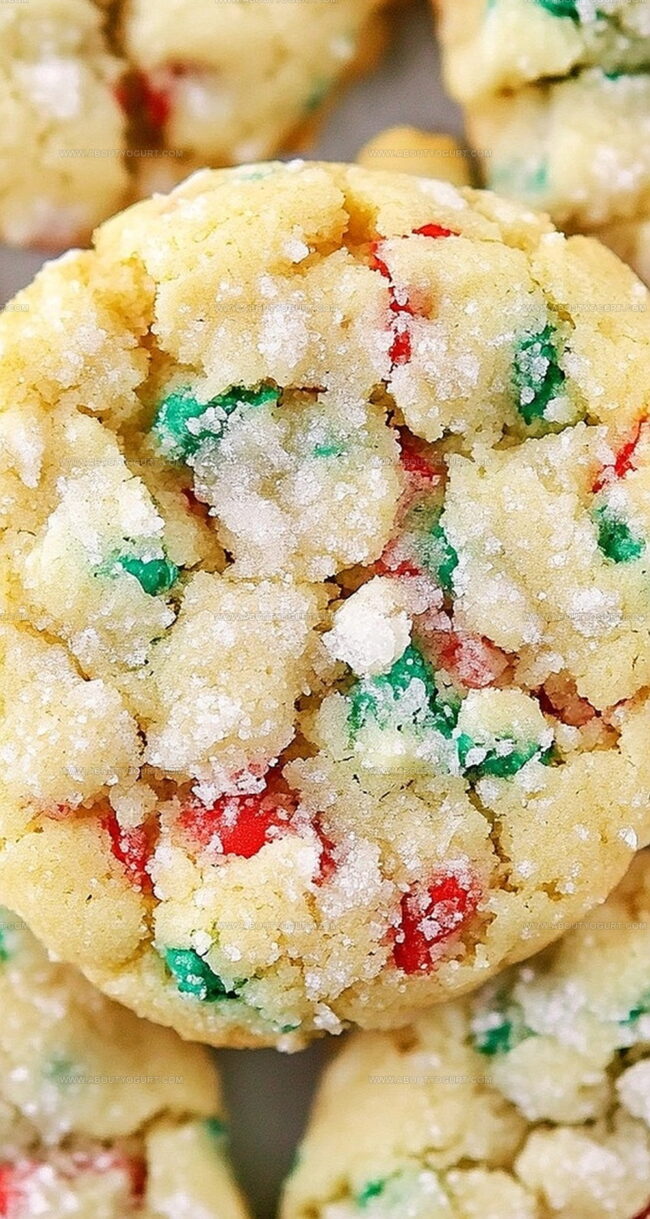
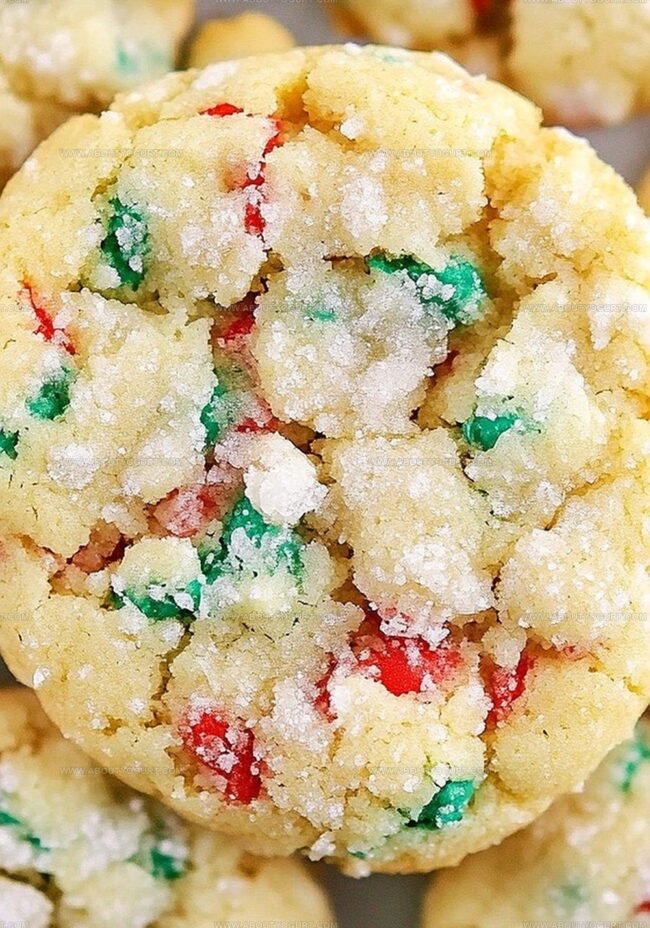
Soft clouds of powdered sugar drift across golden surfaces, promising irresistible comfort.
Childhood nostalgia whispers through delicate crumbs that melt on your tongue.
Butter-rich dough captures festive cheer in every delectable bite.
Simple ingredients blend into miraculous treats that spark joy and connection.
Generations of bakers have perfected this delightful recipe, passing down pure happiness.
You won’t be able to resist these mouthwatering morsels that capture the heart of holiday celebrations.
Why Everyone Loves Christmas Gooey Butter Cookies
What You’ll Need For Christmas Gooey Butter Cookies
Base Ingredients:Dry Ingredients:Decorative Ingredients:How To Make Christmas Gooey Butter Cookies Easily
Step 1: Prepare Baking Station
Heat the oven to 350°F and line two baking sheets with parchment paper. This ensures your cookies won’t stick and will bake evenly.
Step 2: Create Creamy Base
Grab your electric mixer and blend these ingredients until silky smooth:Step 3: Incorporate Cake Mix
Stir in the cake mix until a thick, luxurious dough develops. The mixture should look rich and consistent.
Step 4: Add Festive Flair
Gently fold in holiday sprinkles. Move slowly to prevent color bleeding and maintain the sprinkles’ vibrant appearance.
Step 5: Chill Dough
Refrigerate the dough for at least 30 minutes. This helps the cookies hold their shape and makes them easier to handle.
Step 6: Shape Cookies
Scoop the chilled dough into small balls, then roll each one generously in powdered sugar until completely coated.
Step 7: Arrange on Baking Sheet
Place the sugar-coated dough balls on prepared sheets, leaving about 2 inches between each cookie.
Step 8: Bake to Perfection
Bake for 10-12 minutes. Look for set edges but keep the centers slightly soft for that signature gooey texture.
Step 9: Cool and Enjoy
Allow cookies to rest on the baking sheet for a few minutes, then transfer to a wire rack to cool completely. Savor the festive treat!
Helpful Baking Tips For Christmas Gooey Butter Cookies
Ways To Add A Fun Twist To Christmas Gooey Butter Cookies
Tasty Pairings For Christmas Gooey Butter Cookies
How To Store Christmas Gooey Butter Cookies Right
Christmas Gooey Butter Cookies Questions And Answers
While homemade cake mix might work, store-bought cake mix provides the most consistent texture and flavor for these cookies. Homemade mixes can have different moisture levels that might affect the final result.
Fold the sprinkles gently and briefly into the dough. Use gel food coloring or sprinkles specifically designed for baking to minimize color bleeding. Chilling the dough before adding sprinkles also helps maintain their distinct colors.
Chilling the dough helps prevent spreading during baking, ensures a better cookie shape, and allows the flavors to meld together. It also makes the dough easier to handle and roll in powdered sugar.
Print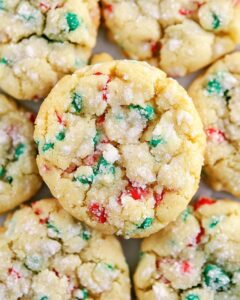
Christmas Gooey Butter Cookies Recipe
- Total Time: 50-52 minutes
- Yield: 24 1x
Description
Festive Christmas gooey butter cookies blend rich cream cheese and powdered sugar into irresistible holiday treats. These melt-in-your-mouth delights promise sweet memories and joyful celebrations with family and friends.
Ingredients
Main Ingredients:
- 1 15.25-ounce (432 grams) yellow cake mix
- 8 ounces (226 grams) full-fat cream cheese
- 1/2 cup (113 grams) unsalted butter
- 1 large egg
Binding and Flavoring Ingredients:
- 1 teaspoon vanilla extract
Decoration and Coating:
- 1/2 cup (60 grams) holiday sprinkles
- 1/2 cup (60 grams) powdered sugar
Instructions
- Prepare the oven to 350°F and line two baking sheets with parchment paper for optimal cookie baking.
- Combine cream cheese, butter, egg, and vanilla extract in a mixing bowl, blending with an electric mixer until achieving a silky, uniform consistency.
- Incorporate the cake mix into the creamy mixture, stirring until a dense, cohesive dough develops.
- Gently introduce holiday sprinkles, mixing delicately to prevent color dispersal throughout the dough.
- Refrigerate the dough for a minimum of 30 minutes, allowing it to firm up and become more manageable.
- Shape the chilled dough into compact 1½-inch spheres, thoroughly coating each ball with a generous layer of powdered sugar.
- Arrange the sugar-dusted dough balls on prepared baking sheets, maintaining approximately 2 inches of separation between each cookie.
- Bake for 10-12 minutes, ensuring the cookie edges become firm while preserving a tender, soft center.
- Allow the cookies to rest on the baking sheet momentarily before transferring them to a wire cooling rack for complete cooling and optimal texture.
Notes
- Ensure cream cheese and butter are at room temperature for smoother mixing and better cookie texture.
- Experiment with different cake mix flavors like red velvet or funfetti for unique holiday variations.
- Refrigerating dough helps prevent spreading and creates a more dense, chewy cookie consistency.
- For gluten-free option, substitute regular cake mix with a gluten-free cake mix to accommodate dietary restrictions.
- Prep Time: 40 minutes
- Cook Time: 10-12 minutes
- Category: Desserts, Snacks
- Method: Baking
- Cuisine: American
Nutrition
- Serving Size: 24
- Calories: 181 kcal
- Sugar: 13 g
- Sodium: 120 mg
- Fat: 9 g
- Saturated Fat: 5 g
- Unsaturated Fat: 3 g
- Trans Fat: 0.2 g
- Carbohydrates: 22 g
- Fiber: 0.5 g
- Protein: 2 g
- Cholesterol: 30 mg
Michael Thompson
Founder & Recipe Developer
Expertise
Education
Cascade Culinary Institute – Bend, OR
ServSafe Food Handler Certification – Portland, OR
Focus: Certified in core food safety and hygiene principles for both home and professional kitchens, with emphasis on ingredient handling, kitchen cleanliness, and safe preparation methods.
Mike’s kitchen journey began with a single goal: to make everyday meals feel like something worth celebrating.
After earning his Certificate in Culinary Arts from Cascade Culinary Institute, he spent years working with local farmers and small kitchens across Oregon, learning the beauty of seasonal, small-batch cooking.
Mike’s approach is simple, cook with what’s fresh, keep it approachable, and always leave room for a little creativity. When he’s not testing yogurt marinades or designing single-serving meals, you’ll find him hiking trails or hunting down the best berries at local markets.