
Cranberry Upside Down Cake Recipe with Tangy Sweet Layers
Sweet memories dance through my kitchen whenever I whip up this delightful cranberry upside down cake that sparkles with festive charm.
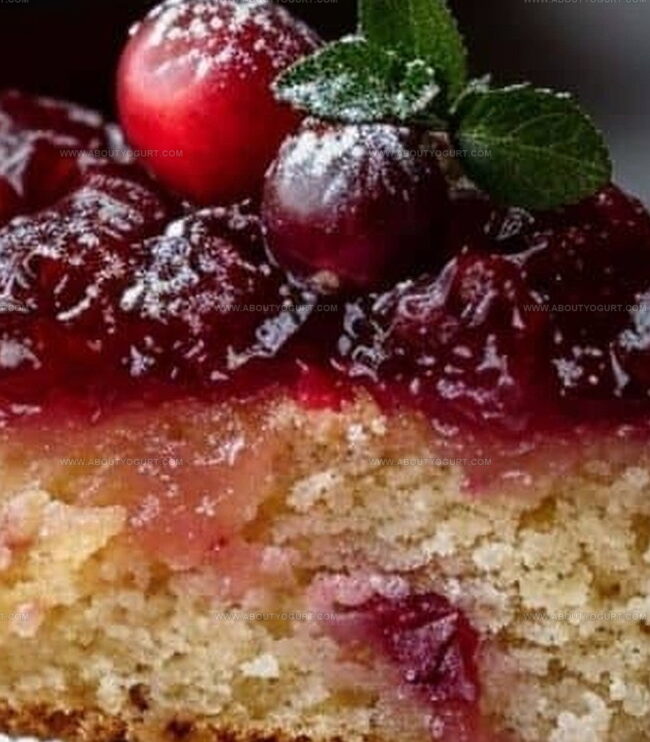
Seasonal berries burst with vibrant color across a golden landscape of tender cake.
Soft caramel notes weave between tart fruit clusters, creating a sensational dessert experience.
Rich butter and warm spices complement the bright cranberry medallions nestled throughout the surface.
Each slice promises a delectable journey through contrasting textures and flavors that surprise and delight.
My grandmother’s cherished recipe inspired this modern twist on a classic comfort treat.
Why Cranberry Upside Down Cake Is a Festive Favorite

Ingredients List for Cranberry Upside Down Cake
Fruit Layer:Dry Ingredients:Wet Ingredients:How to Bake Cranberry Upside Down Cake Perfectly
Step 1: Warm Up the Oven
Crank the oven to a toasty 350°F (175°C). Grab your cake pan and melt butter directly inside, creating a golden base.
Sprinkle sugar over the melted butter, then carefully distribute cranberries across the surface in an even layer.
Step 2: Create the Cake Batter
In one bowl, combine your dry ingredients with a gentle whisk.
In a separate bowl, blend wet ingredients until perfectly smooth.
Gently fold the wet and dry mixtures together until you have a silky, lump-free batter.
Step 3: Layer and Prepare for Baking
Carefully pour the cake batter over the cranberry-sugar layer, ensuring an even distribution.
Step 4: Bake to Perfection
Slide the pan into the preheated oven and bake for 45 minutes. Check doneness by inserting a toothpick into the center – it should come out clean with no wet batter clinging to it.
Step 5: Unveil the Delicious Masterpiece
Let the cake rest and cool slightly. Confidently flip the pan onto a serving plate, watching the gorgeous cranberry topping reveal itself in a stunning display of culinary magic.
Pro Tips for Cranberry Upside Down Cake
Delicious Variations of Cranberry Upside Down Cake
Pairings to Complement Cranberry Upside Down Cake
Best Storage Methods for Cranberry Upside Down Cake
FAQs About Cranberry Upside Down Cake
Yes, you can use frozen cranberries without thawing them first. Just ensure they are well-drained and pat them dry before adding to the cake pan.
Greasing the pan thoroughly with butter or using parchment paper will help prevent the cranberries from sticking when you invert the cake.
Substitute the all-purpose flour with a gluten-free flour blend to create a gluten-free version of this cranberry upside down cake.
Sprinkle an extra tablespoon of sugar over the cranberries before adding the cake batter to balance the tartness and enhance the sweetness.
Print
Cranberry Upside Down Cake Recipe
- Total Time: 60 minutes
- Yield: 8 1x
Description
Cranberry upside down cake brings festive winter magic to dessert tables with its rustic charm. Crimson berries nestled in caramelized sugar create a delightful sweet-tart masterpiece that makes celebrations more delicious.
Ingredients
Fruits:
- 2 cups (473 ml) cranberries (fresh or frozen)
Cake Base Ingredients:
- 1 1/2 cups (180 grams) flour
- 1 teaspoon baking powder
- 1/4 teaspoon salt
- 2 eggs
Sweeteners and Liquids:
- 1 cup (200 grams) sugar (divided)
- 1/4 cup (57 grams) butter
- 1/2 cup (120 ml) milk
- 1 teaspoon vanilla extract
Instructions
- Heat the oven to 350F (175C) and prepare a cake pan by melting butter, then evenly coating with sugar.
- Scatter fresh cranberries across the sugared butter layer, creating a vibrant base for the cake.
- Whisk dry ingredients together in a mixing bowl, ensuring even distribution of flour, baking powder, and salt.
- In a separate bowl, blend eggs, milk, and vanilla extract until thoroughly combined and smooth.
- Gradually incorporate wet ingredients into dry ingredients, stirring carefully to create a uniform cake batter without overmixing.
- Gently pour the batter over the cranberry layer, ensuring an even spread across the pan.
- Transfer to the preheated oven and bake for 45 minutes, watching for a golden surface and checking doneness with a toothpick inserted in the center.
- Remove from oven and allow cake to rest for 10 minutes, cooling slightly and helping the cranberry layer set.
- Carefully invert the cake onto a serving plate, letting the caramelized cranberry topping create a stunning presentation.
- Serve warm or at room temperature, revealing the beautiful ruby-red cranberry design on top of the cake.
Notes
- Prevent Sticking: Grease the cake pan thoroughly with butter or non-stick spray before adding melted butter and sugar to ensure easy cake release.
- Fruit Distribution: Gently arrange cranberries in a single layer for an even, attractive presentation when the cake is inverted.
- Moisture Tip: Use room temperature eggs and milk to create a smoother, more uniform cake batter that bakes more evenly.
- Gluten-Free Adaptation: Substitute all-purpose flour with a gluten-free flour blend to make the cake suitable for those with gluten sensitivities.
- Prep Time: 15 minutes
- Cook Time: 45 minutes
- Category: Desserts
- Method: Baking
- Cuisine: American
Nutrition
- Serving Size: 8
- Calories: 230 kcal
- Sugar: 21 g
- Sodium: 120 mg
- Fat: 8 g
- Saturated Fat: 5 g
- Unsaturated Fat: 2 g
- Trans Fat: 0.1 g
- Carbohydrates: 36 g
- Fiber: 2 g
- Protein: 3 g
- Cholesterol: 55 mg
Sarah Mitchell
Content Specialist & Home Cooking Enthusiast
Expertise
Education
Asheville-Buncombe Technical Community College – Asheville, NC
American Fitness Professionals & Associates – Online
Sarah’s passion for food was sparked by weekend trips to the farmers’ market and her belief that healthy meals should never feel boring.
After earning her culinary diploma and becoming a certified Nutrition and Wellness Consultant, she set out to help others fall in love with simple, wholesome cooking.
She’s all about celebrating the small wins in the kitchen: a colorful yogurt bowl, a new twist on a classic dish, or a homemade snack that feels just a little extra special.
Outside the kitchen, Sarah is a gardener at heart, a yoga enthusiast, and a believer that fresh herbs can brighten any meal, and any day.