
Giant Strawberry Cake Recipe for Sweet Celebration Fans
Crafting a giant strawberry seismic cake can unleash unexpected culinary magic in your kitchen.
Sweet layers of fruity goodness promise an extraordinary dessert adventure.
Massive strawberry flavors dance through each delectable slice, creating pure excitement.
Bakers who love bold challenges will adore this spectacular creation.
Summer gatherings deserve something magnificent and memorable like this impressive treat.
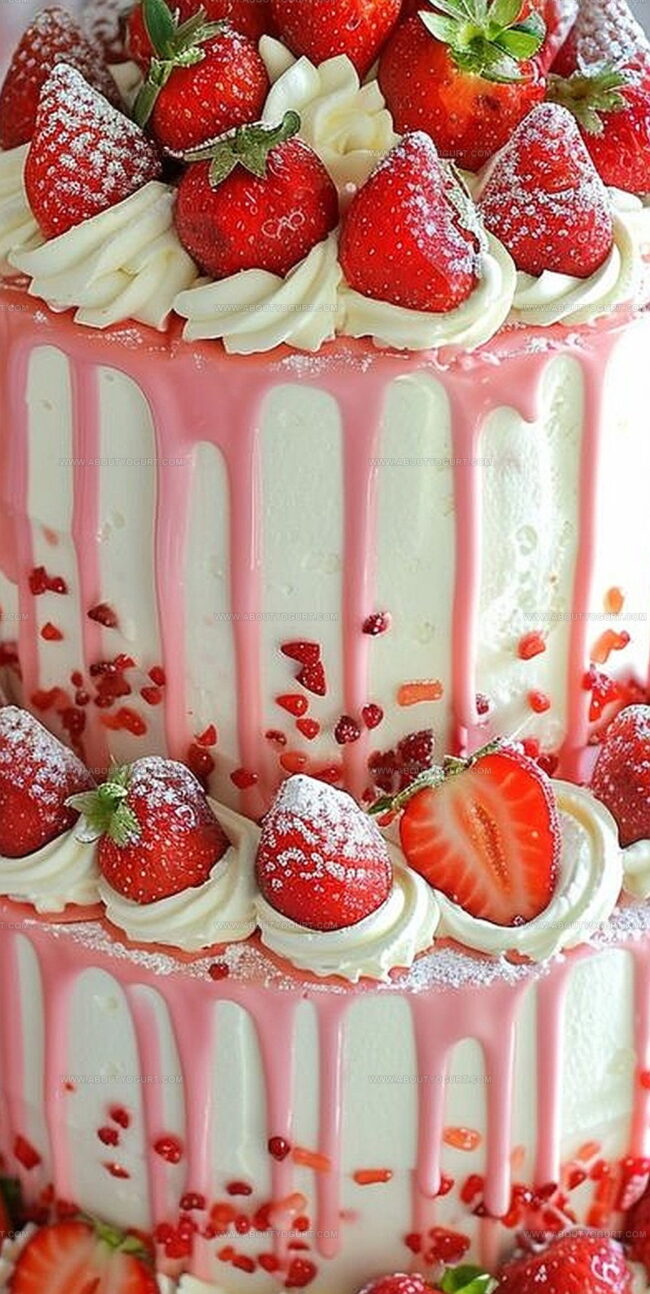
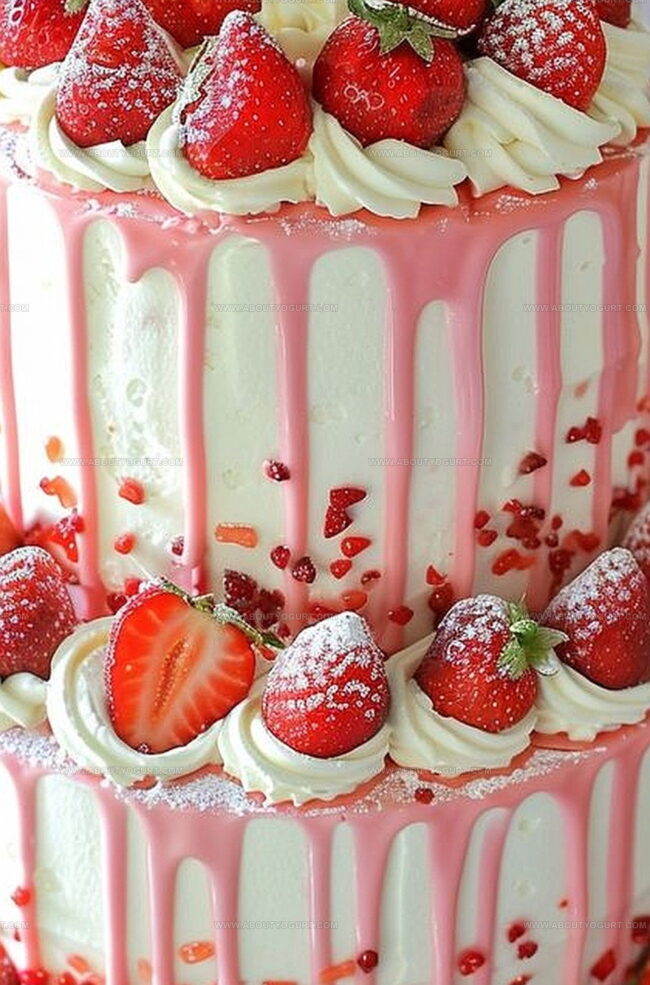
Vibrant red colors and incredible textures make this cake a showstopper.
Slice into pure deliciousness and watch everyone’s eyes light up with pure joy.
Giant Strawberry Seismic Cake: The Ultimate Showstopper
Key Ingredients for Giant Strawberry Seismic Cake
Cake Base Ingredients:Dry Ingredients:Cheesecake Layer Ingredients:Glaze Ingredients:How to Master Baking Giant Strawberry Seismic Cake
Step 1: Warm Up the Oven
Set your oven to a toasty 350°F (175°C). Grab a 10-inch round cake pan and give it a generous coating of butter and flour to prevent sticking.
Step 2: Whip Up the Strawberry Cake Base
In a spacious mixing bowl, cream butter and sugar until they transform into a fluffy cloud. Crack eggs one by one, blending thoroughly after each addition. Pour in strawberry puree and extract, mixing until silky smooth.
Step 3: Combine Dry Ingredients
In a separate bowl, whisk together:Gradually fold this mixture into the butter blend, alternating with milk. Start and end with the flour mixture. Transfer batter to the prepared pan, smoothing the surface with a spatula.
Step 4: Create the Creamy Cheesecake Layer
In a large bowl, beat cream cheese and sugar until completely smooth. Add eggs individually, ensuring each is fully incorporated. Stir in vanilla extract and strawberry puree until well blended.
Step 5: Layer the Batters
Carefully spoon the cheesecake mixture over the strawberry cake batter, spreading it evenly across the surface.
Step 6: Bake to Perfection
Slide the pan into the preheated oven. Bake for 60-70 minutes until a toothpick comes out clean and the cheesecake layer looks set. Let the cake rest in the pan for 10 minutes, then transfer to a wire rack for complete cooling.
Step 7: Craft the Strawberry Glaze
In a small saucepan, combine:Cook over medium heat, stirring constantly until the mixture thickens into a luscious syrup (about 5-7 minutes). Allow the glaze to cool slightly.
Step 8: Finish and Chill
Drizzle the strawberry glaze over the cooled cake. Refrigerate for a minimum of 4 hours or overnight to let the flavors meld and set perfectly.
Pro Tips for a Flawless Giant Strawberry Seismic Cake
Variations to Customize Giant Strawberry Seismic Cake
Pairing Ideas for Giant Strawberry Seismic Cake
Storage Tips for Giant Strawberry Seismic Cake Freshness
FAQs About Giant Strawberry Seismic Cake
Yes, you can use frozen strawberries. Thaw them completely and drain excess liquid before pureeing to maintain the right consistency for the recipe.
Avoid overmixing the cheesecake batter and bake the cake in a water bath to create a more gentle, even heat. Also, don’t overbake the cake – remove it when the center is still slightly jiggly.
Substitute the all-purpose flour with a gluten-free flour blend designed for baking. Use a 1:1 replacement ratio and ensure your other ingredients are gluten-free.
Print
Giant Strawberry Seismic Cake Recipe
- Total Time: 5 hours 40 minutes to overnight
- Yield: 12 1x
Description
Delectable Giant Strawberry Seismic Cake blends French pastry techniques with bold Californian flavor profiles. Sweet strawberry layers and silky cream create a dramatic dessert landscape that delights culinary adventurers with complex textures and rich sensations.
Ingredients
Main Ingredients:
- 4 large eggs
- 3 cups all-purpose flour
- 2 cups sugar
- 1 cup unsalted butter, softened
- 1 cup milk
- 1/2 cup strawberry puree
Leavening Agents:
- 2 teaspoons baking powder
- 1/2 teaspoon salt
Flavor Enhancers:
- 1 tablespoon strawberry extract
Instructions
- Prepare the oven at 350F (175C) and meticulously coat a 10-inch round cake pan with grease and flour to prevent sticking.
- Whip butter and sugar in a spacious mixing bowl until achieving a cloud-like, airy consistency. Incorporate eggs individually, then fold in vibrant strawberry puree and fragrant strawberry extract until harmoniously blended.
- Separately, combine flour, baking powder, and salt through a whisking motion. Gently integrate the dry ingredients into the butter mixture, alternating with milk, ensuring a smooth, lump-free batter. Transfer the mixture into the prepared pan, carefully leveling the surface.
- For the cheesecake component, thoroughly blend cream cheese and sugar until silky. Add eggs sequentially, thoroughly mixing after each inclusion. Introduce vanilla extract and strawberry puree, stirring until completely integrated.
- Delicately layer the cheesecake batter atop the strawberry cake base, spreading evenly to create a uniform surface.
- Bake for 60-70 minutes, monitoring until a toothpick emerges clean and the cheesecake layer appears firm and set. Allow initial cooling within the pan for 10 minutes before transferring to a wire rack for complete temperature reduction.
- Craft the strawberry glaze by combining chopped strawberries, sugar, lemon juice, and cornstarch in a compact saucepan. Simmer over medium heat for 5-7 minutes until the mixture transforms into a luxurious, thickened syrup. Permit slight cooling.
- Cascade the glossy strawberry glaze over the completely cooled cake. Refrigerate for a minimum of 4 hours, preferably overnight, to enhance flavor melding and structural integrity before serving.
Notes
- Select ultra-ripe strawberries for maximum flavor intensity and vibrant color in your cake layers.
- Ensure all ingredients are at room temperature before mixing to create smoother, more evenly incorporated batters.
- Use a springform pan for easier cake removal and more professional presentation of this complex dessert.
- Consider whisking cornstarch directly into strawberry puree before adding to prevent potential lumping in the glaze.
- Prep Time: 30 minutes
- Cook Time: 70-77 minutes
- Category: Desserts
- Method: Baking
- Cuisine: American
Nutrition
- Serving Size: 12
- Calories: 357 kcal
- Sugar: 27 g
- Sodium: 141 mg
- Fat: 15 g
- Saturated Fat: 9 g
- Unsaturated Fat: 5 g
- Trans Fat: 0.3 g
- Carbohydrates: 48 g
- Fiber: 1 g
- Protein: 4 g
- Cholesterol: 62 mg
Sarah Mitchell
Content Specialist & Home Cooking Enthusiast
Expertise
Education
Asheville-Buncombe Technical Community College – Asheville, NC
American Fitness Professionals & Associates – Online
Sarah’s passion for food was sparked by weekend trips to the farmers’ market and her belief that healthy meals should never feel boring.
After earning her culinary diploma and becoming a certified Nutrition and Wellness Consultant, she set out to help others fall in love with simple, wholesome cooking.
She’s all about celebrating the small wins in the kitchen: a colorful yogurt bowl, a new twist on a classic dish, or a homemade snack that feels just a little extra special.
Outside the kitchen, Sarah is a gardener at heart, a yoga enthusiast, and a believer that fresh herbs can brighten any meal, and any day.