Lawson Shortcrust Pastry Recipe Every Baker Needs
Crafting a delightful lawson sweet shortcrust pastry demands precision and a touch of culinary magic.
Bakers seeking perfection will find this recipe both challenging and rewarding.
Crisp and buttery, the pastry promises to elevate your dessert game with minimal effort.
Simple ingredients merge into a delicate canvas for countless sweet creations.
Professional chefs and home bakers alike appreciate how carefully measured components can transform ordinary into extraordinary.
Mixing techniques matter more than you might expect in achieving that perfect, flaky texture.
You’ll want to bookmark this recipe for your next baking adventure.
Why People Love Nigella Lawson Sweet Shortcrust Pastry

Everything In Nigella Lawson Sweet Shortcrust Pastry
Pastry Base:Fat Components:Liquid Component:How To Prepare Nigella Lawson Sweet Shortcrust Pastry

Step 1: Blend Dry Ingredients
In a spacious mixing bowl, combine flour and salt. Whisk them together until evenly distributed, ensuring a uniform base for your pastry.
Step 2: Create Crumbly Texture
Add chilled butter and shortening to the flour mixture. Use your fingertips to gently rub and press the fats into the dry ingredients. Continue until the mixture resembles rough, sandy breadcrumbs with small pea-sized butter pieces.
Step 3: Form Pastry Dough
Gradually introduce cold water, one tablespoon at a time. Gently mix and press the ingredients until a cohesive dough starts to form. Stop adding water once the dough holds together without crumbling.
Step 4: Shape and Chill Pastry
Divide the dough into two equal portions. Shape each portion into a flat, round disc. Wrap each disc tightly in plastic wrap. Refrigerate for 30 minutes to allow the fats to solidify and the gluten to relax.
Step 5: Roll and Prepare Pastry
Remove chilled dough from refrigerator. Roll out on a lightly floured surface to a thin, even thickness. Carefully transfer to a pie dish, pressing gently without stretching the dough.
Step 6: Trim and Prepare for Baking
Trim excess pastry from the edges of the pie dish. Use a fork to prick the bottom of the pastry. Return the lined pie dish to the refrigerator and chill for an additional 20 minutes.
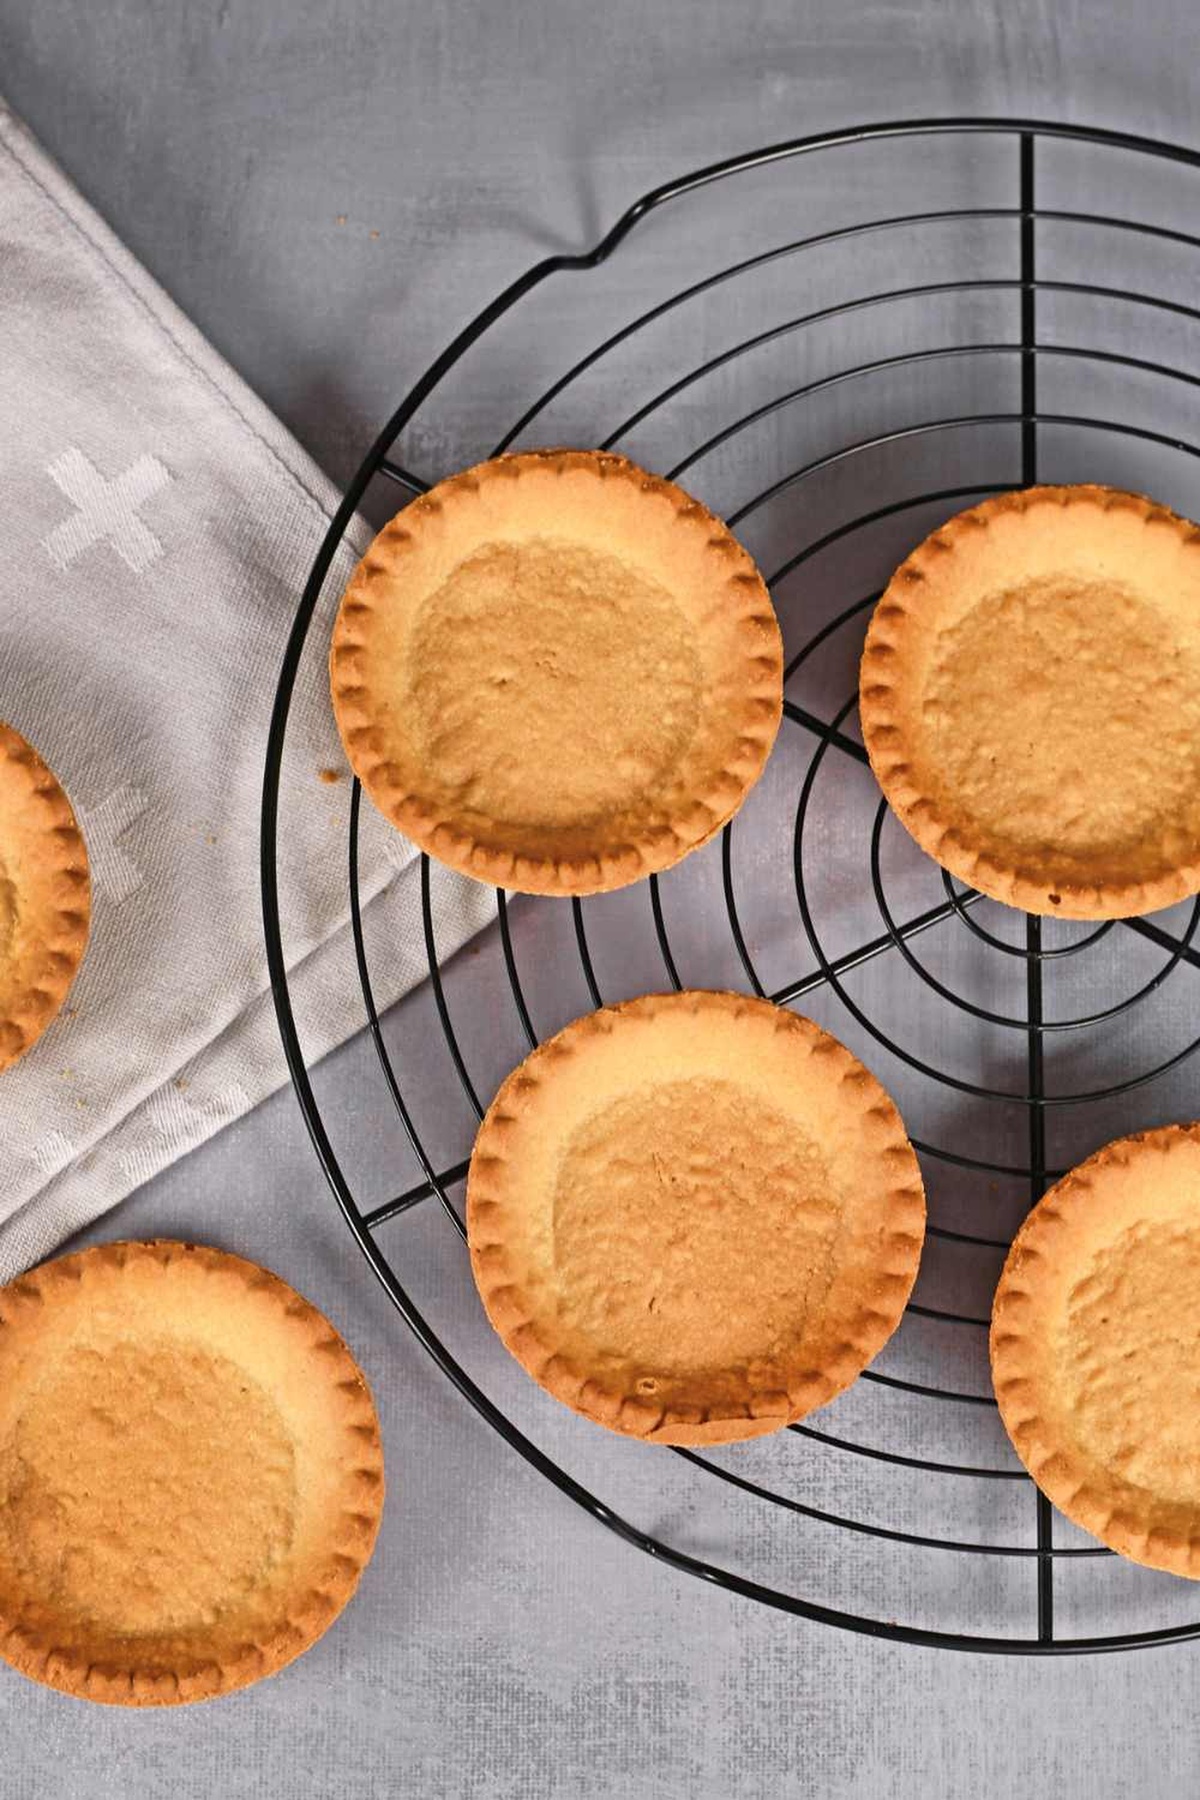
Step 7: Blind Bake Pastry
Preheat oven to 350°F. If blind baking is required, line the pastry with parchment paper and fill with pie weights or dried beans. Bake for 15 minutes. Remove weights and parchment, then bake for 5-10 more minutes until golden brown.
Tips That Help With Nigella Lawson Sweet Shortcrust Pastry

New Ideas For Nigella Lawson Sweet Shortcrust Pastry

Great Matches For Nigella Lawson Sweet Shortcrust Pastry
Enhance Pastry’s Flavor with Cheese
Match Sweet Pastry with Fruity Companions
Elevate Pastry with Herbal Notes
Best Way To Keep Nigella Lawson Sweet Shortcrust Pastry
Answers To Nigella Lawson Sweet Shortcrust Pastry FAQs
Chilling helps the gluten relax and prevents shrinkage, ensuring a more tender and flaky crust when baked.
The mixture should look like coarse breadcrumbs with no large butter lumps, and it should just hold together when squeezed.
Add cold water one tablespoon at a time until the dough just comes together – avoid adding too much water as this can make the pastry tough.
Yes, you can prepare the dough and keep it wrapped in the refrigerator for up to 3 days before using, or freeze for up to a month.
Print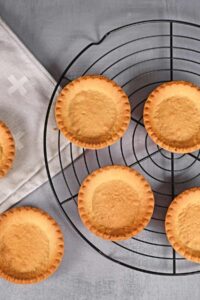
Lawson Sweet Shortcrust Pastry Recipe
- Total Time: 1 hour 15 minutes
- Yield: 8 1x
Description
Lawson sweet shortcrust pastry weaves culinary magic into desserts with its buttery, crumbly texture. Home bakers can easily master this classic pastry, creating delectable tarts and pies that elevate simple ingredients into extraordinary treats.
Ingredients
Main Ingredients:
- 2 1/2 cups (312.5 grams) all-purpose flour
- 1/2 cup (113 grams) cold butter
- 1/2 cup (113 grams) cold vegetable shortening
Fat Binding Ingredients:
- 8 tablespoons (120 milliliters) cold water
Seasoning:
- 1 teaspoon salt
Instructions
- Sift flour and salt together in a spacious mixing vessel, ensuring even distribution of dry ingredients.
- Incorporate cold butter and shortening into the flour mixture, using fingertips to create a texture resembling rough breadcrumbs.
- Gradually introduce chilled water, one tablespoon at a time, gently combining until a cohesive dough emerges.
- Partition the dough into two equal portions, shaping each into a flat disc to facilitate even cooling and rolling.
- Encase each disc in plastic wrap, sealing tightly to prevent moisture loss, and refrigerate for 30 minutes to relax the gluten and firm up the fat.
- On a lightly floured surface, roll out the chilled dough to approximately 1/4 inch thickness, maintaining uniform coverage.
- Carefully transfer the rolled pastry to a pie dish, pressing gently into corners without stretching the dough to prevent shrinkage.
- Trim excess pastry around the edges, creating a neat rim, and use a fork to create small perforations across the base.
- Return the lined pie dish to the refrigerator for an additional 20 minutes to re-chill and set the pastry.
- For blind baking, preheat the oven to 180°C (350°F), line the pastry with parchment and pie weights, and bake for 15 minutes.
- Remove weights and parchment, then continue baking for 5-10 minutes until the crust achieves a light golden color.
Notes
- Keep butter and shortening cold for the flakiest, most tender pastry texture.
- Use a light touch when rubbing in fats to prevent overworking the dough, which can make it tough.
- Chill the dough twice to ensure maximum structure and prevent shrinking during baking.
- For gluten-free version, substitute all-purpose flour with a mix of gluten-free flour blend and xanthan gum.
- Prep Time: 50 minutes
- Cook Time: 25 minutes
- Category: Desserts
- Method: Baking
- Cuisine: British
Nutrition
- Serving Size: 8
- Calories: 354
- Sugar: 0.1 g
- Sodium: 153 mg
- Fat: 18 g
- Saturated Fat: 7 g
- Unsaturated Fat: 9 g
- Trans Fat: 0.2 g
- Carbohydrates: 43 g
- Fiber: 1.5 g
- Protein: 4 g
- Cholesterol: 30 mg
Michael Thompson
Founder & Recipe Developer
Expertise
Education
Cascade Culinary Institute – Bend, OR
ServSafe Food Handler Certification – Portland, OR
Focus: Certified in core food safety and hygiene principles for both home and professional kitchens, with emphasis on ingredient handling, kitchen cleanliness, and safe preparation methods.
Mike’s kitchen journey began with a single goal: to make everyday meals feel like something worth celebrating.
After earning his Certificate in Culinary Arts from Cascade Culinary Institute, he spent years working with local farmers and small kitchens across Oregon, learning the beauty of seasonal, small-batch cooking.
Mike’s approach is simple, cook with what’s fresh, keep it approachable, and always leave room for a little creativity. When he’s not testing yogurt marinades or designing single-serving meals, you’ll find him hiking trails or hunting down the best berries at local markets.