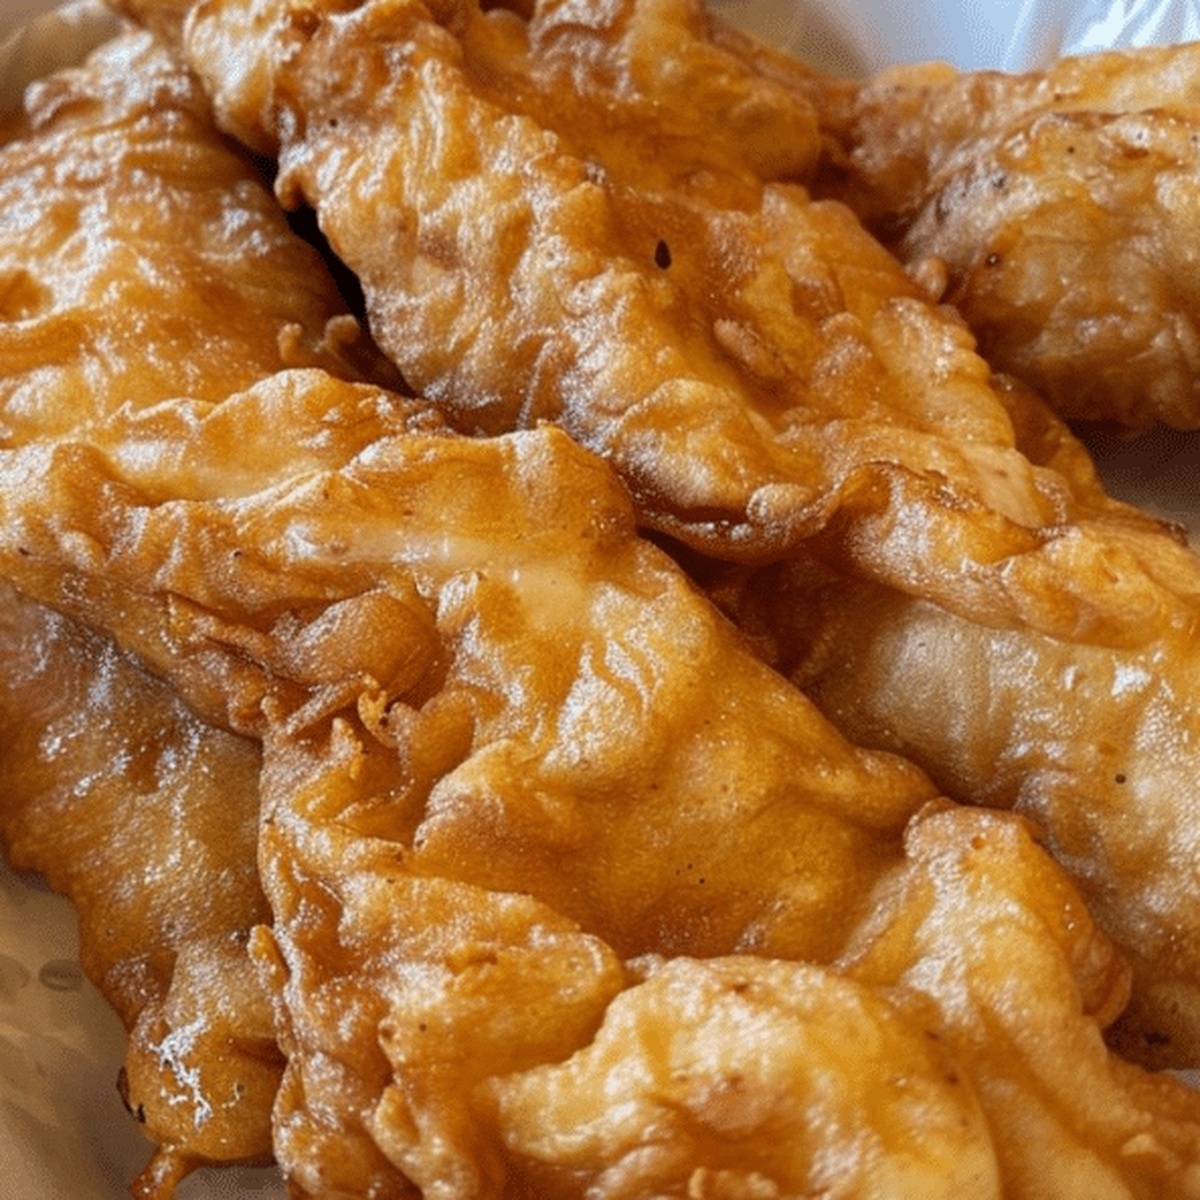
Crispy Golden Long John Silvers Batter Recipe for Seafood Fans
Crispy golden batter from Long John Silvers has been my seafood obsession since childhood.
Restaurants guard these secret recipes like treasure maps.
Seafood enthusiasts know the magical coating makes every bite extraordinary.
Restaurants rarely share their precise techniques for achieving that signature crunch.
My grandmother’s kitchen experiments taught me clever tricks for recreating restaurant-style magic.
Seafood lovers will appreciate how simple ingredients create restaurant-quality results.
You can master this classic coating with just a few pantry staples.
Prepare to unlock the ultimate seafood transformation right in your kitchen.
Reasons to Love Long John Silvers Batter
Ingredients for Long John Silvers Batter
Dry Ingredients:Wet Ingredients:Frying Ingredients:How to Make Long John Silvers Batter
Step 1: Whisk Dry Ingredients
Grab a spacious mixing bowl and combine flour, cornstarch, baking powder, salt, and black pepper. Use a whisk to blend everything thoroughly, ensuring no clumpy spots remain. The mixture should look uniform and light.
Step 2: Blend Wet Components
In a separate bowl, crack the egg and pour in sparkling water and vegetable oil. Whisk these ingredients until they create a smooth, well-integrated liquid with a consistent texture.
Step 3: Create Magical Batter
Pour wet ingredients into dry ingredients. Stir gently with a light hand, allowing some small lumps to remain. The key is not to overmix, which keeps the batter light and crispy.
Step 4: Allow Batter to Rest
Let the batter sit quietly for 10-15 minutes. This resting period helps develop a crunchier coating when frying, creating that perfect golden exterior.
Step 5: Prepare Frying Station
Heat oil in a deep fryer or heavy skillet until it reaches 375°F. Use a cooking thermometer to ensure precise temperature for the best crispy results.
Step 6: Dip and Fry
Dunk your protein or vegetables into the batter, letting excess drip off. Carefully lower items into hot oil, cooking in small batches. Fry until each piece turns a beautiful golden brown, approximately 3-4 minutes per side.
Step 7: Finish and Serve
Transfer fried items onto paper towels to drain excess oil. Serve immediately while crispy and hot for maximum deliciousness.
Pro Tips for Long John Silvers Batter
Variation Suggestions for Long John Silvers Batter
Pairing Recommendations for Long John Silvers Batter
Storage Tips for Long John Silvers Batter
FAQs for Long John Silvers Batter
The baking powder and sparkling water create extra crispiness and lightness, making the coating extra crunchy and airy compared to traditional batters.
Yes, substitute all-purpose flour with a gluten-free flour blend and ensure all other ingredients are gluten-free certified.
Ensure oil is at the correct temperature (375F) and don’t overcrowd the frying pan, which helps maintain crisp texture and prevents oil temperature drop.
Absolutely. Resting allows flour to absorb liquid, develops gluten structure, and helps create a lighter, crispier coating when fried.
Print
Long John Silvers Batter Recipe
- Total Time: 16-23 minutes
- Yield: 4 1x
Description
Crispy golden Long John Silver’s batter creates seafood magic with its light, crunchy exterior. Home cooks can easily recreate this classic restaurant-style coating that delivers perfect texture and flavor for fish and seafood lovers.
Ingredients
Main Ingredients:
- 1 cup (240 ml) all-purpose flour
- 1/2 cup (60 g) cornstarch
- 1 large egg
- 1 cup (240 ml) cold sparkling water or cold water
Leavening and Seasoning:
- 1 tablespoon (15 ml) baking powder
- 1 teaspoon (5 g) salt
- 1/2 teaspoon (2.5 g) black pepper
Fat:
- 1 tablespoon (15 ml) vegetable oil
Instructions
- Combine all dry ingredients in a spacious mixing vessel, whisking thoroughly to distribute cornstarch, baking powder, salt, and black pepper evenly throughout the flour.
- In a separate container, vigorously blend the egg with chilled sparkling water and vegetable oil until smooth and integrated.
- Gently cascade wet mixture into dry ingredients, stirring minimally to create a slightly lumpy consistency that will ensure a light, crisp coating.
- Allow batter to relax and develop texture for 10-15 minutes at room temperature, which enhances crispiness during frying.
- Preheat cooking oil in a deep fryer or heavy-bottomed skillet to precisely 375°F, utilizing a reliable kitchen thermometer for accuracy.
- Submerge protein or vegetables into batter, ensuring excess drips off, then carefully lower into sizzling oil, maintaining consistent temperature.
- Fry each item until achieving a rich golden-brown exterior, approximately 3-4 minutes per side, rotating once to guarantee even cooking.
- Transfer fried items onto absorbent paper towels to eliminate excess oil, then serve immediately while maintaining maximum crispness and temperature.
Notes
- Ensure sparkling water is ice-cold to create the crispiest, lightest batter possible for maximum crunch and texture.
- For gluten-free diets, substitute all-purpose flour with a 1:1 gluten-free flour blend to maintain similar consistency and flavor.
- Avoid overmixing the batter to prevent tough, dense coating; lumpy batter creates a lighter, crispier exterior when fried.
- Use a thermometer to maintain consistent oil temperature, preventing soggy or greasy results and ensuring perfectly golden-brown coating.
- Prep Time: 10-15 minutes
- Cook Time: 6-8 minutes
- Category: Appetizer, Snacks, Dinner
- Method: Frying
- Cuisine: American
Nutrition
- Serving Size: 4
- Calories: 154 kcal
- Sugar: 0.2 g
- Sodium: 456 mg
- Fat: 5 g
- Saturated Fat: 0.7 g
- Unsaturated Fat: 4.3 g
- Trans Fat: 0 g
- Carbohydrates: 26 g
- Fiber: 1 g
- Protein: 3.5 g
- Cholesterol: 37 mg
Sarah Mitchell
Content Specialist & Home Cooking Enthusiast
Expertise
Education
Asheville-Buncombe Technical Community College – Asheville, NC
American Fitness Professionals & Associates – Online
Sarah’s passion for food was sparked by weekend trips to the farmers’ market and her belief that healthy meals should never feel boring.
After earning her culinary diploma and becoming a certified Nutrition and Wellness Consultant, she set out to help others fall in love with simple, wholesome cooking.
She’s all about celebrating the small wins in the kitchen: a colorful yogurt bowl, a new twist on a classic dish, or a homemade snack that feels just a little extra special.
Outside the kitchen, Sarah is a gardener at heart, a yoga enthusiast, and a believer that fresh herbs can brighten any meal, and any day.