
Buttery Melting Moments Cookie Recipe for Tea Time
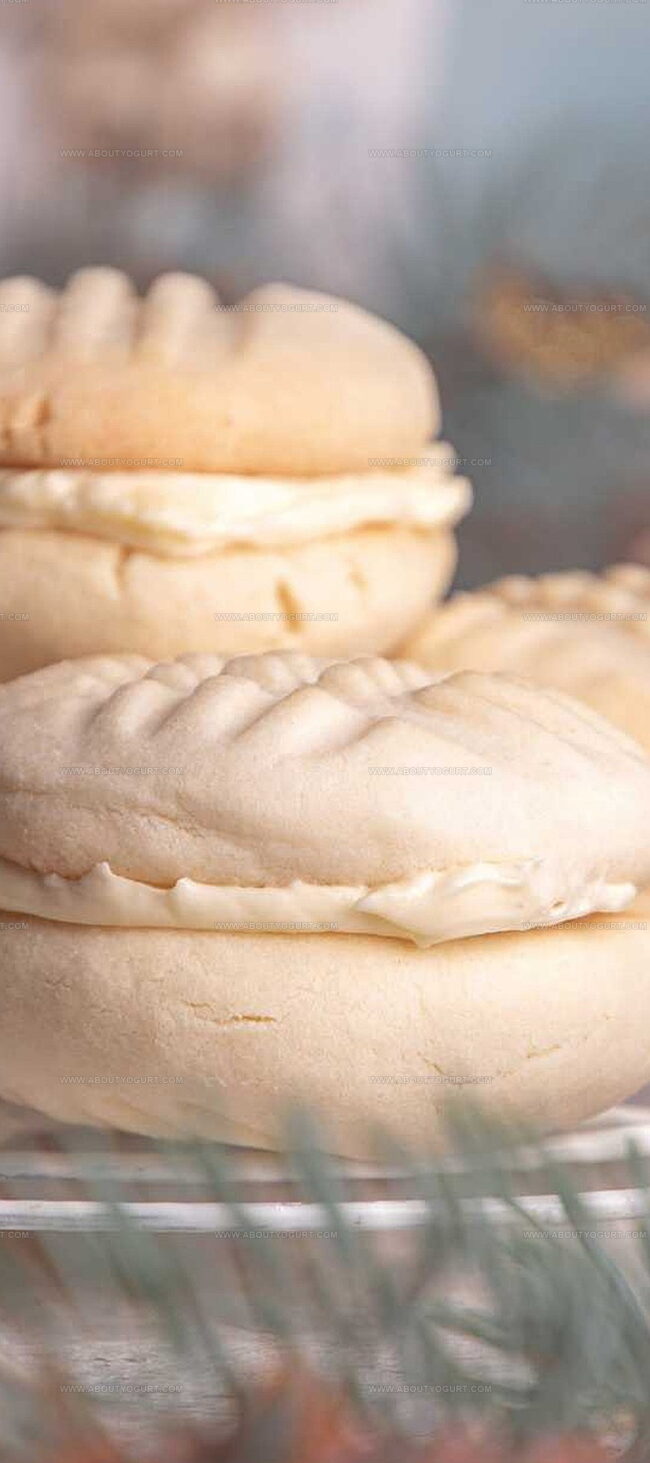
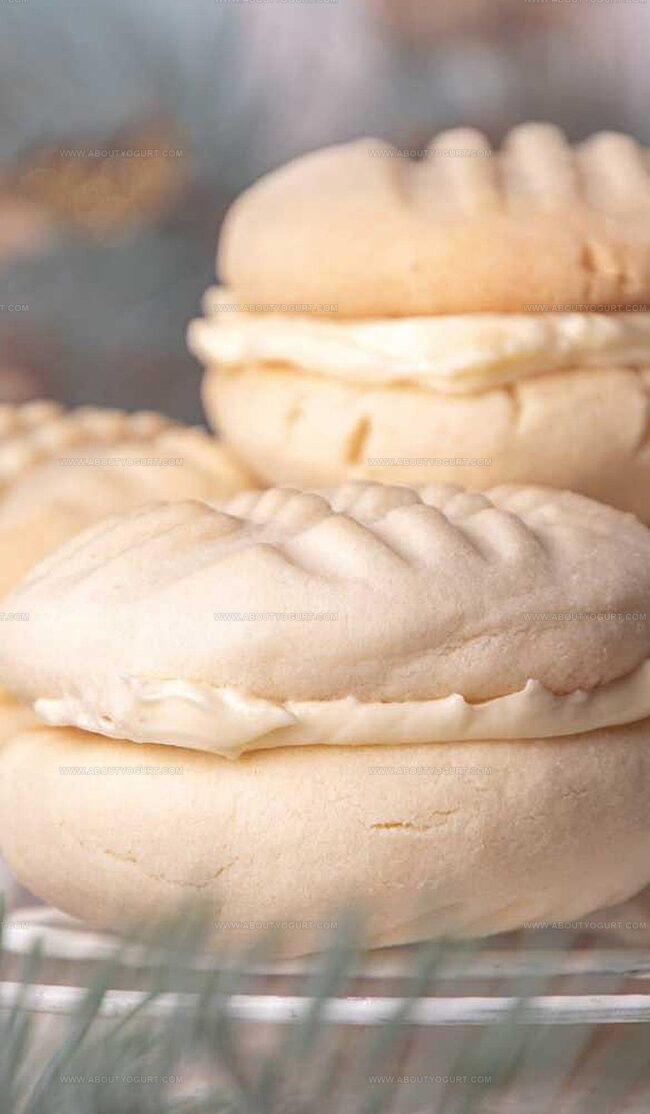
Delicate butter cookies with a melting moments recipe promise an irresistible crumbly texture that dissolves instantly on your tongue.
Soft shortbread-like delights originate from australian baking traditions.
Powdered sugar coatings add a delightful sweetness to these melt-in-your-mouth treats.
Each bite brings a gentle, cloud-like experience that feels luxurious yet simple.
Minimal ingredients create maximum flavor in this classic dessert.
Light and airy, these cookies represent pure comfort in every crumbly morsel.
Whip up this effortless recipe and surprise yourself with a moment of pure culinary bliss.
What Makes Mary Berrys Melting Moments So Good

What You Need For Mary Berrys Melting Moments
Cookies Base:Binding Ingredients:Baking Essentials:Baking Mary Berrys Melting Moments Made Simple

Step 1: Prepare Baking Setup
Grab your baking sheets and line them with parchment paper. Preheat the oven to a cozy 325°F (160°C), creating the perfect warm environment for your sweet treats.
Step 2: Create Coconut Base
In a spacious mixing bowl, combine these delightful ingredients:Stir everything together until they become best friends and form a smooth mixture.
Step 3: Whip Egg Whites
In a separate clean bowl, start whisking egg whites with a pinch of salt. Keep beating until soft, pillowy peaks form that hold their shape but aren’t too stiff.
Step 4: Combine Mixtures
Gently fold the fluffy egg whites into the coconut mixture. Use a delicate touch, like you’re tucking in a soft blanket, to keep all that lovely air and volume.
Step 5: Shape Cookies
Using a cookie scoop or two spoons, drop small mounds of the mixture onto your prepared baking sheets. Space them evenly to give each cookie room to shine.
Step 6: Bake to Golden Perfection
Slide the trays into the preheated oven and bake for 25-30 minutes. Watch for a beautiful golden-brown color that signals your cookies are ready.
Step 7: Cool and Enjoy
Remove the trays from the oven and let the cookies cool completely. Patience is key – these delicate treats need time to set and reach their ultimate tastiness.
Mary Berrys Melting Moments Helpful Tips
Fun Twists On Mary Berrys Melting Moments
What Goes Well With Mary Berrys Melting Moments
Store And Reheat Mary Berrys Melting Moments With Ease
Mary Berrys Melting Moments Common Questions
Yes, this recipe is naturally gluten-free since it uses coconut as the main ingredient without wheat flour.
No, condensed milk provides both sweetness and binding for the cookies, so substituting it will change the recipe’s texture and taste.
Medium peaks hold their shape but slightly curl over when the beater is lifted, looking soft and glossy but not stiff.
Gentle folding preserves the air bubbles in the egg whites, which helps create a light, soft texture in the cookies.
Print
Melting Moments Recipe
- Total Time: 35-40 minutes
- Yield: 12 1x
Description
Delicate “Melting Moments” cookies whisper sweet nostalgia from Australian bakeries. Buttery shortbread rounds dusted with powdered sugar crumble gently, promising a delightful experience that connects generations through simple, elegant baking.
Ingredients
Main Ingredients:
- 250 grams (8.8 ounces) unsalted butter, softened
- 250 grams (8.8 ounces) all-purpose flour
Dry Ingredients:
- 60 grams (2.1 ounces) powdered sugar
- 60 grams (2.1 ounces) cornstarch
- 1 pinch salt
Flavor Enhancers:
- 1 teaspoon vanilla extract
- Zest of 1 lemon
Instructions
- Prepare workspace by lining baking sheets with parchment paper and preheating oven to 325F (160C).
- Combine coconut, condensed milk, and vanilla extract in a spacious mixing bowl, creating a smooth base mixture.
- In a separate clean bowl, whip egg whites with salt, beating until soft, billowy peaks develop.
- Carefully incorporate whipped egg whites into coconut mixture, using gentle folding technique to maintain airy texture.
- Use cookie scoop or tablespoons to deposit uniform mounds of mixture onto prepared baking sheets, spacing evenly.
- Transfer trays to preheated oven and bake for 25-30 minutes, monitoring color transformation to golden brown.
- Remove from oven and allow cookies to rest on baking sheets for initial cooling phase.
- Transfer delicate cookies to wire rack, permitting complete cooling to achieve optimal texture and stability.
- Once thoroughly cooled, arrange on serving platter and present for enjoyment.
Notes
- Chilling these delicate cookies completely ensures they maintain their perfect melt-in-your-mouth texture and don’t crumble when handled.
- Whip egg whites to medium peaks, not stiff peaks, to keep the cookies light and airy without becoming dense or tough.
- Use fresh, high-quality shredded coconut for the most intense flavor and best overall texture in these delightful treats.
- For a gluten-free version, double-check that all ingredients are certified gluten-free, especially the vanilla extract and coconut.
- Prep Time: 10 minutes
- Cook Time: 25-30 minutes
- Category: Desserts, Snacks
- Method: Baking
- Cuisine: Australian
Nutrition
- Serving Size: 12
- Calories: 168
- Sugar: 3 g
- Sodium: 12 mg
- Fat: 11 g
- Saturated Fat: 7 g
- Unsaturated Fat: 4 g
- Trans Fat: 0.2 g
- Carbohydrates: 15 g
- Fiber: 0.3 g
- Protein: 1.5 g
- Cholesterol: 30 mg
Michael Thompson
Founder & Recipe Developer
Expertise
Education
Cascade Culinary Institute – Bend, OR
ServSafe Food Handler Certification – Portland, OR
Focus: Certified in core food safety and hygiene principles for both home and professional kitchens, with emphasis on ingredient handling, kitchen cleanliness, and safe preparation methods.
Mike’s kitchen journey began with a single goal: to make everyday meals feel like something worth celebrating.
After earning his Certificate in Culinary Arts from Cascade Culinary Institute, he spent years working with local farmers and small kitchens across Oregon, learning the beauty of seasonal, small-batch cooking.
Mike’s approach is simple, cook with what’s fresh, keep it approachable, and always leave room for a little creativity. When he’s not testing yogurt marinades or designing single-serving meals, you’ll find him hiking trails or hunting down the best berries at local markets.