
Mini Biscoff Cheesecakes Recipe for Sweet Snacking Joy
Sweet moments call for special mini biscoff cheesecakes that melt into pure bliss.
Creamy layers blend smooth textures with crunchy cookie crumbles.
Every bite promises delightful comfort and indulgence.
Unexpected combinations create magic in small dessert portions.
Bakers love how simple ingredients can produce stunning results.
Minimal effort leads to maximum satisfaction with these irresistible treats.
You’ll want to savor each delectable spoonful and share the joy with everyone around you.
Why Mini Biscoff Cheesecakes Are Hard To Resist
Everything Needed For Mini Biscoff Cheesecakes
Crust Ingredients:Cheesecake Filling Ingredients:Topping Ingredients:How To Put Together Mini Biscoff Cheesecakes
Step 1: Create Crumbly Crust
Mix Biscoff cookie crumbs, sugar, and melted butter in a bowl until thoroughly combined. This creates a delectable base that will hold your cheesecake perfectly.
Step 2: Press Crust into Pan
Distribute the crumb mixture into mini cheesecake pan, pressing firmly to form a solid foundation. Use the back of a spoon to compact the crust evenly.
Step 3: Whip Creamy Cheesecake Filling
Beat cream cheese with ingredients:Use an electric mixer until the mixture becomes silky smooth and free of lumps.
Step 4: Enhance Filling Texture
Pour heavy cream into the mixture and whip on medium-high speed. Continue beating until the filling becomes light, airy, and develops a fluffy consistency.
Step 5: Fill Cheesecake Shells
Transfer the creamy mixture into a piping bag. Carefully pipe the filling onto prepared crusts, slightly overflowing the pan edges for a luscious look.
Step 6: Chill and Set
Refrigerate the mini cheesecakes for 12 hours or overnight. This allows the filling to firm up and develop rich flavors.
Step 7: Prepare Whipped Topping
Whip together:Beat until medium-stiff peaks form, creating a cloudlike topping.
Step 8: Decorate with Flair
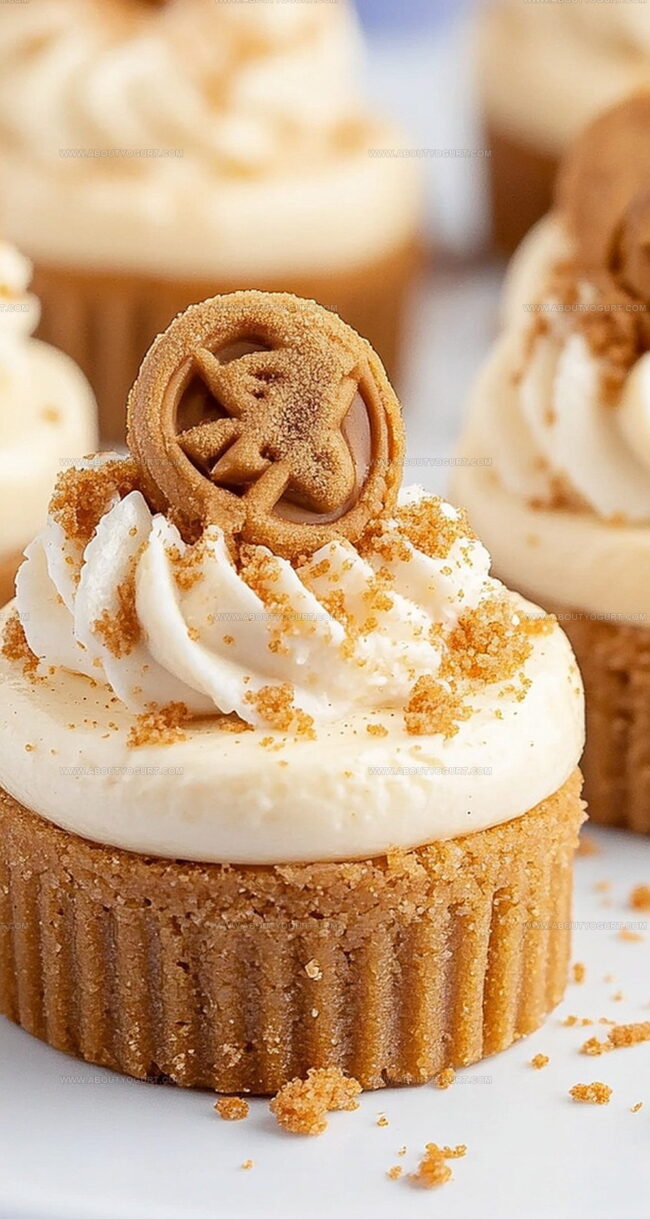
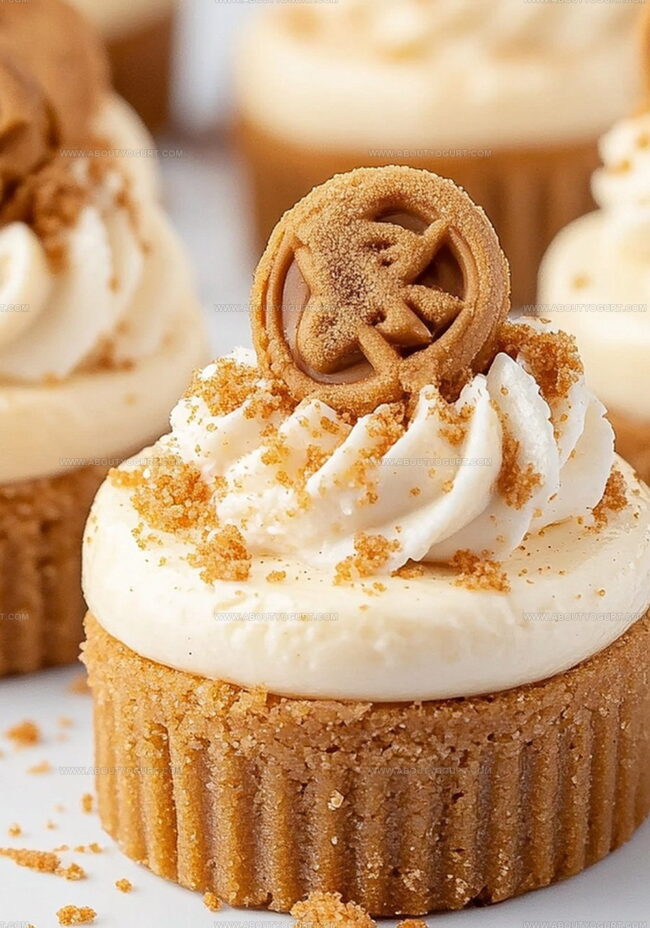
Warm Biscoff spread in microwave for 30 seconds. Drizzle over chilled cheesecakes in elegant patterns.
Step 9: Add Final Touches
Pipe whipped cream swirls using a Wilton 1M tip. Sprinkle crushed Biscoff cookies and garnish with a half cookie for a stunning presentation.
Tips That Help When Making Mini Biscoff Cheesecakes
Ways To Tweak Mini Biscoff Cheesecakes
What Works Well With Mini Biscoff Cheesecakes
Storing Mini Biscoff Cheesecakes The Smart Way
FAQ For Mini Biscoff Cheesecakes
Biscoff cookies are Belgian caramelized shortbread cookies with a distinct spiced flavor, originally created by Lotus Bakeries. They have a crunchy texture and sweet caramel taste that’s popular worldwide.
Yes, you can use a standard muffin tin lined with cupcake liners. Just ensure you grease the liners lightly to help with easy removal of the cheesecakes.
Biscoff spread is a creamy version of the cookies, made by grinding the cookies into a smooth, spreadable consistency. It has the same caramel and spice flavor profile as the original cookies.
Print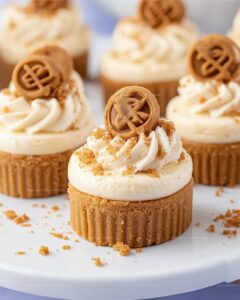
Mini Biscoff Cheesecakes Recipe
- Total Time: 12 hours 20 minutes
- Yield: 12 1x
Description
Creamy mini biscoff cheesecakes deliver a delightful twist on classic desserts, blending smooth cream cheese with irresistible cookie butter. Crunchy biscoff cookie base and silky filling promise pure indulgence that will transport you to sweet bliss.
Ingredients
Crust Ingredients:
- 2 cups (256 grams) Biscoff cookie crumbs
- 6 tablespoons (85 grams) salted butter, melted
- 2 tablespoons (25 grams) granulated sugar
Cheesecake Filling Ingredients:
- 16 ounces (454 grams) cream cheese, room temperature
- 1 ¾ cups (210 grams) powdered sugar
- 1 cup (250 grams) Biscoff spread (cookie butter)
- 1 cup (240 milliliters) heavy cream
- 2 teaspoons vanilla extract
Topping Ingredients:
- ¾ cup (180 milliliters) heavy cream
- 2 tablespoons (15 grams) powdered sugar
- ½ teaspoon vanilla extract
- ¾ cup (180 grams) Biscoff spread (cookie butter), melted
- 2 tablespoons (16 grams) Biscoff cookie crumbs
- 12 Biscoff cookies, halved
Instructions
- Crush Biscoff cookies into fine crumbs and blend with melted butter and sugar to create a cohesive crust mixture.
- Distribute the crumb mixture evenly into mini cheesecake pan cavities, pressing firmly to compact the base.
- Whip cream cheese with Biscoff spread, powdered sugar, and vanilla extract until achieving a silky, uniform consistency.
- Gradually incorporate heavy cream into the mixture, blending on medium-high speed until the texture becomes airy and voluminous.
- Transfer the cheesecake filling into a piping bag and carefully distribute over the prepared crusts, slightly overfilling each cavity.
- Refrigerate the assembled mini cheesecakes for 12-14 hours, allowing them to set completely and develop a rich, creamy texture.
- Gently extract the chilled cheesecakes from the pan, ensuring careful handling to maintain their delicate structure.
- Prepare a stabilized whipped cream by whisking heavy cream with powdered sugar and vanilla until medium-stiff peaks form.
- Warm the Biscoff spread in the microwave for 20-30 seconds until it reaches a smooth, drizzling consistency.
- Embellish each mini cheesecake by drizzling melted Biscoff spread in an artistic pattern.
- Pipe an elegant whipped cream swirl atop each cheesecake using a decorative Wilton 1M tip.
- Sprinkle crushed Biscoff cookie crumbs and garnish with a halved Biscoff cookie for a final flourish.
Notes
- Crust Consistency Matters: Press the Biscoff cookie crumbs firmly and evenly to create a solid, compact base that won’t crumble when serving.
- Cream Cheese Temperature: Ensure cream cheese is at room temperature for smoother mixing and preventing lumps in the cheesecake filling.
- Whipping Technique: Whip the heavy cream slowly at first, then increase speed to prevent splattering and achieve a stable, fluffy texture.
- Make-Ahead Magic: These mini cheesecakes can be prepared up to 3 days in advance, making them perfect for stress-free entertaining.
- Prep Time: 20 minutes
- Cook Time: 0 minutes
- Category: Desserts
- Method: Refrigerating
- Cuisine: American
Nutrition
- Serving Size: 12
- Calories: 382 kcal
- Sugar: 34 g
- Sodium: 130 mg
- Fat: 27 g
- Saturated Fat: 16 g
- Unsaturated Fat: 10 g
- Trans Fat: 0.5 g
- Carbohydrates: 31 g
- Fiber: 1 g
- Protein: 5 g
- Cholesterol: 70 mg
Michael Thompson
Founder & Recipe Developer
Expertise
Education
Cascade Culinary Institute – Bend, OR
ServSafe Food Handler Certification – Portland, OR
Focus: Certified in core food safety and hygiene principles for both home and professional kitchens, with emphasis on ingredient handling, kitchen cleanliness, and safe preparation methods.
Mike’s kitchen journey began with a single goal: to make everyday meals feel like something worth celebrating.
After earning his Certificate in Culinary Arts from Cascade Culinary Institute, he spent years working with local farmers and small kitchens across Oregon, learning the beauty of seasonal, small-batch cooking.
Mike’s approach is simple, cook with what’s fresh, keep it approachable, and always leave room for a little creativity. When he’s not testing yogurt marinades or designing single-serving meals, you’ll find him hiking trails or hunting down the best berries at local markets.