
No-Bake Orange Creamsicle Truffle Recipe for Summer
Sweet memories of childhood summers dance through my orange creamsicle truffles, a delightful treat that captures nostalgic flavors in every bite.
Cool citrus notes blend perfectly with creamy textures.
Each truffle promises a burst of refreshing excitement without turning on the oven.
Minimal ingredients create maximum happiness in these delectable spheres of joy.
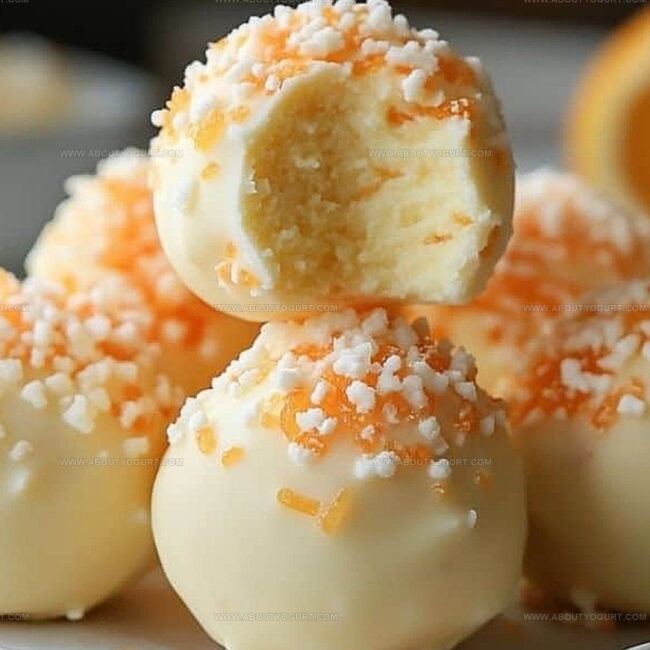
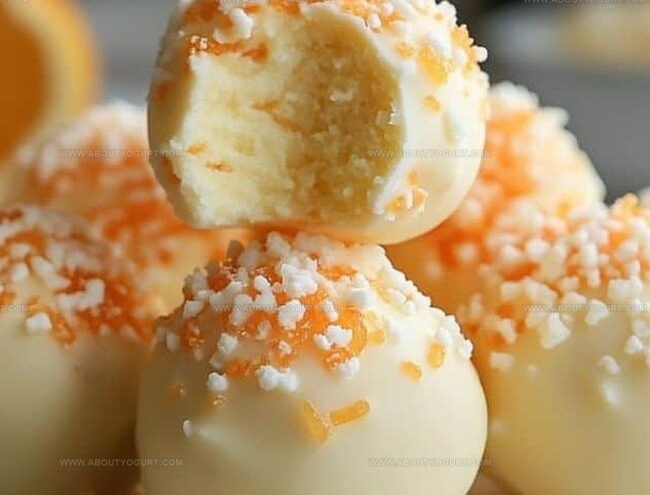
Smooth white chocolate provides a luxurious canvas for zesty orange essence.
Simple steps mean anyone can craft these elegant confections at home.
Dive into this effortless recipe and let your taste buds celebrate a classic flavor reimagined.
Why No Bake Orange Creamsicle Truffles Are Refreshing and Simple
Ingredients for No Bake Orange Creamsicle Truffles
Base Ingredients:Flavor Enhancers:Coating Ingredients:How to Make No Bake Orange Creamsicle Truffles
Step 1: Warm Orange-Infused Butter
Grab a saucepan and sprinkle in fresh orange zest with butter. Gently heat the mixture, letting the citrusy aroma dance and release its vibrant flavors. Stir softly to prevent burning and allow the zest to mingle with the butter.
Step 2: Blend Creamy Chocolate Base
Pour the warm butter mixture through a fine strainer directly over white chocolate chips. Let the heat slowly melt the chocolate, creating a silky smooth base. Whisk gently until the mixture becomes perfectly uniform and glossy.
Step 3: Enhance Flavor Profile
Splash in orange extract and add a few drops of bright orange food coloring. Stir until the mixture transforms into a dreamy, creamy consistency that looks like liquid sunshine.
Step 4: Chill and Solidify
Cover the bowl with plastic wrap and slide it into the refrigerator. Allow the mixture to cool and firm up for 1-2 hours, giving it time to develop its rich, decadent texture.
Step 5: Shape Delightful Truffles
Prepare two separate bowls of confectioners sugar. Using a spoon, scoop out small portions of the chilled mixture and roll them into perfect little spheres. Gently coat each truffle in the sugar, creating a delicate, powdery exterior.
Step 6: Final Freeze and Serve
Transfer the coated truffles to the freezer for 20 minutes to set completely. Once firm, move them to the refrigerator until you’re ready to indulge in these heavenly orange creamsicle treats.
Pro Tips for No Bake Orange Creamsicle Truffles
Variation Ideas for No Bake Orange Creamsicle Truffles
Pairing Suggestions for No Bake Orange Creamsicle Truffles
Storage Advice for No Bake Orange Creamsicle Truffles
FAQs on No Bake Orange Creamsicle Truffles
The orange zest and orange extract provide the authentic creamsicle taste, creating a bright citrusy profile that mimics the classic frozen treat.
Yes, the orange food coloring is optional and only used for visual appeal. The truffles will taste exactly the same without adding color.
These truffles can be stored in the refrigerator for up to 5-7 days in an airtight container, maintaining their creamy texture and delicious flavor.
Print
No Bake Orange Creamsicle Truffles Recipe
- Total Time: 1 hour 33 minutes
- Yield: 12 1x
Description
Creamy orange dreamsicles dance into delightful no bake orange creamsicle truffles, bringing nostalgic summer memories to sweet life. Cool citrus notes and velvety white chocolate create irresistible bites you’ll savor with pure childhood joy.
Ingredients
Main Ingredients:
- 1 cup white chocolate melting chips
- 1/4 cup unsalted butter
- 3 tablespoons (44 milliliters) heavy cream
Flavor Enhancers:
- 1 orange zest
- 1/2 teaspoon orange extract
- A few drops orange food coloring
Sweetener:
- 1/2 cup confectioners sugar
Instructions
- Create an aromatic base by gently heating butter with vibrant orange zest in a saucepan for approximately 1 minute, releasing the citrusy essential oils.
- Incorporate heavy cream into the zesty butter mixture, stirring consistently to prevent scorching and ensure smooth integration over 2 minutes.
- Position white chocolate melting chips in a medium bowl, then strain the warm cream-butter mixture directly over them, allowing residual heat to gradually melt the chocolate.
- Enhance the flavor profile by whisking in orange extract and a few drops of orange food coloring, creating a uniform, glossy mixture with subtle tangerine undertones.
- Seal the bowl with plastic wrap and refrigerate for 1-2 hours until the mixture transforms into a firm, moldable consistency.
- Prepare two separate confectioners sugar bowls for coating the truffles.
- Using a spoon, carefully portion and roll the chilled mixture into uniform tablespoon-sized spheres.
- Gently coat each truffle by rolling them through the first sugar bowl, then repeat the process in the second bowl for a delicate, powdery finish.
- Stabilize the truffles by placing them in the freezer for 20 minutes, then transfer to the refrigerator until serving time to maintain their delicate structure.
Notes
- Zest Selection Matters: Choose fresh, bright oranges with vibrant, aromatic peels to maximize the citrusy flavor profile of the truffles.
- Temperature Control is Key: Keep the butter and cream mixture warm but not boiling to prevent chocolate from seizing or separating during melting process.
- Smooth Texture Technique: Strain the butter-zest mixture through a fine mesh sieve to ensure a silky, refined truffle without any orange zest chunks.
- Coating Perfection: Use a light touch when rolling truffles in powdered sugar to create a delicate, even coating that melts beautifully in your mouth.
- Prep Time: 10 minutes
- Cook Time: 3 minutes
- Category: Desserts, Snacks
- Method: Simmering
- Cuisine: American
Nutrition
- Serving Size: 12
- Calories: 189 kcal
- Sugar: 17 g
- Sodium: 15 mg
- Fat: 13 g
- Saturated Fat: 8 g
- Unsaturated Fat: 5 g
- Trans Fat: 0.2 g
- Carbohydrates: 19 g
- Fiber: 0.1 g
- Protein: 1 g
- Cholesterol: 18 mg
Sarah Mitchell
Content Specialist & Home Cooking Enthusiast
Expertise
Education
Asheville-Buncombe Technical Community College – Asheville, NC
American Fitness Professionals & Associates – Online
Sarah’s passion for food was sparked by weekend trips to the farmers’ market and her belief that healthy meals should never feel boring.
After earning her culinary diploma and becoming a certified Nutrition and Wellness Consultant, she set out to help others fall in love with simple, wholesome cooking.
She’s all about celebrating the small wins in the kitchen: a colorful yogurt bowl, a new twist on a classic dish, or a homemade snack that feels just a little extra special.
Outside the kitchen, Sarah is a gardener at heart, a yoga enthusiast, and a believer that fresh herbs can brighten any meal, and any day.