
No-Bake Chocolate Pink Cheesecake Recipe for Sweet Lovers
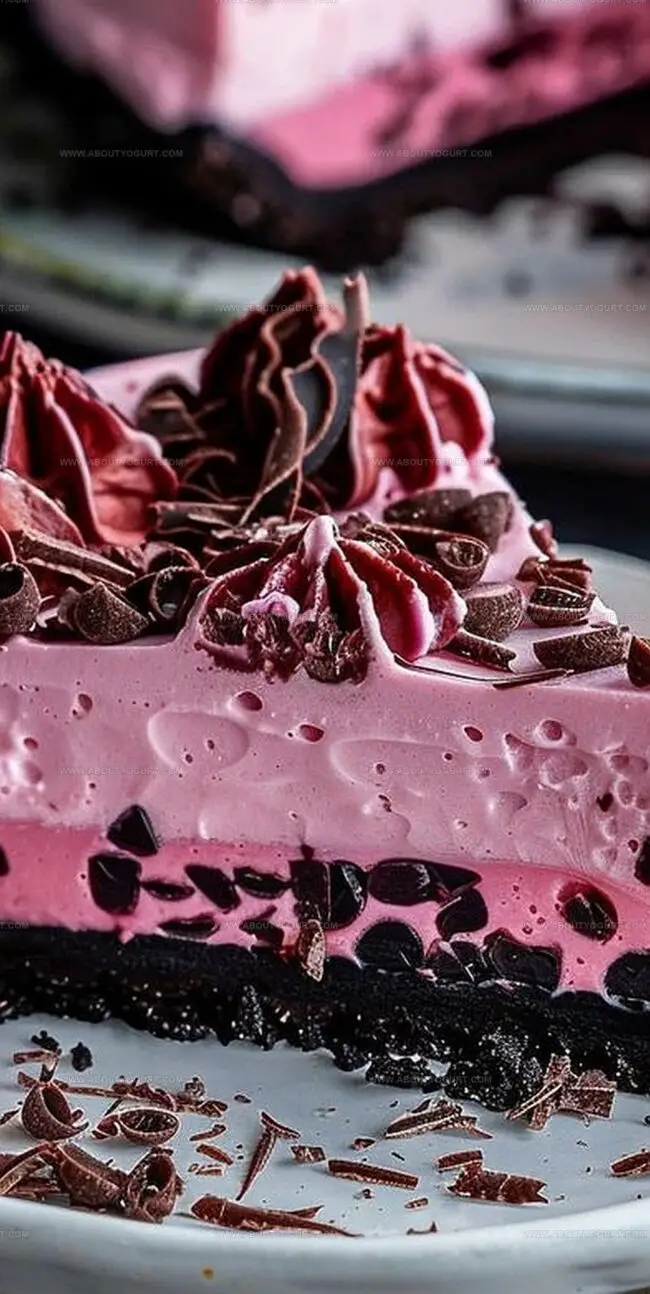
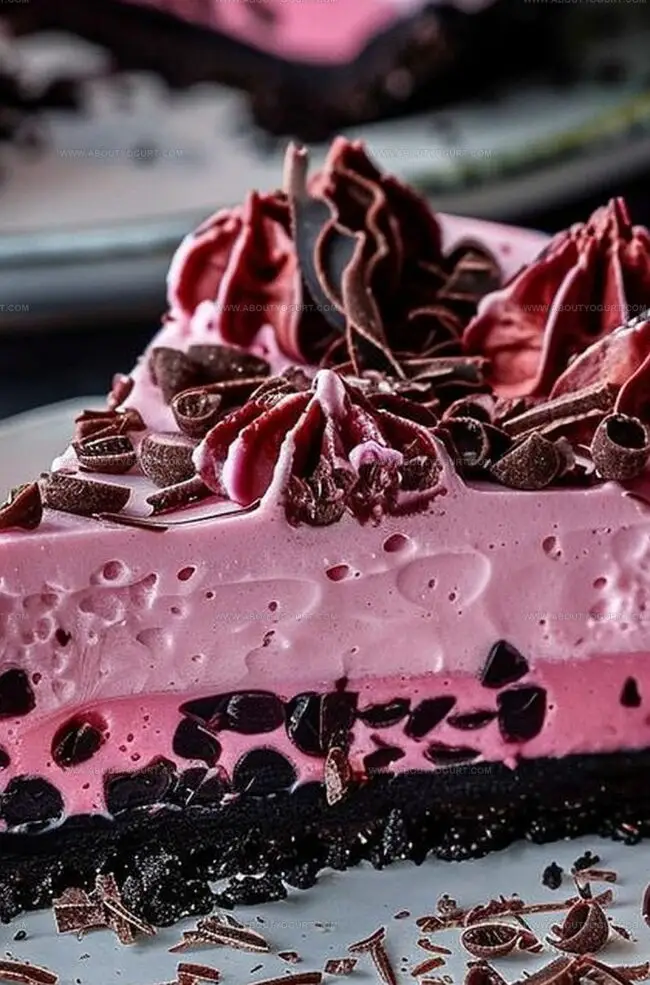
Creamy no-bake chocolate pink cheesecake brings a delightful twist to classic dessert traditions.
Layers of smooth chocolate and blush-colored filling promise a visual and taste sensation.
Rich cocoa notes blend seamlessly with delicate raspberry undertones.
Chilled perfection awaits those who appreciate elegant yet simple sweet experiences.
Cool, silky textures melt across your palate with each incredible bite.
Zero oven time means maximum convenience without compromising decadent flavor profiles.
You’ll fall in love with this dreamy, effortless treat that looks as spectacular as it tastes.
What Makes No-Bake Chocolate Pink Cheesecake So Tempting
Ingredients Needed for No-Bake Chocolate Pink Cheesecake
Crust Ingredients:Cheesecake Filling Ingredients:Ganache Topping Ingredients:Optional Garnish Ingredients:How to Prepare No-Bake Chocolate Pink Cheesecake
Step 1: Crush Cookie Base
Grab a food processor or rolling pin to crush chocolate cookies into fine crumbs. Mix crumbs with melted butter until the texture resembles wet sand. Press this mixture firmly into the bottom of a springform pan, creating an even layer that will hold the cheesecake.
Step 2: Whip Cream Cheese Smooth
Beat cream cheese in a large mixing bowl until it becomes silky and free of lumps. Add powdered sugar and vanilla extract, continuing to mix until the ingredients blend into a luxurious, creamy consistency.
Step 3: Fold Whipped Cream
Gently incorporate whipped cream into the cream cheese mixture, using folding motions to maintain the light and airy texture. The goal is a smooth, velvety filling that will melt in your mouth.
Step 4: Split Cheesecake Batter
Carefully divide the cheesecake batter into two separate bowls, preparing for the color transformation.
Step 5: Create Chocolate Layer
Melt semisweet chocolate and stir into one portion of the batter. Mix thoroughly until the chocolate is completely integrated, creating a rich, dark layer.
Step 6: Craft Pink Layer
Add pink food coloring to the second bowl of batter. Stir until you achieve a vibrant, soft pink shade that looks both playful and delicious.
Step 7: Build Colorful Layers
Spoon alternating dollops of chocolate and pink batter onto the cookie crust. Use a random, playful approach to create an exciting visual pattern.
Step 8: Swirl Magic
Take a knife or skewer and gently drag it through the layers. Create mesmerizing swirls that blend the chocolate and pink colors without overmixing.
Step 9: First Chill
Place the cheesecake in the refrigerator while preparing the ganache topping.
Step 10: Craft Chocolate Ganache
Heat heavy cream in a saucepan until it just starts to simmer. Pour the hot cream over chocolate chips in a separate bowl. Let it sit briefly, then stir until the mixture becomes glossy and smooth.
Step 11: Top with Ganache
Pour the silky chocolate ganache over the chilled cheesecake. Use a spatula to spread it evenly, ensuring complete coverage.
Step 12: Final Chill
Refrigerate the cheesecake for at least 4 hours, or ideally overnight, allowing it to set perfectly.
Step 13: Decorate and Serve
Before serving, add optional garnishes like whipped cream rosettes, chocolate shavings, or fresh berries to elevate the visual appeal and add extra flavor.
Pro Suggestions for No-Bake Chocolate Pink Cheesecake
Variation Ideas for No-Bake Chocolate Pink Cheesecake
Ideal Pairings for No-Bake Chocolate Pink Cheesecake
Proper Storage of No-Bake Chocolate Pink Cheesecake
FAQs on No-Bake Chocolate Pink Cheesecake
Yes, graham crackers or chocolate graham crackers work great as an alternative to chocolate cookie crumbs. Just maintain the same ratio of crumbs to melted butter.
Ensure all ingredients are at room temperature and mix gently to avoid incorporating too much air. Overmixing can cause cracks and a less smooth texture.
No, you can skip the food coloring if you prefer. The cheesecake will still taste delicious without the pink color. If you want a natural pink hue, try using a small amount of raspberry puree.
Print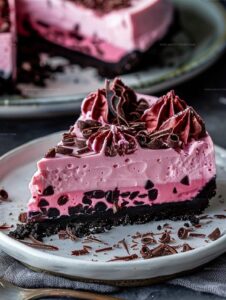
No-Bake Chocolate Pink Cheesecake Recipe
- Total Time: 4 hours 25 minutes
- Yield: 4 1x
Description
Silky pink chocolate cheesecake emerges as a dreamy dessert that combines rich cocoa with delicate rose-colored charm. Creamy layers promise pure indulgence without heating up your kitchen, inviting you to savor each luxurious bite.
Ingredients
Main Ingredients:
- 16 ounces (454 grams) cream cheese, softened
- 1 cup heavy cream
- 1/2 cup pink white chocolate, melted
Crust Ingredients:
- 1 1/2 cups chocolate cookie crumbs
- 1/4 cup granulated sugar
- 1/3 cup unsalted butter, melted
Flavoring and Stabilizing Ingredients:
- 1/4 cup powdered sugar
- 1 teaspoon vanilla extract
- 2 tablespoons water
- 1 packet unflavored gelatin
Instructions
- Craft a decadent base by pulverizing chocolate cookies with sugar and melted butter, pressing the mixture compactly into a springform pan’s bottom.
- Whip cream cheese until silky, incorporating powdered sugar and vanilla extract into a velvety consistency.
- Gently fold whipped cream into the mixture, creating a luxurious, airy texture.
- Separate the cheesecake batter into two distinct portions.
- Transform one portion by integrating melted semisweet chocolate thoroughly.
- Enhance the alternate portion with pink food coloring, achieving a vibrant hue.
- Artfully distribute chocolate and pink batters across the crust, creating an interlacing pattern.
- Employ a knife to delicately marble the color layers, generating an elegant swirled design.
- Chill the preliminary creation while preparing ganache.
- Warm heavy cream until it barely reaches simmering point, then cascade over chocolate chips. Allow brief resting, then stir until achieving a glossy, smooth consistency.
- Lavishly drape the ganache across the chilled cheesecake, ensuring uniform coverage.
- Refrigerate for a minimum of 4 hours, allowing complete setting and flavor melding.
- Elevate presentation with optional garnishes like whipped cream, chocolate shavings, or fresh berries before serving.
Notes
- Crust Tip: Press the cookie crumb mixture firmly and evenly to create a solid, compact base that won’t crumble when slicing the cheesecake.
- Cream Cheese Trick: Ensure cream cheese is at room temperature to achieve a smooth, lump-free filling that blends perfectly.
- Whipping Wisdom: Fold whipped cream gently to maintain its airy texture and prevent deflating the mixture.
- Color Control: Add food coloring gradually to achieve the desired pink shade without altering the cheesecake’s consistency.
- Swirl Technique: Use a light hand when creating the marbled effect to maintain distinct chocolate and pink layers.
- Make-Ahead Magic: This dessert can be prepared up to 2 days in advance, making it ideal for stress-free entertaining.
- Prep Time: 20 minutes
- Cook Time: 5 minutes
- Category: Desserts
- Method: Refrigerating
- Cuisine: American
Nutrition
- Serving Size: 4
- Calories: 194
- Sugar: 7 g
- Sodium: 36 mg
- Fat: 11 g
- Saturated Fat: 6 g
- Unsaturated Fat: 4 g
- Trans Fat: 0.1 g
- Carbohydrates: 22 g
- Fiber: 1 g
- Protein: 2 g
- Cholesterol: 18 mg
Sarah Mitchell
Content Specialist & Home Cooking Enthusiast
Expertise
Education
Asheville-Buncombe Technical Community College – Asheville, NC
American Fitness Professionals & Associates – Online
Sarah’s passion for food was sparked by weekend trips to the farmers’ market and her belief that healthy meals should never feel boring.
After earning her culinary diploma and becoming a certified Nutrition and Wellness Consultant, she set out to help others fall in love with simple, wholesome cooking.
She’s all about celebrating the small wins in the kitchen: a colorful yogurt bowl, a new twist on a classic dish, or a homemade snack that feels just a little extra special.
Outside the kitchen, Sarah is a gardener at heart, a yoga enthusiast, and a believer that fresh herbs can brighten any meal, and any day.