Dreamy No-Bake Funfetti Oreo Icebox Cake Recipe for Sweet Bliss
Sweet memories burst through every delightful no-bake funfetti oreo icebox cake slice that connects childhood joy with grown-up dessert magic.
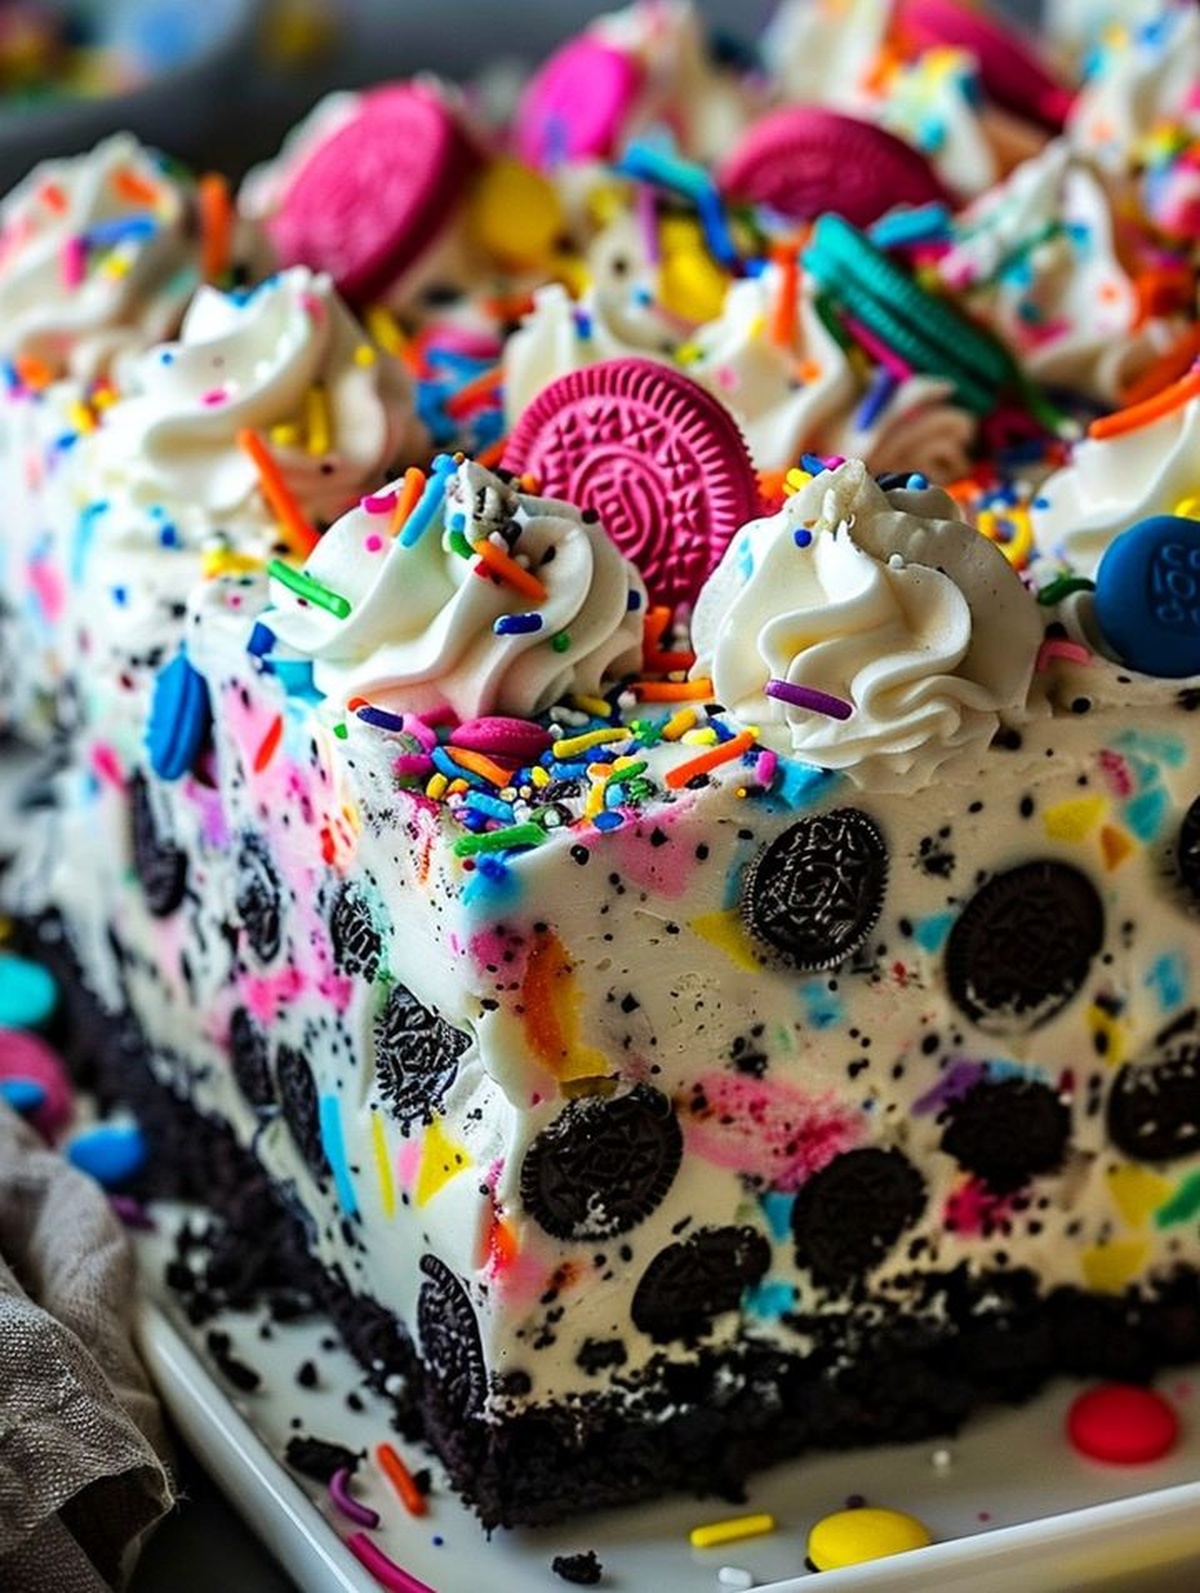
Colorful sprinkles dance across creamy layers, promising a playful treat that requires zero oven time.
Cookies create the perfect crunchy foundation for this dreamy confection.
Whipped cream transforms simple ingredients into an irresistible celebration of flavor and texture.
Our cool dessert combines classic oreo cookies with festive funfetti for a stunning no-fuss creation.
Minimal effort delivers maximum happiness in each delectable bite you’ll savor.
Prepare to wow everyone with this ridiculously easy and utterly charming summer dessert.
Storing Your No-Bake Funfetti Oreo Icebox Cake Properly
No-Bake Funfetti Oreo Icebox Cake FAQs
The Funfetti cake mix and vanilla extract create a sweet, celebratory taste, while Oreo cookies add a classic chocolate crunch to the creamy dessert.
No, it’s incredibly easy! This no-bake dessert requires simple mixing and layering techniques, making it perfect for home cooks of all skill levels.
Absolutely! The icebox cake actually improves when refrigerated for 4-8 hours, allowing the cookies to soften and flavors to blend perfectly.
You’ll only need basic kitchen tools like a mixing bowl, electric mixer, and a 9×13 inch dish – nothing complicated or expensive.
No-Bake Funfetti Oreo Icebox Cake — Fun Without the Oven!
Ingredients for No-Bake Funfetti Oreo Icebox Cake
Base Ingredients:Cake and Milk:Cookie Layer:Topping:Easy Steps for No-Bake Funfetti Oreo Icebox Cake
Step 1: Whip The Creamy Cloud
In a spacious mixing bowl, transform heavy cream, powdered sugar, and vanilla extract into a billowy, cloud-like mixture with stiff, standing peaks. Set this fluffy creation aside for later magic.
Step 2: Blend The Cheesy Base
Grab another bowl and transform cream cheese into a silky smooth texture. Pour in Funfetti cake mix and milk, blending until everything harmonizes into a creamy, dreamy consistency.
Step 3: Fold The Dreamy Layers
Gently marry the whipped cream into the cream cheese mixture, creating a mesmerizing swirl of sweetness. Use soft, careful motions to preserve the airy texture.
Step 4: Create The Foundation
Grab a rectangular baking dish and spread a delicate, thin layer of the cream mixture across the bottom, creating a smooth canvas for the upcoming layers.
Step 5: Build The Oreo Layer
Carefully arrange Oreo cookies in a neat, snug pattern over the cream foundation. Generously drape another layer of cream mixture over the cookies, ensuring complete coverage.
Step 6: Repeat The Layering Dance
Continue building beautiful layers of Oreo cookies and cream mixture, alternating with artistic precision. Finish with a luxurious top layer of cream mixture.
Step 7: Sprinkle The Celebration
Shower the top with a vibrant cascade of colorful sprinkles, adding a playful, festive touch to your creation.
Step 8: Chill And Transform
Cover the dish and let it rest in the refrigerator for a minimum of 4 hours or ideally overnight. During this time, the cookies will soften and the flavors will mingle, creating a delectable dessert experience.
Pro Tips to Nail No-Bake Funfetti Oreo Icebox Cake
Variations to Jazz Up No-Bake Funfetti Oreo Icebox Cake
Perfect Pairings with No-Bake Funfetti Oreo Icebox Cake
Print
No-Bake Funfetti Oreo Icebox Cake Recipe
- Total Time: 4 hours 20 minutes
- Yield: 8 1x
Description
Magical no-bake funfetti oreo icebox cake brings childhood nostalgia and party vibes to dessert tables. Cool creamy layers meld with crunchy cookie textures, creating a delightful sweet treat you’ll crave at every celebration.
Ingredients
Main Ingredients:
- 1 package (14.3 ounces / 405 grams) Oreo cookies
- 1 package (8 ounces / 226 grams) cream cheese, softened
- 1/2 cup Funfetti cake mix
Dairy and Cream Components:
- 2 cups heavy cream
- 1/4 cup milk
- 1/4 cup powdered sugar
Flavor and Decoration:
- 1 teaspoon vanilla extract
- 1/4 cup sprinkles
Instructions
- Whip heavy cream, powdered sugar, and vanilla extract until forming thick, sturdy peaks. Reserve the whipped cream mixture to the side.
- Thoroughly beat cream cheese until completely smooth and creamy.
- Incorporate Funfetti cake mix and milk into the cream cheese, stirring until perfectly integrated and no lumps remain.
- Delicately fold the previously whipped cream into the cream cheese mixture, ensuring gentle and complete blending.
- Prepare a 9×13 inch dish by spreading a thin, even layer of cream mixture across the bottom surface.
- Create the first cookie layer by precisely arranging Oreo cookies across the cream base, covering the entire surface.
- Carefully spread another generous layer of cream mixture directly over the Oreo cookies, ensuring complete coverage.
- Repeat the layering process, alternating between Oreo cookies and cream mixture, finishing with a final cream layer on top.
- Generously scatter colorful sprinkles across the uppermost cream surface for visual appeal and festive texture.
- Securely cover the dish with plastic wrap or lid and refrigerate for minimum 4 hours, preferably overnight, allowing cookies to soften and flavors to harmonize completely.
Notes
- Soften cream cheese at room temperature to prevent lumps and ensure smooth mixing.
- Use room temperature ingredients for better blending and smoother texture.
- Whip heavy cream to stiff peaks for a light, airy consistency that holds its shape perfectly.
- Fold ingredients gently to maintain the whipped cream’s volume and prevent deflation.
- Choose full-fat cream cheese for richer, more stable filling.
- Chill the dish longer for softer, more cake-like Oreo layers.
- Customize with different cake mix flavors or cookie varieties for unique twists.
- Make it gluten-free by using gluten-free Oreos and cake mix.
- Prep Time: 20 minutes
- Cook Time: 0 minutes
- Category: Desserts
- Method: Refrigerating
- Cuisine: American
Nutrition
- Serving Size: 8
- Calories: 388
- Sugar: 27 g
- Sodium: 235 mg
- Fat: 27 g
- Saturated Fat: 16 g
- Unsaturated Fat: 10 g
- Trans Fat: 0.5 g
- Carbohydrates: 32 g
- Fiber: 1 g
- Protein: 4 g
- Cholesterol: 75 mg
Sarah Mitchell
Content Specialist & Home Cooking Enthusiast
Expertise
Education
Asheville-Buncombe Technical Community College – Asheville, NC
American Fitness Professionals & Associates – Online
Sarah’s passion for food was sparked by weekend trips to the farmers’ market and her belief that healthy meals should never feel boring.
After earning her culinary diploma and becoming a certified Nutrition and Wellness Consultant, she set out to help others fall in love with simple, wholesome cooking.
She’s all about celebrating the small wins in the kitchen: a colorful yogurt bowl, a new twist on a classic dish, or a homemade snack that feels just a little extra special.
Outside the kitchen, Sarah is a gardener at heart, a yoga enthusiast, and a believer that fresh herbs can brighten any meal, and any day.