Dreamy No-Bake Oreo Mud Pie Recipe for Chocolate Lovers
Creamy chocolate dreams collide in this no-bake oreo mud pie that promises pure indulgence without turning on the oven.
Crushed cookies and silky layers create a dessert so irresistible you’ll want to devour every last crumb.
Minimal effort meets maximum satisfaction with this simple yet decadent treat.
Cool and smooth textures blend perfectly in each delightful bite.
Chocolate lovers will appreciate the rich, velvety sensation that melts instantly on your tongue.
Summer gatherings or late-night cravings become extraordinary moments when this pie arrives at the table.
Come see how simple ingredients can transform into a showstopping dessert that’ll make everyone ask for seconds.
Why No-Bake Oreo Mud Pie Is a Crowd-Pleaser
Ingredients for No-Bake Oreo Mud Pie
Crust Ingredients:Filling Ingredients:Topping Ingredients:How to Make No-Bake Oreo Mud Pie
Step 1: Pulverize Oreo Cookies
Toss Oreo cookies into a sturdy ziplock bag and crush them using a rolling pin or heavy glass until they transform into fine, sandy crumbs. Ensure the crumbs are uniform and no large chunks remain.
Step 2: Create Cookie Crust
Mix the crushed Oreo crumbs with melted butter until they bind together. Press the mixture firmly and evenly into the bottom of a 9-inch pie dish, creating a compact and smooth base.
Step 3: Whip Cream Cheese Layer
In a mixing bowl, blend cream cheese and powdered sugar until the mixture becomes silky and lump-free. Gently fold in half of the Cool Whip, incorporating it to create a light and fluffy texture.
Step 4: Spread Cream Cheese Base
Carefully spread the cream cheese mixture over the prepared Oreo cookie crust, ensuring an even layer that covers the entire surface.
Step 5: Prepare Chocolate Pudding Layer
In a separate bowl, whisk chocolate pudding mix with milk until the mixture thickens and becomes smooth. Slowly pour the chocolate pudding over the cream cheese layer.
Step 6: Chill and Set
Place the pie in the refrigerator and let it chill for a minimum of 4 hours. This allows the layers to set and the flavors to meld together perfectly.
Step 7: Garnish and Serve
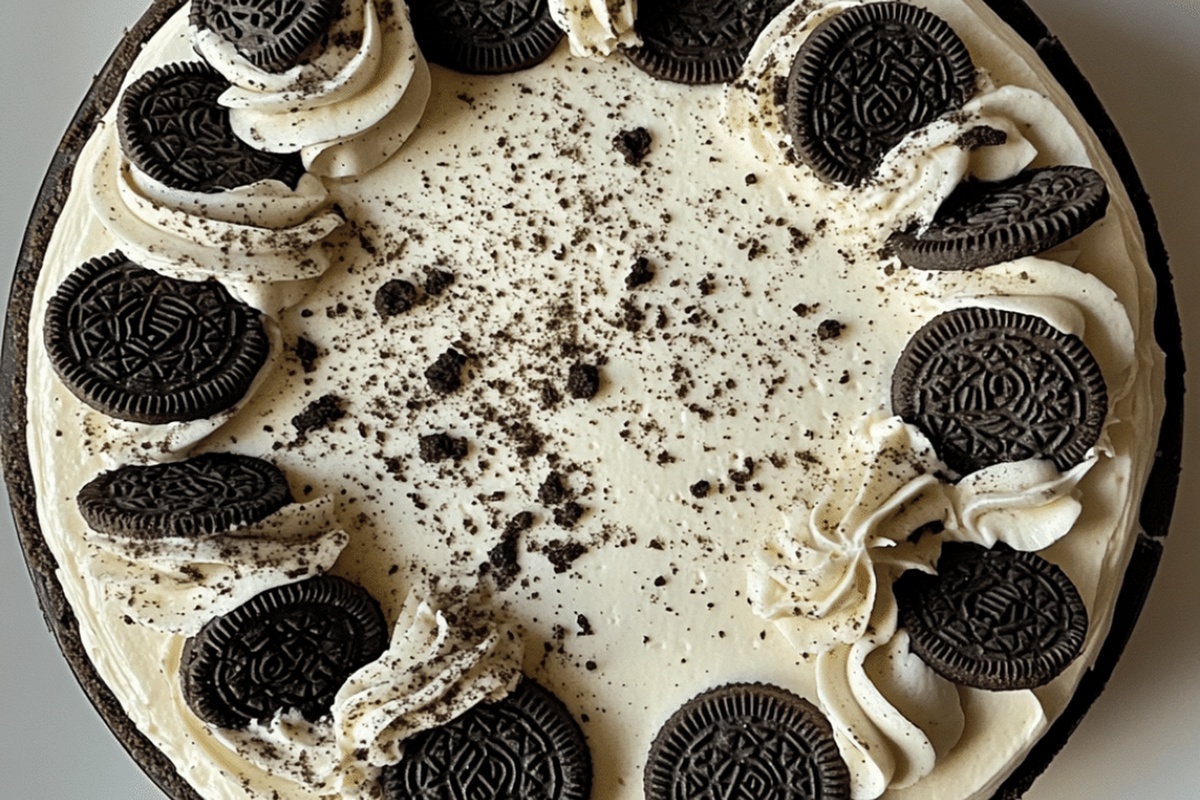
Before serving, top the pie with the remaining Cool Whip. Optionally, sprinkle additional crushed Oreo cookies over the top for extra crunch and visual appeal.
Pro Tips for Perfect Oreo Mud Pie
Variations to Personalize Oreo Mud Pie
Pairing Suggestions for Oreo Mud Pie
Best Storage Practices for No-Bake Oreo Mud Pie
FAQs on No-Bake Oreo Mud Pie
Yes, graham crackers or chocolate wafer cookies work great as alternatives to Oreos for the crust base.
Absolutely! You can prepare this pie up to 2 days in advance and keep it refrigerated until ready to serve.
Ensure each layer is completely chilled before adding the next one, and spread ingredients gently to maintain distinct layers.
While cream cheese adds richness, you could substitute with mascarpone or a non-dairy cream cheese alternative for a similar texture.
Print
No-Bake Oreo Mud Pie Recipe
- Total Time: 4 hours 15 minutes
- Yield: 12 1x
Description
Indulgent no-bake oreo mud pie delivers a creamy chocolate paradise that melts hearts with its rich, velvety layers. Cool summer desserts rarely compete with this luxurious treat that brings pure bliss in each silky spoonful.
Ingredients
Main Ingredients:
- 24 Oreo cookies
- 1 package (8 ounces) cream cheese, softened
- 1 package (3.9 ounces) instant chocolate pudding
- 1 tub (8 ounces) Cool Whip, thawed
Crust and Binding Ingredients:
- 1/4 cup (4 tablespoons) butter, melted
- 1/2 cup powdered sugar
Liquid Ingredient:
- 1 3/4 cups milk
Topping (Optional):
- Additional Oreos for topping
Instructions
- Pulverize Oreo cookies in a sealed plastic bag until transformed into fine, uniform crumbs using a rolling pin or mallet.
- Merge cookie crumbs with melted butter, firmly pressing the mixture into the base and sides of a 9-inch pie dish to create a compact crust.
- Whip cream cheese and powdered sugar in a mixing bowl until achieving a silky, lump-free consistency, then gently incorporate half of the whipped topping.
- Carefully spread the cream cheese mixture evenly across the prepared Oreo crust, ensuring a smooth, consistent layer.
- Vigorously whisk chocolate pudding mix with cold milk until the mixture thickens and becomes glossy, approximately 2 minutes.
- Delicately pour the chocolate pudding over the cream cheese layer, allowing it to settle evenly without disturbing the underlying layer.
- Refrigerate the pie for a minimum of 4 hours at 40°F, or until the filling sets completely and becomes firm to the touch.
- Just before serving, garnish the pie with remaining whipped topping and sprinkle additional crushed Oreo cookies for added texture and visual appeal.
Notes
- Crush Oreos completely to ensure a smooth, compact crust that holds together perfectly when sliced.
- Use room temperature cream cheese to prevent lumps and create a silky-smooth filling that spreads easily.
- For a gluten-free version, swap regular Oreos with gluten-free chocolate sandwich cookies and ensure all other ingredients are gluten-free certified.
- Chill the pie longer than 4 hours for an extra-firm texture that cuts cleanly and holds its shape when served.
- Prep Time: 15 minutes
- Cook Time: 0 minutes
- Category: Desserts, Snacks
- Method: Chilling
- Cuisine: American
Nutrition
- Serving Size: 12
- Calories: 300 kcal
- Sugar: 26 g
- Sodium: 180 mg
- Fat: 18 g
- Saturated Fat: 9 g
- Unsaturated Fat: 7 g
- Trans Fat: 0.5 g
- Carbohydrates: 35 g
- Fiber: 1.5 g
- Protein: 4 g
- Cholesterol: 40 mg
Michael Thompson
Founder & Recipe Developer
Expertise
Education
Cascade Culinary Institute – Bend, OR
ServSafe Food Handler Certification – Portland, OR
Focus: Certified in core food safety and hygiene principles for both home and professional kitchens, with emphasis on ingredient handling, kitchen cleanliness, and safe preparation methods.
Mike’s kitchen journey began with a single goal: to make everyday meals feel like something worth celebrating.
After earning his Certificate in Culinary Arts from Cascade Culinary Institute, he spent years working with local farmers and small kitchens across Oregon, learning the beauty of seasonal, small-batch cooking.
Mike’s approach is simple, cook with what’s fresh, keep it approachable, and always leave room for a little creativity. When he’s not testing yogurt marinades or designing single-serving meals, you’ll find him hiking trails or hunting down the best berries at local markets.