
No-Bake Peanut Butter Cheesecake Recipe Made Simple
Creamy no-bake peanut butter cheesecake promises a delightful escape from traditional dessert expectations.
Smooth textures and rich flavors blend seamlessly in this simple yet indulgent treat.
Decadent ingredients come together without requiring an oven, making it perfect for lazy afternoons or spontaneous sweet cravings.
Minimal kitchen skills work magic in crafting this silky dessert.
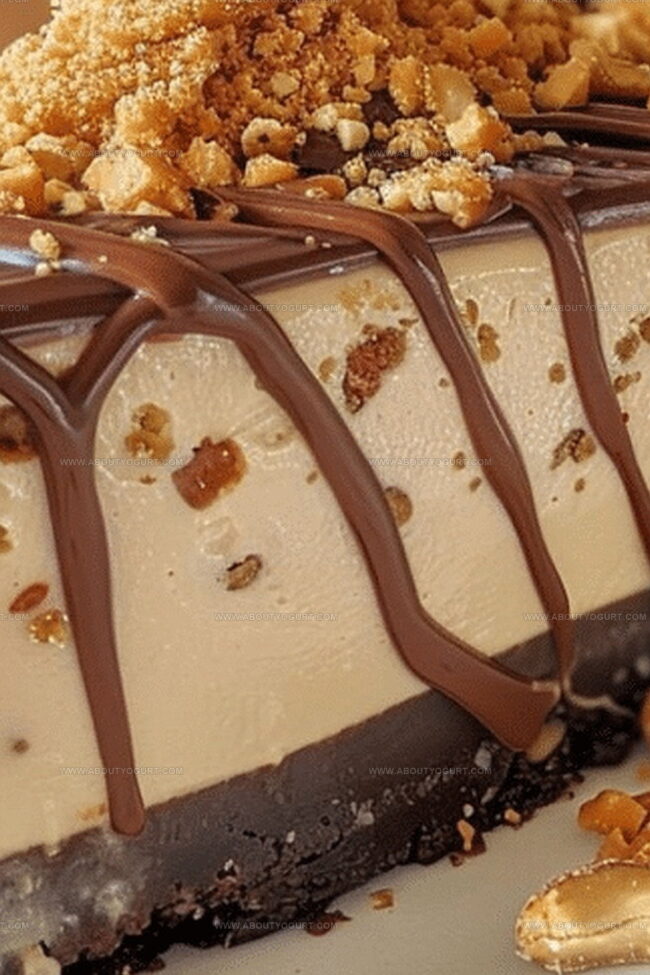
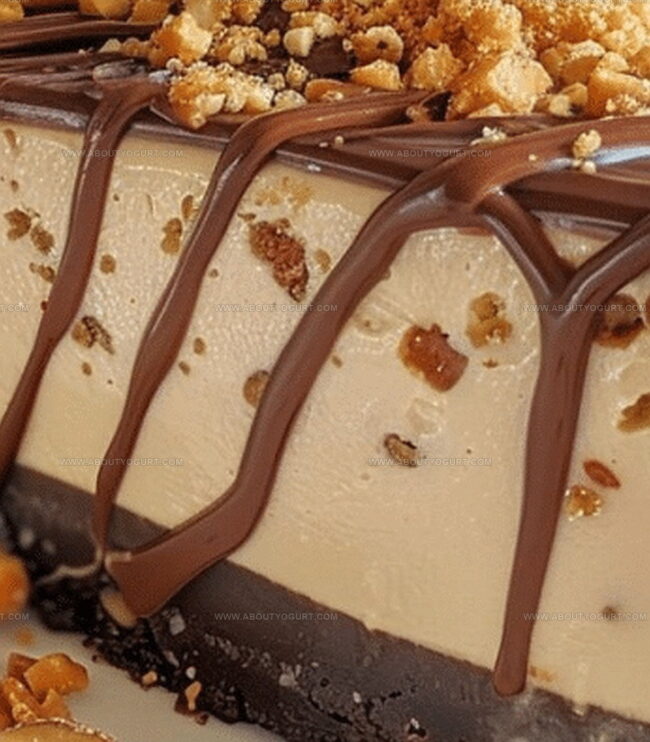
Graham cracker crusts provide a delicious crunch that complements the velvety filling.
Each spoonful delivers a luxurious combination of tangy cream cheese and nutty peanut butter goodness.
You’ll fall in love with how quickly this dessert comes together, tempting everyone at the table.
Grab a slice and savor every incredible moment of pure dessert bliss.
What Makes No-Bake Peanut Butter Cheesecake So Tasty
Ingredients for No-Bake Peanut Butter Cheesecake
Crust Ingredients:Filling Ingredients:Topping Ingredients:How to Prepare No-Bake Peanut Butter Cheesecake
Step 1: Create Crumbly Crust Base
Grab a mixing bowl and combine graham cracker crumbs, sugar, and melted butter. Mix until the texture feels like damp beach sand. Press this mixture firmly into the bottom of a springform pan, creating an even layer. Pop the pan into the refrigerator to chill while you prepare the filling.
Step 2: Whip Creamy Peanut Butter Filling
Take a large mixing bowl and beat cream cheese until super smooth. Add peanut butter, powdered sugar, and vanilla extract. Continue beating until the mixture looks completely blended and silky.
Step 3: Fold Fluffy Whipped Cream
In a separate bowl, whip heavy cream until it forms stiff, beautiful peaks. Gently fold the whipped cream into the peanut butter mixture. Blend carefully to keep the mixture light and airy.
Step 4: Build Cheesecake Layer
Pour the creamy filling over the chilled crust. Spread evenly across the pan, making sure the surface looks smooth and uniform. Slide the pan into the refrigerator and let it set for at least 4 hours.
Step 5: Decorate with Delicious Toppings
Before serving, drizzle melted peanut butter over the top of the cheesecake. Add a sprinkle of:Step 6: Slice and Serve
Remove the cheesecake from the springform pan. Cut into beautiful wedges and enjoy the creamy, dreamy dessert!
Pro Tips for No-Bake Peanut Butter Cheesecake
Flavor Variations for No-Bake Peanut Butter Cheesecake
Pairing Ideas for No-Bake Peanut Butter Cheesecake
Storage Guidelines for No-Bake Peanut Butter Cheesecake
FAQs for No-Bake Peanut Butter Cheesecake
Yes, you can substitute crunchy peanut butter for a textured filling. Just ensure it’s well mixed to maintain a smooth consistency.
A springform pan makes removing the cheesecake easier, but you can use a regular cake pan lined with parchment paper if needed.
The cheesecake can be stored in the refrigerator for up to 5 days when covered tightly with plastic wrap or in an airtight container.
Yes, you can freeze the cheesecake for up to 1 month. Wrap it tightly in plastic wrap and aluminum foil before freezing.
Print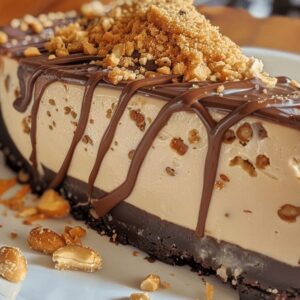
No-Bake Peanut Butter Cheesecake Recipe
- Total Time: 4 hours 20 minutes
- Yield: 8 1x
Description
Creamy no-bake peanut butter cheesecake beckons dessert enthusiasts with its irresistible blend of smooth textures and rich flavors. Silky layers of peanut butter and cream cheese create a delightful finale that will satisfy sweet cravings without turning on the oven.
Ingredients
Primary Ingredients:
- 8 ounces (226 grams) cream cheese
- 1 cup (240 grams) creamy peanut butter
- 1 cup (240 milliliters) heavy cream
Crust Ingredients:
- 1 cup (120 grams) graham cracker crumbs
- 1/4 cup (50 grams) granulated sugar
- 6 tablespoons (85 grams) unsalted butter, melted
Topping Ingredients:
- 1/4 cup (60 grams) peanut butter, melted
- 1 cup (120 grams) whipped cream
- 1/4 cup (30 grams) chopped peanuts
Additional Flavoring:
- 1 cup (120 grams) powdered sugar
- 1 teaspoon vanilla extract
Instructions
- Craft a crumbly foundation by combining graham cracker crumbs with granulated sugar and melted butter until the texture resembles damp sand. Firmly press the mixture into the bottom of a 9-inch springform pan, creating an even base.
- Chill the crust in the refrigerator while preparing the filling mixture.
- Using an electric mixer, whip the cream cheese until silky and smooth.
- Incorporate creamy peanut butter, powdered sugar, and vanilla extract into the cream cheese. Beat until the mixture becomes uniform and velvety.
- In a separate chilled bowl, whip heavy cream until it forms stiff, peaks that hold their shape.
- Gently fold the whipped cream into the peanut butter mixture, ensuring a light and airy consistency without deflating the cream.
- Transfer the filling onto the chilled crust, spreading it evenly and smoothing the top with a spatula.
- Refrigerate the cheesecake for 4-6 hours, or ideally overnight, allowing it to set completely and develop rich flavors.
- Before serving, optionally drizzle melted peanut butter across the surface and sprinkle with chopped peanuts for added texture and visual appeal.
- Carefully release the springform pan, slice into elegant wedges, and serve chilled.
Notes
- Swap graham crackers with gluten-free alternatives like almond flour or crushed gluten-free cookies for a celiac-friendly version.
- Reduce sugar content by using natural sweeteners like stevia or monk fruit for a lower-calorie dessert option.
- Ensure cream cheese and peanut butter are at room temperature to prevent lumpy filling and create smooth, creamy texture.
- Chill utensils and mixing bowls beforehand to help whipped cream stabilize faster and maintain stiff peaks more effectively.
- Prep Time: 20 minutes
- Cook Time: 4 hours (refrigeration time)
- Category: Desserts
- Method: Chilling
- Cuisine: American
Nutrition
- Serving Size: 8
- Calories: 488 kcal
- Sugar: 28 g
- Sodium: 160 mg
- Fat: 40 g
- Saturated Fat: 14 g
- Unsaturated Fat: 24 g
- Trans Fat: 0.5 g
- Carbohydrates: 23 g
- Fiber: 2 g
- Protein: 11 g
- Cholesterol: 70 mg
Sarah Mitchell
Content Specialist & Home Cooking Enthusiast
Expertise
Education
Asheville-Buncombe Technical Community College – Asheville, NC
American Fitness Professionals & Associates – Online
Sarah’s passion for food was sparked by weekend trips to the farmers’ market and her belief that healthy meals should never feel boring.
After earning her culinary diploma and becoming a certified Nutrition and Wellness Consultant, she set out to help others fall in love with simple, wholesome cooking.
She’s all about celebrating the small wins in the kitchen: a colorful yogurt bowl, a new twist on a classic dish, or a homemade snack that feels just a little extra special.
Outside the kitchen, Sarah is a gardener at heart, a yoga enthusiast, and a believer that fresh herbs can brighten any meal, and any day.