Homemade Stovetop Bread Recipe: No Oven, Just Fresh Magic
Mastering a no-oven stovetop bread challenges traditional baking expectations in delightful ways.
Skillets become magical platforms for creating warm, crusty goodness without complicated equipment.
You can transform simple ingredients into incredible homemade comfort using just your stove.
Minimal kitchen tools mean maximum flavor potential with this clever technique.
Flour, water, and a pinch of creativity merge into something wonderfully rustic and satisfying.
Unexpected cooking methods often produce the most remarkable culinary surprises.
Dive into this straightforward technique and unlock a whole new world of bread-making magic.
Why No-Oven Stovetop Bread Is a Handy Recipe
Conquer No-Oven Cooking: Stovetop bread brings kitchen magic without requiring a traditional oven setup.
Quick Customization: Shape dough into rolls, rounds, or unique forms to match your meal or personal preference with zero restrictions.
Master Easy Technique: Learn a simple boiling-then-skillet method that transforms basic ingredients into delicious golden bread with minimal culinary expertise required.
Zero Special Equipment Needed: Create delectable bread using standard kitchen tools like a pot, skillet, and mixing bowl – perfect for small kitchens or limited resources.
Ingredients Needed for No-Oven Stovetop Bread
For the Dough Base:For the Liquid and Fat:For the Seasoning:For the Cooking Liquid:Instructions to Make Stovetop Bread Without an Oven

Step 1: Activate The Yeast
Mix warm milk, sugar, and dry yeast in a large mixing bowl. Let the mixture sit for 5-10 minutes until it becomes foamy and fragrant.
The yeast will start to bubble, showing it’s alive and ready to help your bread rise.
Step 2: Create The Dough
Add the following ingredients to the yeast mixture:Blend everything until a soft dough forms.
If the mixture feels too sticky, sprinkle a bit more flour. If it’s too dry, add a splash of milk.
The goal is a smooth, elastic texture.
Step 3: Knead And Rest
Transfer the dough to a floured surface.
Knead vigorously for 8-10 minutes, pushing and folding the dough until it becomes silky and stretchy. Place the dough in a greased bowl, cover with a damp towel, and let it rest in a warm spot for about an hour.
The dough will double in size.
Step 4: Prepare Boiling Water
Fill a large pot with water and bring it to a rolling boil.
Add a pinch of salt to enhance flavor.
Step 5: Shape And Boil
Punch down the risen dough and shape into small rounds or your preferred form.
Gently drop the dough pieces into the boiling water. Cook for 1-2 minutes until they puff up and float to the surface.
Step 6: Crisp On The Stovetop
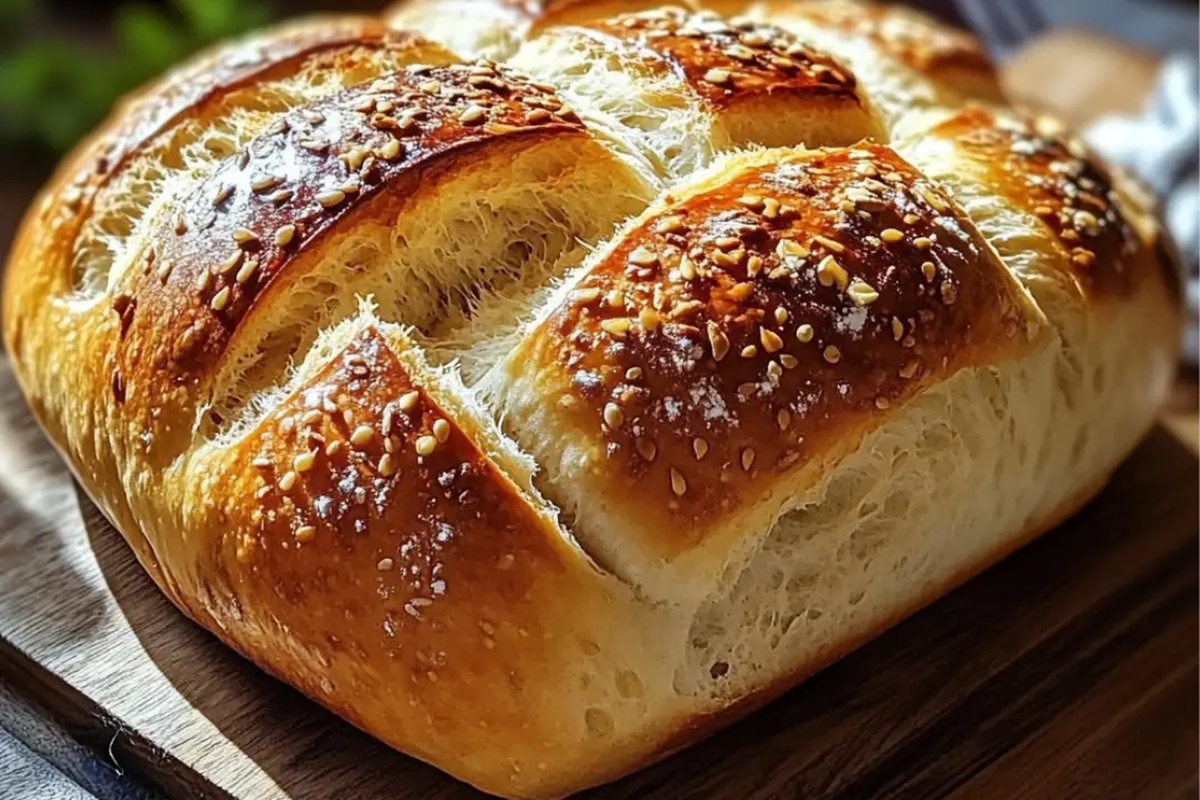
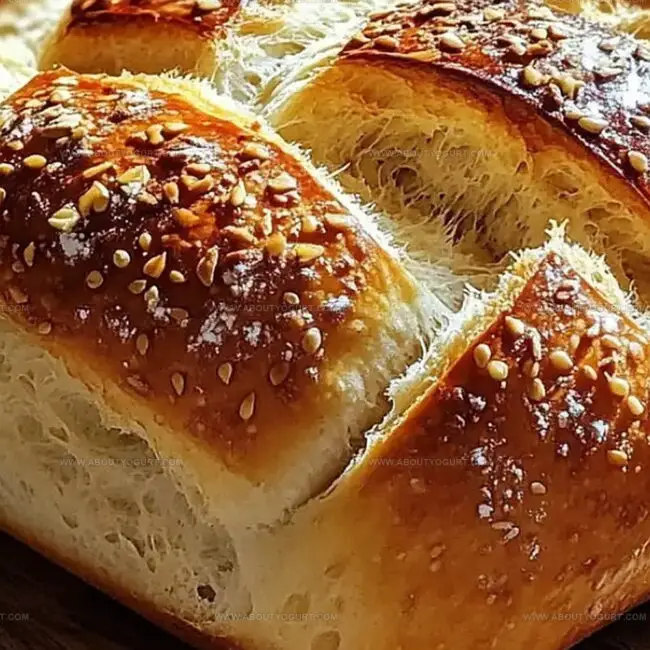
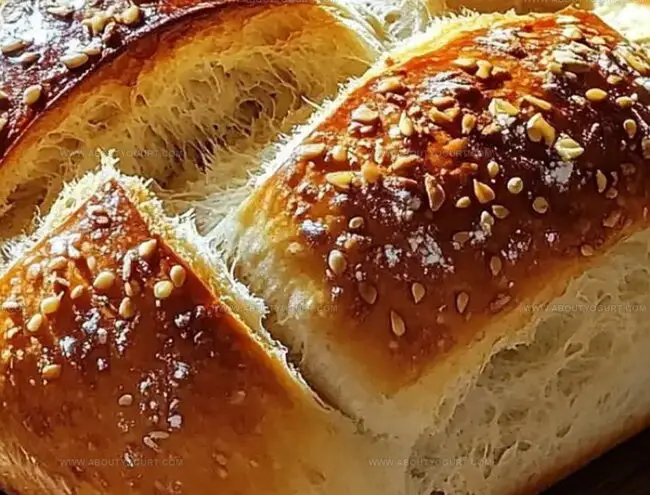
Heat a skillet over medium flame. Place the boiled dough pieces onto the hot surface.
Cook each side for 2-3 minutes until a beautiful golden crust develops. Press lightly with a spatula to ensure even browning.
Step 7: Serve And Enjoy
Transfer the hot bread to a serving plate. Pair with softened butter, fruity jam, or your favorite spread.
Savor the warm, crusty bread straight from the stovetop!
Tips for Perfectly Cooking No-Oven Stovetop Bread
Variations to Customize No-Oven Stovetop Bread Recipe
Foods That Pair Well with Stovetop Bread
Proper Storage Methods for No-Oven Stovetop Bread
Store cooled bread in an airtight container for up to 3 days. Wrap each piece separately in plastic wrap to prevent drying out and maintain freshness.
Place bread in freezer-safe bags, removing excess air. Freeze for up to 1 month. Wrap individually to prevent sticking and freezer burn.
Thaw frozen bread at room temperature, then warm in a preheated 350°F oven for 5-7 minutes. Wrap in aluminum foil to prevent over-browning and retain moisture.
Warm bread in a dry skillet over medium-low heat for 2-3 minutes per side. Brush with a little oil or butter to restore crispy exterior and prevent sticking.
FAQs
The yeast needs time to activate and become frothy. This process helps the yeast develop and ensures the bread will rise properly, creating a light and fluffy texture.
No, warm milk is crucial. Cold milk won’t activate the yeast effectively, which means your bread won’t rise and will be dense and heavy. The ideal temperature is around 100-110°F (37-43°C).
This could happen due to old yeast, too cold environment, or using water that’s too hot. Always check your yeast’s expiration date, keep the dough in a warm spot, and use milk at the right temperature to ensure proper rising.
Print
No-Oven Stovetop Bread Recipe
- Total Time: 1 hour 30 minutes
- Yield: 12 1x
Description
Homemade No-Oven Stovetop Bread brings Mediterranean comfort directly to kitchen counters with minimal ingredients and simple cooking skills. Warm, golden slices emerge from a skillet, promising delicious memories for passionate home cooks who love creating fresh bread without traditional baking methods.
Ingredients
Main Ingredients:
- 5 cups (1.2 kg) flour
- 2 cups (480 ml) warm milk
- 1 cup (240 ml) vegetable or canola oil
Leavening and Seasoning:
- 1 tablespoon dry yeast
- 1 tablespoon granulated sugar
- 1 teaspoon salt
Boiling Liquid:
- 2.5–3 liters (10–12 cups) water
- 1 teaspoon salt
Instructions
- Activate the yeast mixture by combining warm milk, sugar, and dry yeast in a large mixing bowl. Allow the concoction to rest for 5-10 minutes until it becomes frothy and bubbly.
- Integrate flour, oil, and salt into the activated yeast blend. Thoroughly combine ingredients until a cohesive dough forms, adjusting liquid or flour as needed to achieve optimal texture.
- Transfer the dough to a floured surface and knead vigorously for 8-10 minutes. Continue kneading until the dough becomes silky smooth and exhibits elastic properties.
- Coat a clean bowl with oil, place the dough inside, and drape with a moistened cloth. Position in a warm environment for approximately 1 hour, allowing the dough to expand and nearly double in volume.
- Fill a large pot with water and bring to a rolling boil. Enhance the water with a pinch of salt to elevate flavor.
- Deflate the risen dough by gently pressing down. Divide and shape into uniform rounds or desired configurations.
- Carefully submerge dough pieces into the bubbling water, processing a few at a time. Poach for 1-2 minutes until they become puffy and rise to the surface.
- Preheat a skillet or griddle over medium heat. Once temperature is optimal, arrange boiled dough pieces on the cooking surface.
- Sear each side for 2-3 minutes, achieving a golden-brown exterior. Use a spatula to apply gentle pressure, ensuring uniform browning and crisp texture.
- Transfer the freshly cooked stovetop bread to a serving platter. Accompany with butter, jam, or preferred condiments for a delightful culinary experience.
Notes
- Ensure yeast activation by using warm milk (110-115°F) to create the perfect frothy environment, which helps bread rise beautifully.
- use the heel of your hand to stretch and fold dough, creating strong gluten networks for better texture.
- Experiment with alternative flour types like whole wheat or gluten-free blends, adjusting liquid quantities to maintain proper dough consistency.
- Control cooking temperature carefully on stovetop to prevent burning, using medium heat and rotating bread pieces for uniform golden-brown coloration.
- Prep Time: 1 hour 20 minutes
- Cook Time: 10 minutes
- Category: Breakfast, Lunch, Dinner, Snacks
- Method: Boiling
- Cuisine: American
Nutrition
- Serving Size: 12
- Calories: 330
- Sugar: 3 g
- Sodium: 150 mg
- Fat: 12 g
- Saturated Fat: 1.5 g
- Unsaturated Fat: 10.5 g
- Trans Fat: 0 g
- Carbohydrates: 45 g
- Fiber: 2 g
- Protein: 7 g
- Cholesterol: 0 mg
Michael Thompson
Founder & Recipe Developer
Expertise
Education
Cascade Culinary Institute – Bend, OR
ServSafe Food Handler Certification – Portland, OR
Focus: Certified in core food safety and hygiene principles for both home and professional kitchens, with emphasis on ingredient handling, kitchen cleanliness, and safe preparation methods.
Mike’s kitchen journey began with a single goal: to make everyday meals feel like something worth celebrating.
After earning his Certificate in Culinary Arts from Cascade Culinary Institute, he spent years working with local farmers and small kitchens across Oregon, learning the beauty of seasonal, small-batch cooking.
Mike’s approach is simple, cook with what’s fresh, keep it approachable, and always leave room for a little creativity. When he’s not testing yogurt marinades or designing single-serving meals, you’ll find him hiking trails or hunting down the best berries at local markets.