
Pillsbury Biscuit Garlic Cheese Bombs Recipe
A pillsbury biscuit garlic butter cheese bomb might just revolutionize your weekend snacking routine.
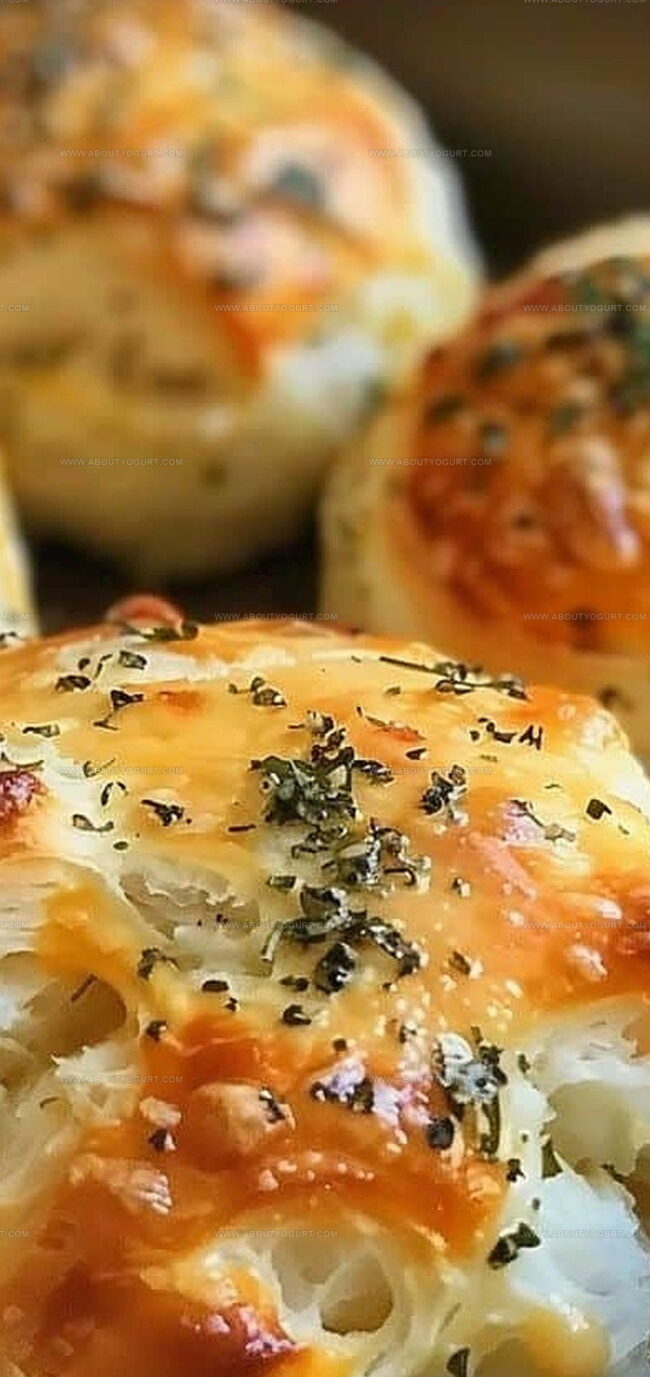
Crispy exterior meets molten cheese center in this irresistible appetizer.
Simple ingredients create magic in your kitchen.
Soft biscuit dough gets wrapped around gooey melted cheese with a garlic butter coating.
Cheese lovers will absolutely adore these bite-sized delights.
Quick preparation means you can whip up these crowd-pleasers in minutes.
Invite friends over and watch these bombs disappear faster than you can say “delicious”!
Reasons to Enjoy Pillsbury Biscuit Garlic Butter Cheese Bombs
Components Needed for Pillsbury Biscuit Garlic Butter Cheese Bombs
Main Ingredients:Butter and Seasoning Group:Garnish:How to Make Pillsbury Biscuit Garlic Butter Cheese Bombs
Step 1: Warm Up the Oven
Turn your oven to 375°F (190°C). Prepare a muffin tin by lightly spraying it with cooking spray or brushing with oil to prevent sticking.
Step 2: Create Flavor-Packed Butter Mixture
In a small mixing bowl, whisk together:Blend until all ingredients are perfectly combined and fragrant.
Step 3: Prepare the Biscuit Base
Crack open the Pillsbury Grands! biscuit container. Gently separate each biscuit and use your fingers to flatten them slightly, creating a wider surface.
Step 4: Stuff with Gooey Cheese
Place a generous chunk of shredded mozzarella right in the center of each flattened biscuit. Carefully fold the edges over the cheese, creating a sealed ball. Pinch the seams tightly to lock in the cheesy goodness.
Step 5: Bathe in Garlic Butter
Roll each cheese-filled biscuit ball completely in the prepared garlic butter mixture, ensuring every surface gets coated with flavor.
Step 6: Bake to Golden Perfection
Arrange the butter-coated biscuit bombs in the prepared muffin tin. Slide the tin into the preheated oven and bake for 15-18 minutes. Look for a beautiful golden-brown top and melted cheese peeking through.
Step 7: Final Flourish
Remove the biscuit bombs from the oven and let them rest for a few minutes. Sprinkle with freshly chopped parsley for a pop of color and extra flavor.
Step 8: Devour and Enjoy
Serve these hot and watch them disappear! These cheesy, garlicky bites are perfect for snacking, parties, or any time you want a delicious treat.
Helpful Tips for Pillsbury Biscuit Garlic Butter Cheese Bombs

Variations to Personalize Pillsbury Biscuit Garlic Butter Cheese Bombs
Suggested Pairings for Pillsbury Biscuit Garlic Butter Cheese Bombs
How to Store Pillsbury Biscuit Garlic Butter Cheese Bombs
Common Questions About Pillsbury Biscuit Garlic Butter Cheese Bombs
Yes, you can substitute mozzarella with cheddar, monterey jack, or a blend of cheeses for varied flavor profiles.
Absolutely! You can freeze unbaked bombs for up to 1 month. Just thaw in refrigerator before baking and add 2-3 extra minutes to cooking time.
No problem. You can use a mix of dried basil, oregano, and thyme as an alternative, or simply use dried parsley.
Yes, you can prepare the bombs earlier and refrigerate them uncooked. When ready to serve, bake them fresh for the best texture and taste.
Print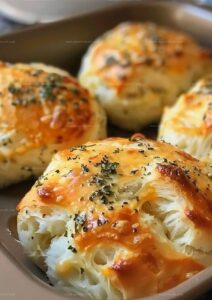
Pillsbury Biscuit Garlic Butter Cheese Bombs Recipe
- Total Time: 25-28 minutes
- Yield: 8 1x
Description
Pillsbury biscuit garlic butter cheese bombs deliver explosive flavor in one irresistible bite. Melted cheese, garlic-infused butter, and golden-brown pastry create a mouthwatering experience that will satisfy quick snack cravings with minimal effort.
Ingredients
Main Ingredients:
- 1 can Pillsbury Grands! refrigerated biscuits (8 count)
- 1 cup shredded mozzarella cheese
Butter and Seasoning:
- 1/2 cup (1 stick) unsalted butter, melted
- 3 cloves garlic, minced
- 1 teaspoon dried Italian seasoning
Finishing Ingredients:
- 1/4 teaspoon salt
- 1/4 teaspoon black pepper
- Fresh parsley, chopped (optional)
Instructions
- Prepare the culinary workspace by heating the oven to 375F (190C) and preparing a muffin tin with a light coating of cooking spray.
- Craft a zesty garlic infusion by whisking melted butter with finely minced garlic, aromatic Italian herbs, a pinch of salt, and a dash of ground pepper.
- Carefully unroll the Pillsbury Grands! biscuit dough, gently extending each round with fingertips to create a slightly flattened surface.
- Position a generous dollop of mozzarella cheese at the center of each biscuit round, then meticulously fold and pinch the edges, transforming the dough into compact spheres that completely encase the cheese.
- Lavishly immerse each cheese-stuffed dough ball into the prepared garlic butter mixture, ensuring a thorough and even coating.
- Arrange the butter-glazed biscuit bombs strategically within the muffin tin, maintaining uniform spacing to promote even baking.
- Slide the tin into the preheated oven and bake for 15-18 minutes, watching for a rich golden-brown exterior and visibly melted cheese.
- Extract from the oven and allow a brief resting period to cool slightly, then optionally sprinkle with freshly chopped parsley for a vibrant finishing touch.
- Serve immediately while warm, revealing the molten cheese center and releasing the intoxicating garlic butter aroma.
Notes
- Always use fresh garlic for the most robust and vibrant flavor in your garlic butter mixture.
- Ensure biscuit edges are completely sealed to prevent cheese from leaking during baking.
- Experiment with different cheese varieties like cheddar or pepper jack for unique flavor profiles.
- For a gluten-free version, substitute Pillsbury biscuits with gluten-free biscuit dough or make your own from scratch.
- Prep Time: 10 minutes
- Cook Time: 15-18 minutes
- Category: Appetizer, Snacks
- Method: Baking
- Cuisine: American
Nutrition
- Serving Size: 8
- Calories: 330 kcal
- Sugar: 1 g
- Sodium: 410 mg
- Fat: 26 g
- Saturated Fat: 15 g
- Unsaturated Fat: 9 g
- Trans Fat: 0.5 g
- Carbohydrates: 14 g
- Fiber: 1 g
- Protein: 10 g
- Cholesterol: 60 mg
Michael Thompson
Founder & Recipe Developer
Expertise
Education
Cascade Culinary Institute – Bend, OR
ServSafe Food Handler Certification – Portland, OR
Focus: Certified in core food safety and hygiene principles for both home and professional kitchens, with emphasis on ingredient handling, kitchen cleanliness, and safe preparation methods.
Mike’s kitchen journey began with a single goal: to make everyday meals feel like something worth celebrating.
After earning his Certificate in Culinary Arts from Cascade Culinary Institute, he spent years working with local farmers and small kitchens across Oregon, learning the beauty of seasonal, small-batch cooking.
Mike’s approach is simple, cook with what’s fresh, keep it approachable, and always leave room for a little creativity. When he’s not testing yogurt marinades or designing single-serving meals, you’ll find him hiking trails or hunting down the best berries at local markets.