Flaky Pumpkin Hand Pies Recipe: Autumn’s Sweetest Treat
Crisp autumn days call for delightful pumpkin hand pies that melt in your mouth with pure comfort.
Sweet spices dance through flaky pastry, creating little handheld desserts perfect for chilly afternoons.
Warm aromas of cinnamon and nutmeg drift through kitchens, promising delectable treats.
Compact and adorable, these miniature pies capture the essence of seasonal baking without overwhelming complexity.
Compact pastry pockets cradle smooth pumpkin filling, delivering rich flavors in every bite.
Sharing becomes effortless when each person gets their own personal pie.
You’ll fall in love with these charming, portable desserts that celebrate fall’s most beloved ingredient.
Why Pumpkin Hand Pies Are the Perfect Portable Treat
Ingredients Needed for Delicious Pumpkin Hand Pies
Primary Pastry Components:Filling Spices and Sweeteners:Finishing and Binding Ingredients:How to Make Pumpkin Hand Pies with Flaky Crusts
Step 1: Warm Up the Oven
Get your oven toasty at 375 degrees Fahrenheit. Grab a baking sheet and line it with parchment paper to prevent any sticky situations.
Step 2: Shape the Dough
Take your pie crusts and roll them out on a surface lightly dusted with flour. Cut the dough into cute 4-inch circles or squares that will become your delicious hand pies.
Step 3: Create Magical Filling
In a mixing bowl, combine your ingredients:Stir everything together until you have a rich, aromatic mixture that screams autumn.
Step 4: Build Your Hand Pies
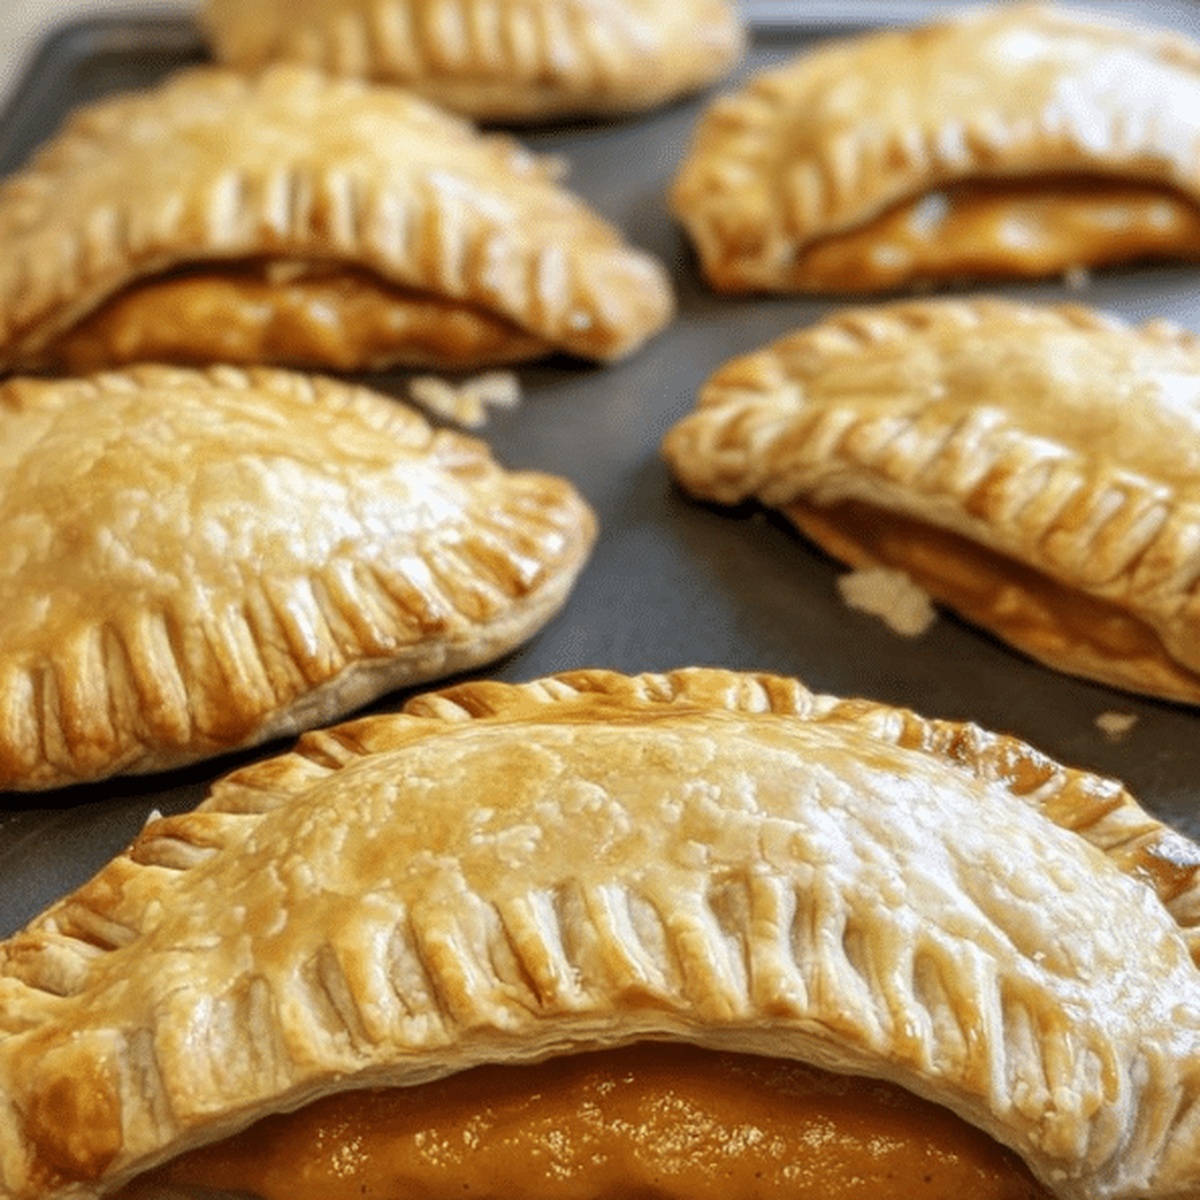
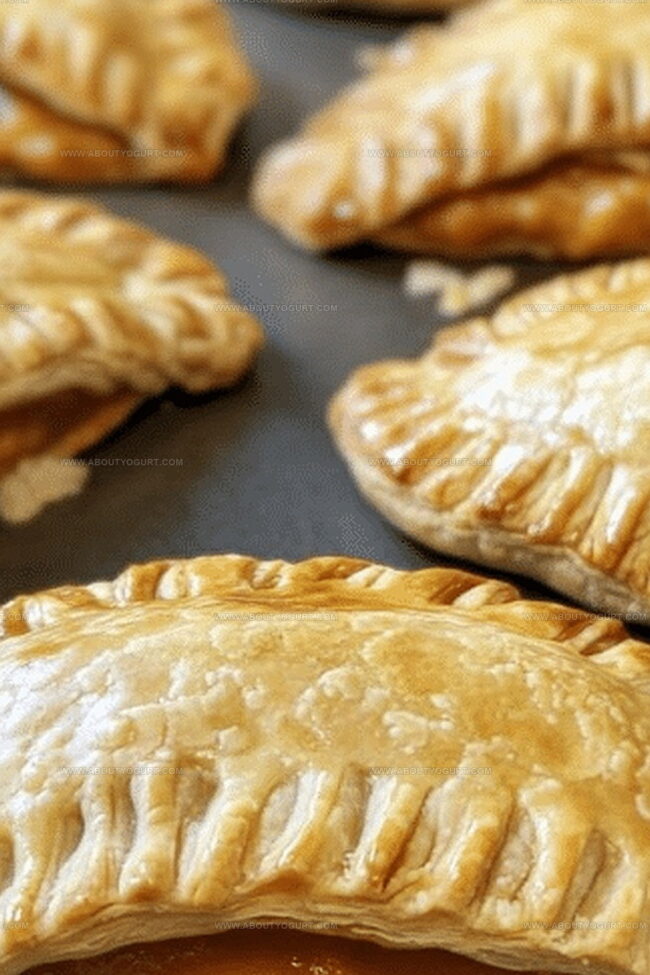
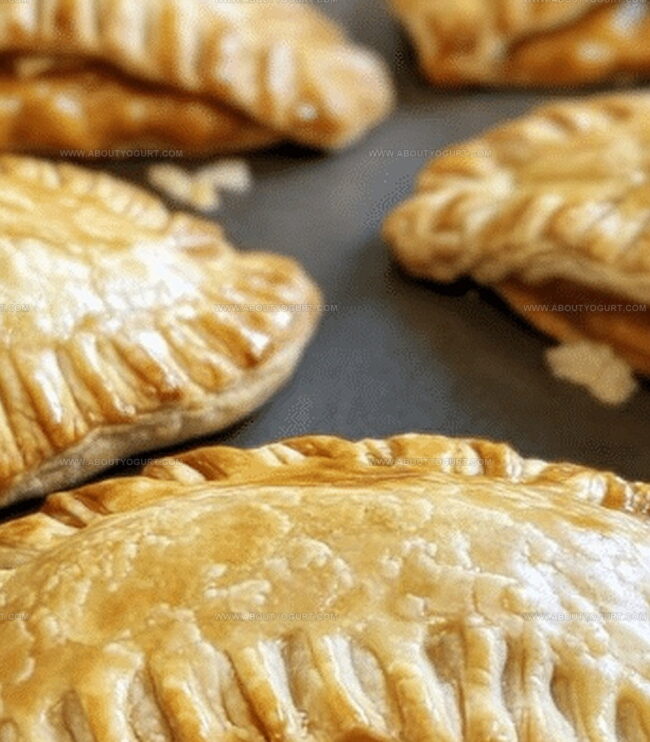
Place a generous dollop of the pumpkin mixture right in the center of each dough shape. Fold the dough over to create a cute little pocket. Use a fork to crimp and seal the edges, making sure no filling escapes.
Step 5: Add a Golden Shine
Whisk an egg with a splash of milk to create a beautiful egg wash. Gently brush this mixture over the tops of your hand pies to give them a gorgeous golden glow.
Step 6: Bake to Perfection
Arrange your hand pies on the prepared baking sheet. Slide them into the preheated oven and bake for 15-20 minutes. You’re looking for a beautiful golden-brown color that promises crispy, flaky deliciousness.
Step 7: Final Touches
Let the hand pies cool down for a few moments. If you’re feeling extra indulgent, dust them with a light sprinkle of powdered sugar for that final touch of sweetness.
Pro Tips for Baking the Best Pumpkin Hand Pies
Unique Variations to Try with Pumpkin Hand Pies
Tasty Pairings for Pumpkin Hand Pies
How to Store Pumpkin Hand Pies for Lasting Freshness
FAQs About Pumpkin Hand Pies Explained
Yes, homemade pie crust works perfectly and can add a more personalized touch to your hand pies. Just ensure the dough is rolled out thin and evenly.
Seal the edges of the hand pies tightly by pressing with a fork and avoid overfilling. This helps keep the delicious pumpkin mixture inside the pastry.
Absolutely! You can prepare the hand pies and refrigerate them unbaked for up to 24 hours before baking. This makes them great for advance preparation.
Print
Pumpkin Hand Pies Recipe
- Total Time: 30-40 minutes
- Yield: 8 1x
Description
Seasonal spices dance through classic Pumpkin Hand Pies, bringing warmth from Grandma’s kitchen to your dessert plate. Sweet pastry pockets filled with creamy pumpkin promise delightful autumn comfort you can savor with every delectable bite.
Ingredients
Main Ingredients:
- 1 cup canned pumpkin puree
- 1 package (14.1 ounces) refrigerated pie crusts or homemade pie dough
Spices and Seasonings:
- 1/2 cup granulated sugar
- 1/2 teaspoon ground cinnamon
- 1/4 teaspoon ground nutmeg
- 1/4 teaspoon ground ginger
- 1/4 teaspoon salt
Egg Wash and Topping:
- 1 large egg
- 1 tablespoon milk
- Powdered sugar (optional, for dusting)
Instructions
- Prepare the workspace by setting the oven to 375F (190C) and lining a baking sheet with parchment paper.
- Flatten pie crusts on a flour-dusted surface and precisely cut into 4-inch uniform circles or squares.
- Create the aromatic filling by blending pumpkin puree with granulated sugar, cinnamon, nutmeg, ginger, and salt until smooth and well-integrated.
- Carefully position a measured spoonful of pumpkin mixture centrally on each dough piece, leaving sufficient border for sealing.
- Fold dough over the filling, creating a compact pocket, and firmly crimp edges using fork tines to ensure complete closure.
- Whisk egg and milk together to create a glossy wash, then delicately brush the surface of each hand pie for a golden finish.
- Strategically place hand pies on prepared baking sheet, maintaining slight separation between each.
- Bake for 15-20 minutes, monitoring until pastries transform into a rich, amber-brown color with crisp edges.
- Remove from oven and allow pies to cool momentarily on a wire rack.
- Optional: Dust with a light veil of powdered sugar for an elegant, sweet presentation.
Notes
- Choose cold butter when making the pie dough to ensure a flaky, tender crust that melts in your mouth.
- Chill the assembled hand pies for 15 minutes before baking to help them maintain their shape and prevent filling leakage.
- For a gluten-free version, swap traditional pie crust with almond flour or gluten-free pastry dough to accommodate dietary restrictions.
- Transform these hand pies into a seasonal treat by adding a sprinkle of pumpkin pie spice or a drizzle of maple glaze for extra autumnal flavor.
- Prep Time: 15-20 minutes
- Cook Time: 15-20 minutes
- Category: Snacks, Desserts
- Method: Baking
- Cuisine: American
Nutrition
- Serving Size: 8
- Calories: 188 kcal
- Sugar: 9 g
- Sodium: 217 mg
- Fat: 9 g
- Saturated Fat: 3 g
- Unsaturated Fat: 6 g
- Trans Fat: 0 g
- Carbohydrates: 25 g
- Fiber: 1.5 g
- Protein: 3 g
- Cholesterol: 35 mg
Sarah Mitchell
Content Specialist & Home Cooking Enthusiast
Expertise
Education
Asheville-Buncombe Technical Community College – Asheville, NC
American Fitness Professionals & Associates – Online
Sarah’s passion for food was sparked by weekend trips to the farmers’ market and her belief that healthy meals should never feel boring.
After earning her culinary diploma and becoming a certified Nutrition and Wellness Consultant, she set out to help others fall in love with simple, wholesome cooking.
She’s all about celebrating the small wins in the kitchen: a colorful yogurt bowl, a new twist on a classic dish, or a homemade snack that feels just a little extra special.
Outside the kitchen, Sarah is a gardener at heart, a yoga enthusiast, and a believer that fresh herbs can brighten any meal, and any day.