
Red Velvet Crinkle Cookie Recipe for Treat Time
Baking red velvet crinkle cookies brings magic into your kitchen with a delightful twist on classic desserts.
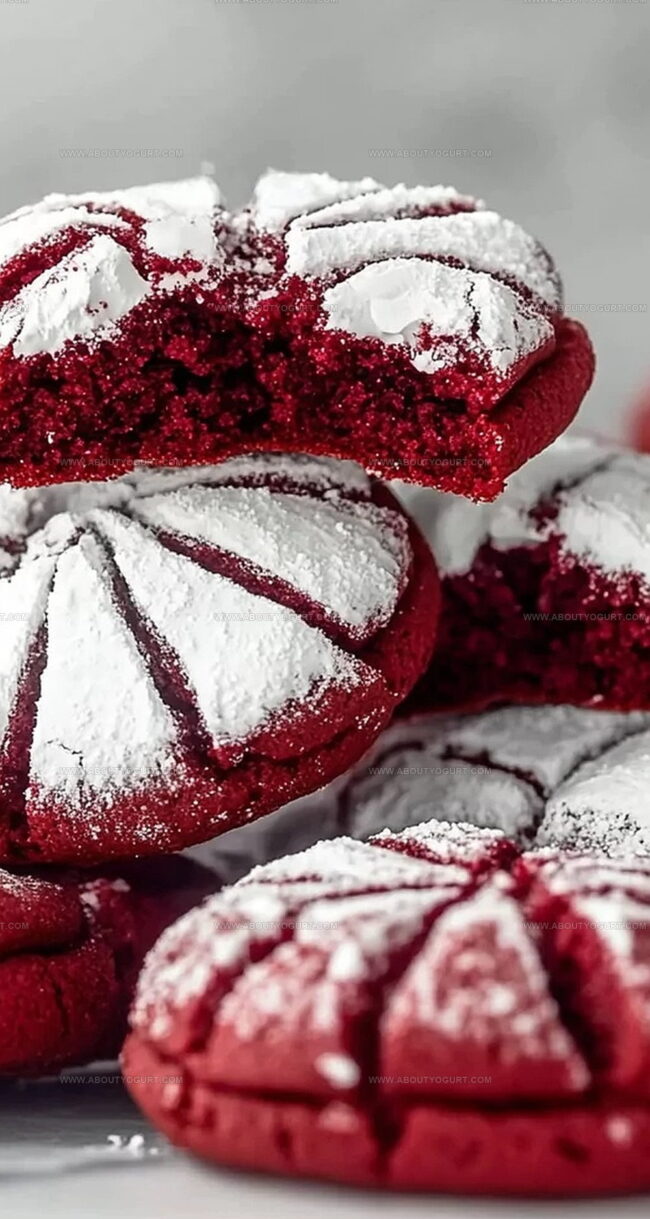
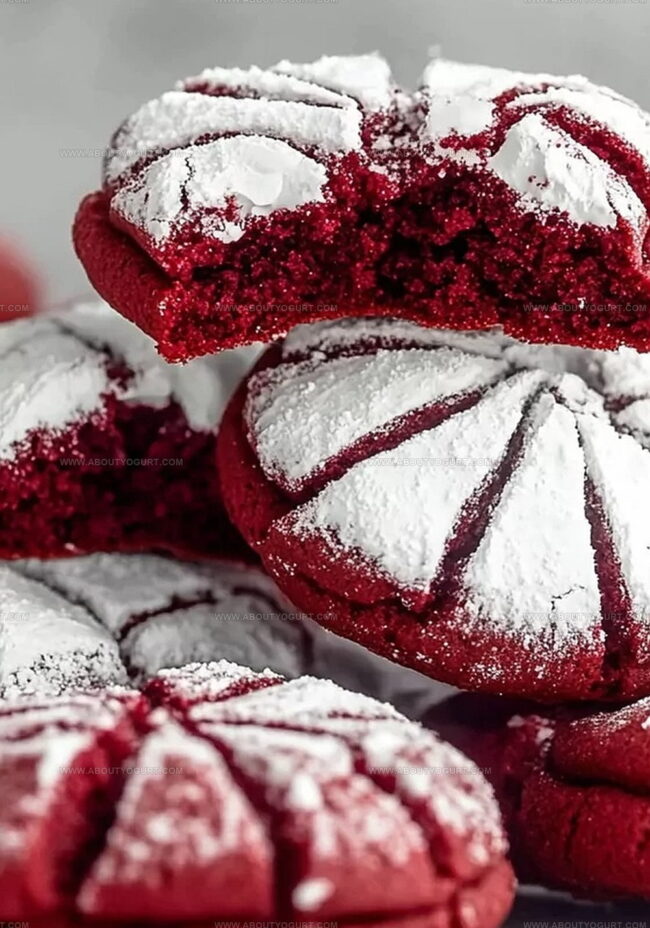
Soft, crumbly edges promise a delectable experience that melts in your mouth.
Cocoa and cream cheese form the heart of this irresistible treat.
Powdered sugar coating creates a stunning visual contrast against the deep crimson backdrop.
Chocolate lovers will adore how these cookies balance richness and sweetness perfectly.
Simple ingredients come together to craft something truly spectacular.
You’ll want to share these beauties with everyone around your table.
What’s Sweet About Red Velvet Crinkle Cookie
Ingredients For Red Velvet Crinkle Cookie
Dry Ingredients:Wet Ingredients:Coating Ingredient:Baking Red Velvet Crinkle Cookie Made Easy
Step 1: Prepare Baking Space
Preheat the oven to 350°F. Line two baking sheets with parchment paper, creating a clean surface for your delightful cookies.
Step 2: Mix Dry Ingredients
Grab a medium bowl and whisk together:Blend these ingredients until they’re perfectly combined.
Step 3: Cream Butter and Sugar
In a large mixing bowl, beat softened butter and granulated sugar until the mixture becomes light, fluffy, and looks like a cloud of sweetness.
Step 4: Create Wet Base
Add eggs one at a time, mixing thoroughly after each addition. Pour in vanilla extract and red food coloring, stirring until the mixture achieves a vibrant, even color.
Step 5: Combine Mixtures
Slowly fold the dry ingredients into the wet mixture. Mix gently until just combined. The dough will feel soft and slightly sticky – that’s exactly what you want!
Step 6: Chill the Dough
Cover the dough and refrigerate for at least 30 minutes. This resting period helps the flavors meld and makes the dough easier to handle.
Step 7: Shape and Coat Cookies
Remove chilled dough and scoop into 1-inch balls. Roll each ball generously in powdered sugar, ensuring a complete white coating that will create beautiful crackles.
Step 8: Bake to Perfection
Place cookie balls on prepared baking sheets, leaving 2 inches between each. Bake for 10-12 minutes until the cookies are set but still soft in the center, with a gorgeous crackled top.
Step 9: Cool and Enjoy
Let cookies rest on the baking sheet for a few minutes, then transfer to a wire rack. Allow them to cool completely before indulging in these velvety, sugary treats.
Tips For Red Velvet Crinkle Cookie Perfection
Ways To Change Up Red Velvet Crinkle Cookie
Tasty Pairings With Red Velvet Crinkle Cookie
Red Velvet Crinkle Cookie Storage Tips
Common Red Velvet Crinkle Cookie Questions
The powdered sugar coating cracks during baking, creating distinctive white lines against the red background when the cookies spread and rise in the oven.
Yes, you can use less food coloring, but it might result in a lighter red color. Some bakers use gel food coloring for more intense color with less liquid.
Chilling helps prevent the cookies from spreading too much during baking, keeps the shape intact, and allows the flavors to develop more deeply. Cold dough also makes rolling in powdered sugar easier.
Print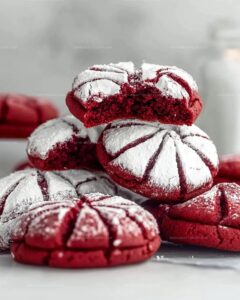
Red Velvet Crinkle Cookie Recipe
- Total Time: 45–47 minutes
- Yield: 12 1x
Description
Indulgent red velvet crinkle cookies blend rich cocoa and velvety texture into a delightful dessert that melts in your mouth. Powdered sugar-dusted edges and deep crimson centers invite you to savor each delectable bite of pure chocolate bliss.
Ingredients
Main Ingredients:
- 1 1/2 cups (187.5 grams) all-purpose flour
- 1/2 cup (50 grams) unsweetened cocoa powder
- 1 cup (200 grams) granulated sugar
- 2 large eggs
- 1/2 cup (113 grams) unsalted butter, softened
Wet and Coloring Ingredients:
- 1 tablespoon red food coloring
- 1 teaspoon vanilla extract
Dry Seasoning Ingredients:
- 1 teaspoon baking powder
- 1/4 teaspoon salt
- 1/2 cup (60 grams) powdered sugar (for rolling)
Instructions
- Prepare the oven at 350°F and arrange parchment-lined baking sheets for the crimson-hued delicacies.
- Combine flour, cocoa powder, baking powder, and salt in a medium mixing vessel, creating a unified dry foundation.
- Cream butter and granulated sugar in a spacious bowl until the mixture transforms into a light, airy consistency, approximately 2-3 minutes.
- Introduce eggs individually, thoroughly integrating each one. Blend in vanilla extract and vibrant red food coloring, ensuring uniform distribution.
- Fold the dry ingredients into the liquid mixture, stirring minimally until just incorporated. Expect a supple, slightly tacky dough texture.
- Refrigerate the dough for a minimum of 30 minutes, allowing it to firm and simplify handling while preserving the cookie’s structural integrity.
- Extract chilled dough and form into compact spheres. Completely enrobe each ball in a generous coating of powdered sugar, positioning them with ample spacing on prepared sheets.
- Roast for 10-12 minutes until edges stabilize and centers remain tender. The surface should display characteristic crackled patterns signaling perfect doneness.
- Permit cookies to rest briefly on baking sheet before transferring to a cooling rack for complete temperature reduction.
Notes
- Chill the dough thoroughly to prevent spreading and maintain the cookie’s shape during baking.
- Use gel food coloring for a more vibrant red color without adding extra liquid to the dough.
- Roll the dough balls in powdered sugar just before baking to create the signature crinkle effect and snow-like appearance.
- For a gluten-free version, substitute all-purpose flour with a 1:1 gluten-free baking flour blend to maintain the cookie’s soft texture.
- Prep Time: 15 minutes
- Cook Time: 10–12 minutes
- Category: Snacks, Desserts
- Method: Baking
- Cuisine: American
Nutrition
- Serving Size: 12
- Calories: 165 kcal
- Sugar: 14 g
- Sodium: 80 mg
- Fat: 8 g
- Saturated Fat: 5 g
- Unsaturated Fat: 3 g
- Trans Fat: 0.2 g
- Carbohydrates: 22 g
- Fiber: 1.5 g
- Protein: 2 g
- Cholesterol: 40 mg
Michael Thompson
Founder & Recipe Developer
Expertise
Education
Cascade Culinary Institute – Bend, OR
ServSafe Food Handler Certification – Portland, OR
Focus: Certified in core food safety and hygiene principles for both home and professional kitchens, with emphasis on ingredient handling, kitchen cleanliness, and safe preparation methods.
Mike’s kitchen journey began with a single goal: to make everyday meals feel like something worth celebrating.
After earning his Certificate in Culinary Arts from Cascade Culinary Institute, he spent years working with local farmers and small kitchens across Oregon, learning the beauty of seasonal, small-batch cooking.
Mike’s approach is simple, cook with what’s fresh, keep it approachable, and always leave room for a little creativity. When he’s not testing yogurt marinades or designing single-serving meals, you’ll find him hiking trails or hunting down the best berries at local markets.