
The Fluffy Cloud Slow Cooker Pavlova Recipe for Sweet Bliss
Crafting a delectable slow cooker pavlova brings unexpected magic to your dessert repertoire.
Sweet meringue dreams rise effortlessly inside this kitchen marvel.
Soft peaks and silky textures emerge without traditional oven constraints.
Crisp exterior and marshmallow-like center create stunning culinary contrasts.
Australian dessert traditions meet modern convenience through this innovative technique.
Delicate and light, the meringue base promises pure indulgence.
You might just revolutionize summer entertaining with this simple yet spectacular approach.
Prepare to impress and savor every cloudlike bite.
Ingredients List for Slow Cooker Pavlova Recipe
Base Ingredients:Binding and Flavor Ingredients:Topping Ingredients:Steps to Make Slow Cooker Pavlova the Right Way

Step 1: Whip Those Egg Whites
Grab your electric mixer and start beating the egg whites until they transform into soft, cloud-like peaks that gently curl when you lift the beaters. This is where the magic begins for your dreamy dessert.
Step 2: Create Sweet Glossy Perfection
Gradually sprinkle in the sugar while continuing to beat the egg whites. Keep whipping until the mixture becomes gloriously stiff and shiny, with peaks that stand up tall and proud when you lift the beaters.
Step 3: Fold in the Flavor Enhancers
Gently incorporate these delightful ingredients into your meringue:Use a delicate folding motion to keep all that beautiful air you’ve whipped into the mixture.
Step 4: Prepare the Slow Cooker Canvas
Line your slow cooker with parchment paper, creating a smooth surface for your pavlova. This will make removing the dessert super easy later.
Step 5: Create a Moisture-Catching Trick
Grab a clean tea towel and place it under the lid of the slow cooker. This clever technique helps catch any condensation and prevents water from dripping onto your beautiful meringue.
Step 6: Slow and Steady Cooking
Set your slow cooker to low heat and let the pavlova gently cook for about 1 to 1.5 hours. Resist the temptation to peek too often – patience is key!
Step 7: Cool Down Gracefully
Once cooking is complete, crack the lid open slightly and let the pavlova cool completely inside the slow cooker. This gradual cooling helps prevent cracking.
Step 8: Dress to Impress
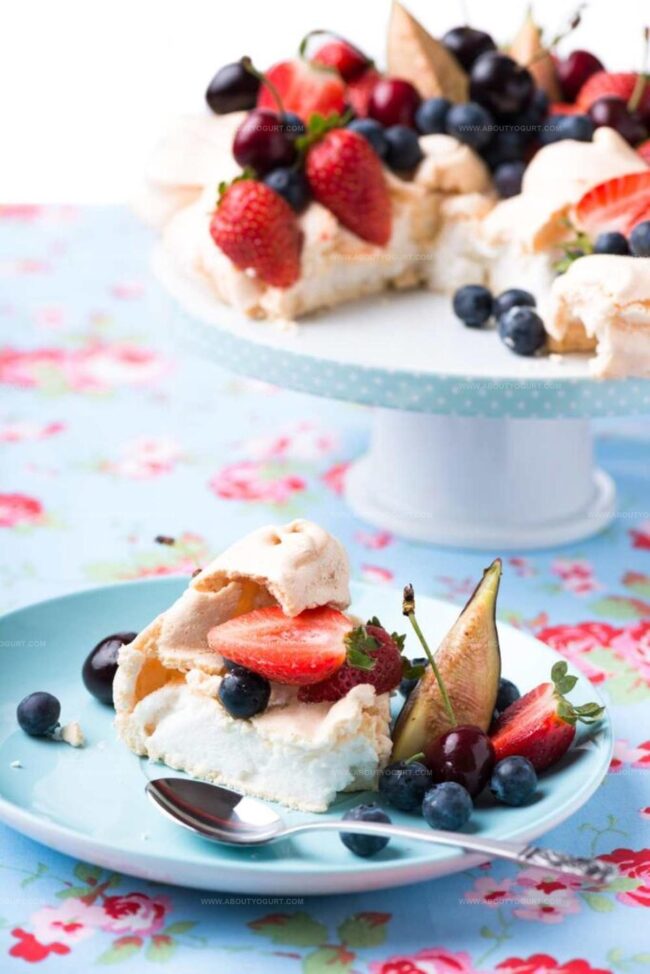
Top your pavlova with fluffy whipped cream and a gorgeous array of fresh fruits. Choose seasonal berries, sliced kiwi, or whatever makes your taste buds dance with joy.
Handy Tips for Slow Cooker Pavlova Recipe
Fun Variations for Slow Cooker Pavlova Recipe
What to Serve with Slow Cooker Pavlova Recipe
Storage Guide for Slow Cooker Pavlova Recipe
FAQs About Slow Cooker Pavlova Recipe
Yes, you can use a traditional oven at 250°F (120°C) for about 1-1.5 hours, keeping the door slightly ajar.
Cornflour helps stabilize the meringue, while vinegar prevents sugar crystallization and creates a soft, marshmallow-like center.
Soft peaks should form when you lift the beater – the mixture should hold its shape briefly before falling back. Stiff peaks will stand straight up when the beater is lifted.
Avoid adding sugar too quickly, using greasy utensils, or opening the slow cooker lid during cooking, which can cause the meringue to collapse.
Why You’ll Adore Slow Cooker Pavlova Recipe
Slow Cooker Pavlova Recipe
- Total Time: 1 hour 10 minutes to 1 hour 40 minutes
- Yield: 6 1x
Description
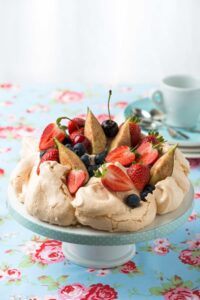
Silky slow cooker pavlova delights dessert enthusiasts with its pillowy meringue and luscious toppings. Creamy whipped cream and fresh berries crown this Australian classic, inviting you to savor each heavenly spoonful.
Ingredients
Main Ingredients:
- 6 eggs, separated
- 1 1/4 cups (315 milliliters) caster sugar
Base Ingredients:
- 2 teaspoons cornstarch
- 1 teaspoon white vinegar
Flavor Enhancers:
- 1 teaspoon vanilla extract
Instructions
- Whip egg whites in a clean, dry bowl until they form soft, billowy mounds with gentle peaks.
- Gradually incorporate sugar while continuously whisking, creating a lustrous, stable meringue with stiff, elegant peaks.
- Delicately integrate cornflour, vinegar, and vanilla essence, folding gently to maintain the meringue’s delicate structure.
- Transfer the silky mixture into a parchment-lined slow cooker, ensuring an even, smooth surface.
- Place a clean tea towel beneath the lid to absorb condensation and prevent moisture dripping onto the dessert.
- Slow cook on low temperature (approximately 200°F) for 90-100 minutes, maintaining a gentle, even heat.
- Turn off the slow cooker and allow the pavlova to cool completely inside with the lid slightly ajar, preventing rapid temperature changes.
- Once thoroughly cooled and set, carefully remove the pavlova from the slow cooker.
- Crown the meringue with billowy whipped cream and an artistic arrangement of fresh, vibrant seasonal fruits.
- Serve immediately to preserve the pavlova’s delicate crisp exterior and marshmallow-like interior.
Notes
- Egg White Technique: Ensure absolutely no yolk traces when separating eggs, as fat prevents proper white whipping.
- Sugar Incorporation: Add sugar gradually and continuously beat to achieve silky, stable meringue texture with zero graininess.
- Moisture Management: Using tea towel under lid prevents condensation dripping onto pavlova surface, maintaining crisp exterior.
- Low Temperature Control: Slow cooker provides consistent gentle heat, preventing cracking and creating perfect marshmallow-like interior.
- Prep Time: 10 minutes
- Cook Time: 1 to 1.5 hours
- Category: Desserts
- Method: Slow Cooking
- Cuisine: Australian
Nutrition
- Serving Size: 6
- Calories: 208
- Sugar: 32 g
- Sodium: 18 mg
- Fat: 5 g
- Saturated Fat: 1.6 g
- Unsaturated Fat: 3.4 g
- Trans Fat: 0 g
- Carbohydrates: 35 g
- Fiber: 0 g
- Protein: 6 g
- Cholesterol: 140 mg
Michael Thompson
Founder & Recipe Developer
Expertise
Education
Cascade Culinary Institute – Bend, OR
ServSafe Food Handler Certification – Portland, OR
Focus: Certified in core food safety and hygiene principles for both home and professional kitchens, with emphasis on ingredient handling, kitchen cleanliness, and safe preparation methods.
Mike’s kitchen journey began with a single goal: to make everyday meals feel like something worth celebrating.
After earning his Certificate in Culinary Arts from Cascade Culinary Institute, he spent years working with local farmers and small kitchens across Oregon, learning the beauty of seasonal, small-batch cooking.
Mike’s approach is simple, cook with what’s fresh, keep it approachable, and always leave room for a little creativity. When he’s not testing yogurt marinades or designing single-serving meals, you’ll find him hiking trails or hunting down the best berries at local markets.