
Fluffy Soft Sourdough Sandwich Bread Recipe to Brighten Your Day
Every home baker dreams of creating the perfect soft sourdough sandwich bread that melts in your mouth.
Crafting this delightful loaf requires patience and a touch of culinary magic.
Our simple recipe breaks down complex techniques into easy-to-follow steps.
Sourdough enthusiasts will love how straightforward this method becomes with practice.
Wild yeast works its incredible charm, developing rich flavors and a tender crumb.
Warm kitchens become bakeries filled with comforting aromas that invite eager hands to slice into a freshly baked treasure.
You’ll want to savor each delicious bite of this homemade masterpiece.
Why People Like Soft Sourdough Sandwich Bread
What’s In Soft Sourdough Sandwich Bread
Sourdough Starter:Flour Group:Liquid Group:Fat and Flavor Enhancers:Supplementary Ingredients:Steps To Make Soft Sourdough Sandwich Bread
Step 1: Wake Up Your Sourdough Starter
Mix your active sourdough starter with warm water and flour in a large mixing bowl. Stir until everything comes together smoothly, creating a loose, bubbly mixture. Let this sit and become super lively and frothy.
Step 2: Create the Overnight Magic
Combine sourdough starter, milk, and flour in a stand mixer. Use the dough hook to blend everything gently. Cover the bowl and let it hang out at room temperature overnight, allowing wild fermentation to work its magic.
Step 3: Build Your Bread Dough
Add these ingredients to your fermented mixture:Mix on low speed until ingredients start to incorporate. Gradually introduce flour, letting the dough develop strength and elasticity.
Step 4: Knead Until Silky Smooth
Continue mixing and adding flour until the dough becomes smooth, pulling away from bowl edges. The texture should feel slightly tacky but not sticky. Knead for 5-10 minutes to develop beautiful gluten structure.
Step 5: First Rise Adventure
Transfer dough to an oiled bowl. Cover and let it rise in a warm, cozy spot. Watch as it doubles in size, which might take 2-3 hours depending on kitchen temperature.
Step 6: Shape Your Loaves
Gently deflate the risen dough. Divide into equal portions. Shape each piece into a neat loaf by folding and rolling. Tuck edges for a professional look.
Step 7: Second Rise and Preparation
Place shaped loaves in greased bread pans. Cover and let them rise until they peek just above pan edges. This usually takes 2-3 hours.
Step 8: Bake to Perfection
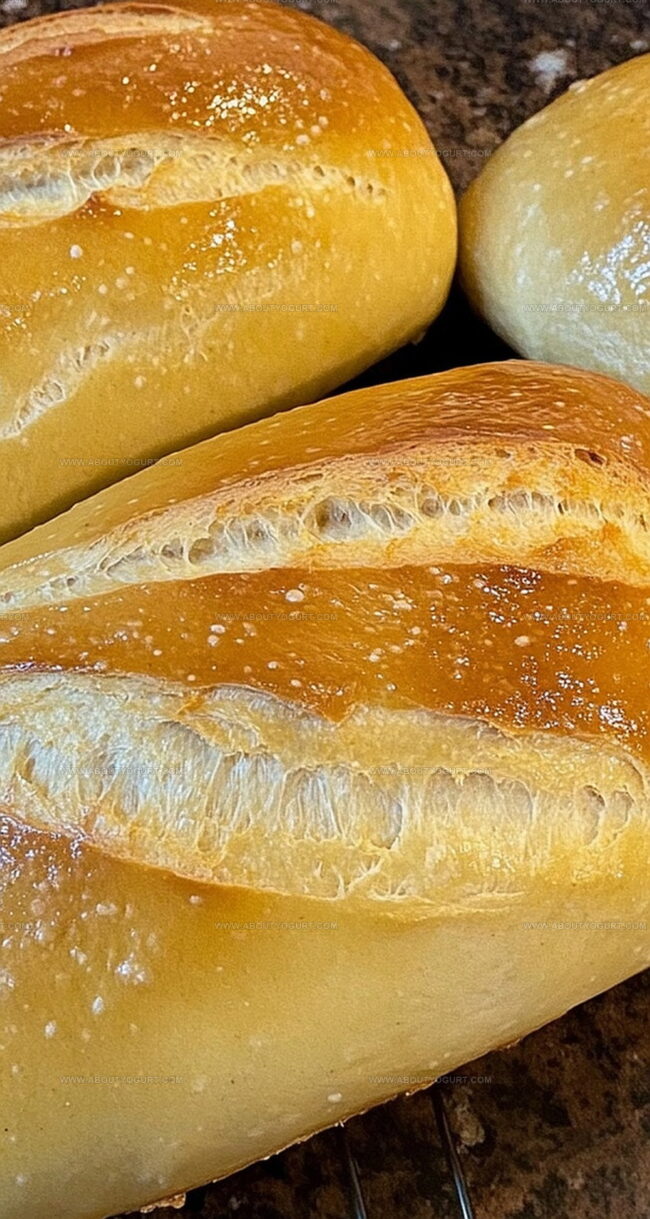
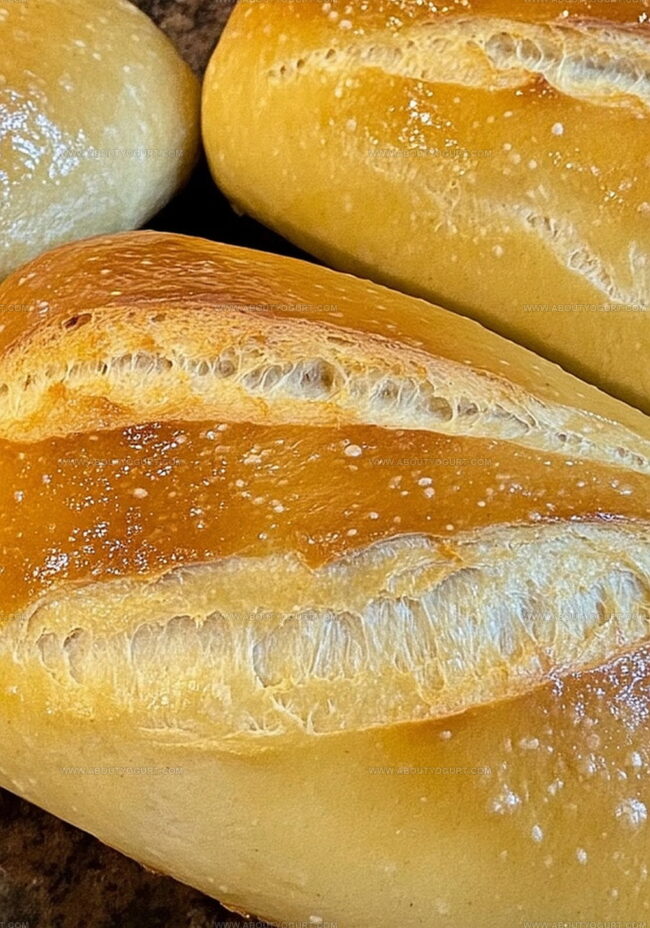
Preheat oven to 375°F. Score loaf tops with a sharp blade. Bake until golden brown and internal temperature reaches 190°F.
Step 9: Finishing Touches
Remove bread from pans. Brush tops with melted butter for a soft, luxurious crust. Allow to cool completely before slicing.
Step 10: Storage and Enjoyment
Store bread in a plastic bag at room temperature for a week. For longer preservation, slice and freeze up to 3 months. Enjoy with your favorite spreads or use for incredible sandwiches!
Tips For Making Soft Sourdough Sandwich Bread
Creative Takes On Soft Sourdough Sandwich Bread
What To Eat With Soft Sourdough Sandwich Bread
Keeping Soft Sourdough Sandwich Bread Fresh
FAQs About Soft Sourdough Sandwich Bread
A sourdough starter is a fermented mixture of flour and water containing wild yeast and beneficial bacteria that helps bread rise and provides a tangy flavor.
Your starter is active when it doubles in size, becomes bubbly, and has a pleasant, slightly sour smell within 4-12 hours after feeding.
Yes, you can knead the dough by hand, but it will require more physical effort and time to develop the gluten and achieve the right texture.
Overnight fermentation allows the dough to develop deeper flavor, improved digestibility, and better gluten structure, resulting in a more complex-tasting bread.
Print
Soft Sourdough Sandwich Bread Recipe
- Total Time: Approximately 7.5 to 8 hours plus overnight fermentation and cooling (includes overnight ferment in step 4, rising times in steps 9 and 13, baking time in step 15, and cooling in step18)
- Yield: 12 1x
Description
Homemade Sourdough Sandwich Bread elevates kitchen craft with rustic charm and classic comfort. Crisp crust and tender crumb promise delightful slices perfect for morning toast or midday sandwiches you’ll savor.
Ingredients
Main Ingredients:
- 9–11 cups all-purpose or bread flour
- 3 cups all-purpose or bread flour
- 2 cups water (milk or buttermilk)
- 3 cups milk or buttermilk
Liquid/Fat Ingredients:
- 2 cups active sourdough starter
- 1/4 cup fat (butter, oil, melted coconut oil, or beef tallow)
Flavor Enhancers:
- 1/2 cup sweetener (honey or sugar)
- 4 teaspoons salt
Instructions
- Mix sourdough starter with flour and warm water in a large bowl, creating a bubbly pre-fermentation mixture at room temperature.
- Allow the mixture to become active and rise, developing fermentation characteristics.
- Incorporate milk or buttermilk, active sourdough starter, and additional flour using a stand mixer with a dough hook attachment.
- Blend ingredients on low speed for one minute, then cover and let ferment overnight at ambient temperature.
- Introduce fat, sweetener, salt, and extra milk to the pre-fermented mixture, mixing on low speed until partially combined.
- Gradually add flour, mixing on medium speed for 5-10 minutes to develop strong gluten networks.
- Continue adding flour until the dough separates cleanly from the bowl’s sides, maintaining a slight stickiness.
- Transfer the developed dough to a generously oiled mixing bowl, ensuring complete surface coverage.
- Allow dough to rise in a warm environment for 2-3 hours, or until volume doubles – longer in cooler temperatures.
- Deflate the risen dough and place on a lightly floured surface.
- Divide dough into four equal portions, shaping each into a structured loaf by folding and rolling techniques.
- Position shaped loaves into greased bread pans, ensuring even distribution.
- Permit loaves to rise until they slightly exceed pan edges, typically 2-3 hours – monitor closely to prevent over-proofing.
- Heat oven to 375°F (190°C), then score loaf tops with a precise cut using a bread lame or sharp razor.
- Bake for 30 minutes, verifying doneness when internal temperature reaches 190°F (88°C).
- Extract loaves from pans and transfer to a cooling rack for proper air circulation.
- Apply melted butter to create a tender, glossy crust surface.
- Allow complete cooling before slicing to maintain structural integrity.
- Store in a sealed plastic bag at room temperature or refrigerate, maintaining freshness for up to one week.
- For extended preservation, freeze loaves for maximum three months, pre-slicing for convenient future use.
Notes
- Maintain a consistent warm environment around 70-75°F for optimal starter activation and dough rising, preventing slow fermentation or uneven texture.
- Use bread flour with higher protein content to develop stronger gluten structure, ensuring a softer, more elastic sandwich bread with better rise and chew.
- Monitor hydration levels carefully by adjusting flour gradually, creating a slightly tacky but not overly wet dough that prevents dense, heavy loaves.
- Experiment with alternative milk options like almond or oat milk for dairy-free variations, keeping similar liquid ratios to maintain bread’s soft texture and moisture.
- Prep Time: About 10 minutes (steps 1, 3, 5-8, 10-12)
- Cook Time: 30 minutes (step 15)
- Category: Breakfast, Lunch, Dinner, Snacks
- Method: Baking
- Cuisine: American
Nutrition
- Serving Size: 12
- Calories: 210 kcal
- Sugar: 5 g
- Sodium: 400 mg
- Fat: 4 g
- Saturated Fat: 2 g
- Unsaturated Fat: 2 g
- Trans Fat: 0 g
- Carbohydrates: 40 g
- Fiber: 1.5 g
- Protein: 6 g
- Cholesterol: 10 mg
Michael Thompson
Founder & Recipe Developer
Expertise
Education
Cascade Culinary Institute – Bend, OR
ServSafe Food Handler Certification – Portland, OR
Focus: Certified in core food safety and hygiene principles for both home and professional kitchens, with emphasis on ingredient handling, kitchen cleanliness, and safe preparation methods.
Mike’s kitchen journey began with a single goal: to make everyday meals feel like something worth celebrating.
After earning his Certificate in Culinary Arts from Cascade Culinary Institute, he spent years working with local farmers and small kitchens across Oregon, learning the beauty of seasonal, small-batch cooking.
Mike’s approach is simple, cook with what’s fresh, keep it approachable, and always leave room for a little creativity. When he’s not testing yogurt marinades or designing single-serving meals, you’ll find him hiking trails or hunting down the best berries at local markets.