
Creamy Snowball Cookies Recipe with Sweet Milk Twist
Soft, buttery snowball cookies with sweetened condensed milk promise a delightful twist on classic holiday treats.
Creamy ingredients meld together in unexpected ways, creating irresistible bite-sized delights.
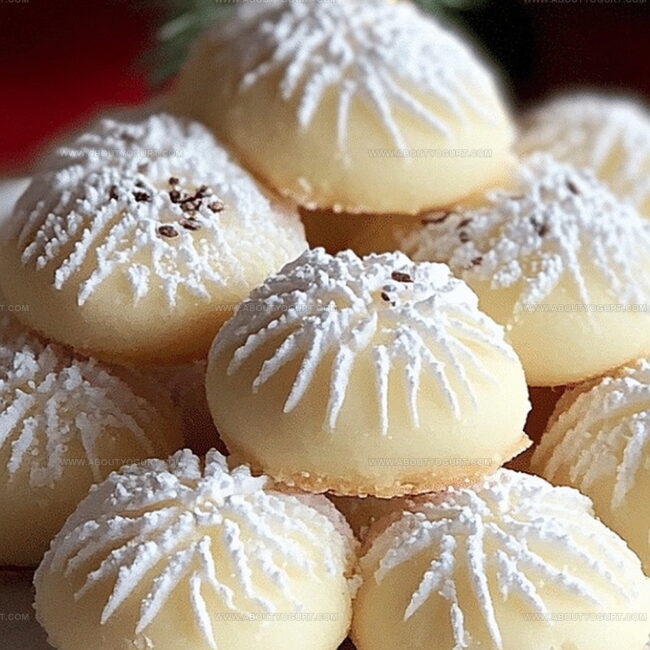
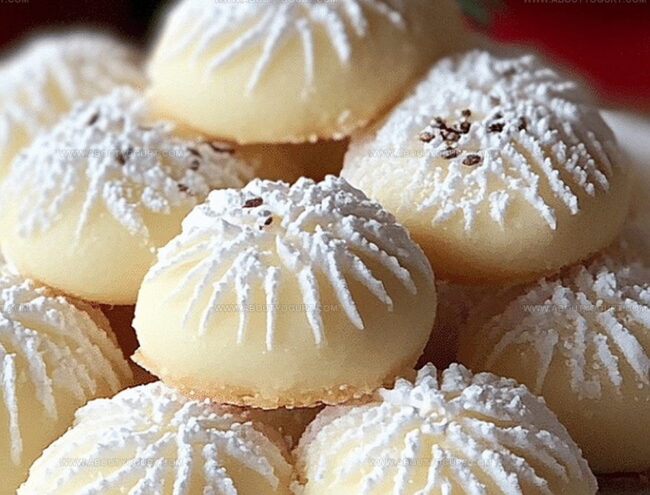
Powdered sugar coats each morsel, delivering a melt-in-your-mouth experience that surprises and delights.
Small kitchen adventures await when you mix simple pantry staples into something magical.
Nutty undertones complement the rich sweetness, making these cookies perfect for sharing.
Minimal effort yields maximum satisfaction with this uncomplicated yet elegant dessert.
Warm ovens and cheerful spirits beckon you to whip up these delectable morsels that will spark joy at every gathering.
Why Sweetened Condensed Milk Snowball Cookies Are Melt-In-Your-Mouth Good
Ingredients for Sweetened Condensed Milk Snowball Cookies
Sweetened Condensed Milk Snowball Cookies Ingredients:
Main Ingredients:Flavor Enhancers:Finishing Ingredient:How to Make Sweetened Condensed Milk Snowball Cookies
Step 1: Warm Up The Oven
Heat your oven to a toasty 350F (175C), creating the perfect environment for these delightful treats.
Step 2: Create A Creamy Base
In a large mixing bowl, blend butter and sweetened condensed milk until the mixture becomes silky smooth and fully incorporated.
Step 3: Add Flavor Boost
Introduce vanilla extract to the creamy mixture, stirring gently to distribute the rich, aromatic essence throughout.
Step 4: Build The Dough
Gradually incorporate flour into the mixture, mixing carefully until a soft, pliable dough forms. Ensure no dry flour patches remain.
Step 5: Introduce Nutty Crunch
Fold in chopped nuts, distributing them evenly throughout the dough for a delightful textural surprise in every bite.
Step 6: Shape The Cookies
Roll the dough into small, uniform balls using your palms. Place each ball carefully on a greased baking sheet, leaving space between them.
Step 7: Bake To Perfection
Slide the baking sheet into the preheated oven. Bake for 12-15 minutes, watching carefully until the cookies set but maintain a delicate, pale appearance.
Step 8: Dust With Sweetness
Once slightly cooled, gently roll each cookie in powdered sugar, creating a beautiful snowy coating that adds an extra layer of sweetness.
Step 9: Serve And Enjoy
Arrange the finished cookies on a serving plate, ready to delight friends and family with these melt-in-your-mouth treats.
Pro Tips for Snowball Cookies Perfection
Variations to Try With Snowball Cookies
Pairing Ideas for Snowball Cookies
Proper Storage for Snowball Cookies
FAQs on Sweetened Condensed Milk Snowball Cookies
Butter, sweetened condensed milk, vanilla extract, flour, and chopped nuts are the main ingredients that create the rich, tender texture of these delightful cookies.
Absolutely! While the original recipe suggests chopped nuts, you can easily substitute with pecans, walnuts, or almonds based on your preference and what you have available.
Use a small cookie scoop or tablespoon to ensure uniform size. Gently roll the dough between your palms, creating smooth, round balls that will bake evenly and look beautiful when coated in powdered sugar.
Print
Sweetened Condensed Milk Snowball Cookies Recipe
- Total Time: 27-30 minutes
- Yield: 24 1x
Description
Snowball cookies from Brazil melt hearts with their delicate powdered sugar coating and creamy condensed milk center. Rich, buttery, and irresistibly sweet, these treats invite you to savor a moment of pure culinary bliss.
Ingredients
Main Ingredients:
- 2 cups all-purpose flour
- 1 cup finely chopped nuts
- 1 cup butter, softened
Binding Ingredients:
- 1/2 cup sweetened condensed milk
Flavoring Ingredients:
- 1 teaspoon vanilla extract
- Powdered sugar (for rolling)
Instructions
- Prepare the oven by heating to 350F (175C), ensuring a consistent temperature for baking.
- Using an electric mixer, blend butter and sweetened condensed milk until achieving a smooth, homogeneous texture.
- Incorporate vanilla extract into the creamy mixture, distributing the flavor evenly.
- Gradually introduce flour to the wet ingredients, stirring until a cohesive dough forms without overmixing.
- Gently fold chopped nuts into the dough, distributing them uniformly throughout the mixture.
- Craft small, uniform spheres of dough using your palms, placing them carefully on a lightly greased baking sheet with spacing between each cookie.
- Transfer the baking sheet to the preheated oven and bake for 12-15 minutes, watching for a set consistency without allowing browning.
- Remove cookies from the oven and let them cool for 3-5 minutes until they can be handled safely.
- Roll each slightly warm cookie in powdered sugar, ensuring complete and even coverage to create a delicate, snowy exterior.
- Allow cookies to cool completely, during which the powdered sugar will set and create a delightful, melt-in-your-mouth coating.
Notes
- Swap out regular flour with gluten-free flour blend for those with wheat sensitivities, ensuring the same delightful texture and taste.
- Toast nuts before adding to enhance their nutty flavor and provide a deeper, more complex taste profile to the cookies.
- Control cookie size by using a small cookie scoop for uniform, perfectly round snowballs that bake evenly and look professionally crafted.
- Allow cookies to cool completely before rolling in powdered sugar to prevent clumping and achieve a smooth, even coating that looks pristine.
- Prep Time: 15 minutes
- Cook Time: 12-15 minutes
- Category: Desserts, Snacks
- Method: Baking
- Cuisine: American
Nutrition
- Serving Size: 24
- Calories: 163
- Sugar: 6 g
- Sodium: 28 mg
- Fat: 11 g
- Saturated Fat: 7 g
- Unsaturated Fat: 3 g
- Trans Fat: 0.3 g
- Carbohydrates: 16 g
- Fiber: 1 g
- Protein: 2 g
- Cholesterol: 31 mg
Michael Thompson
Founder & Recipe Developer
Expertise
Education
Cascade Culinary Institute – Bend, OR
ServSafe Food Handler Certification – Portland, OR
Focus: Certified in core food safety and hygiene principles for both home and professional kitchens, with emphasis on ingredient handling, kitchen cleanliness, and safe preparation methods.
Mike’s kitchen journey began with a single goal: to make everyday meals feel like something worth celebrating.
After earning his Certificate in Culinary Arts from Cascade Culinary Institute, he spent years working with local farmers and small kitchens across Oregon, learning the beauty of seasonal, small-batch cooking.
Mike’s approach is simple, cook with what’s fresh, keep it approachable, and always leave room for a little creativity. When he’s not testing yogurt marinades or designing single-serving meals, you’ll find him hiking trails or hunting down the best berries at local markets.