Fluffy Golden Traditional Indian Frybread Recipe
Native communities have long cherished this delightful traditional Indian frybread as a culinary treasure passed through generations.
My grandmother shared stories about its rich cultural significance during festive gatherings.
Soft, pillowy dough emerges from simple ingredients that dance together with remarkable simplicity.
Each bite connects you to ancestral traditions and warm memories of shared meals.
Wheat flour, salt, and baking powder create magic when kneaded with gentle hands.
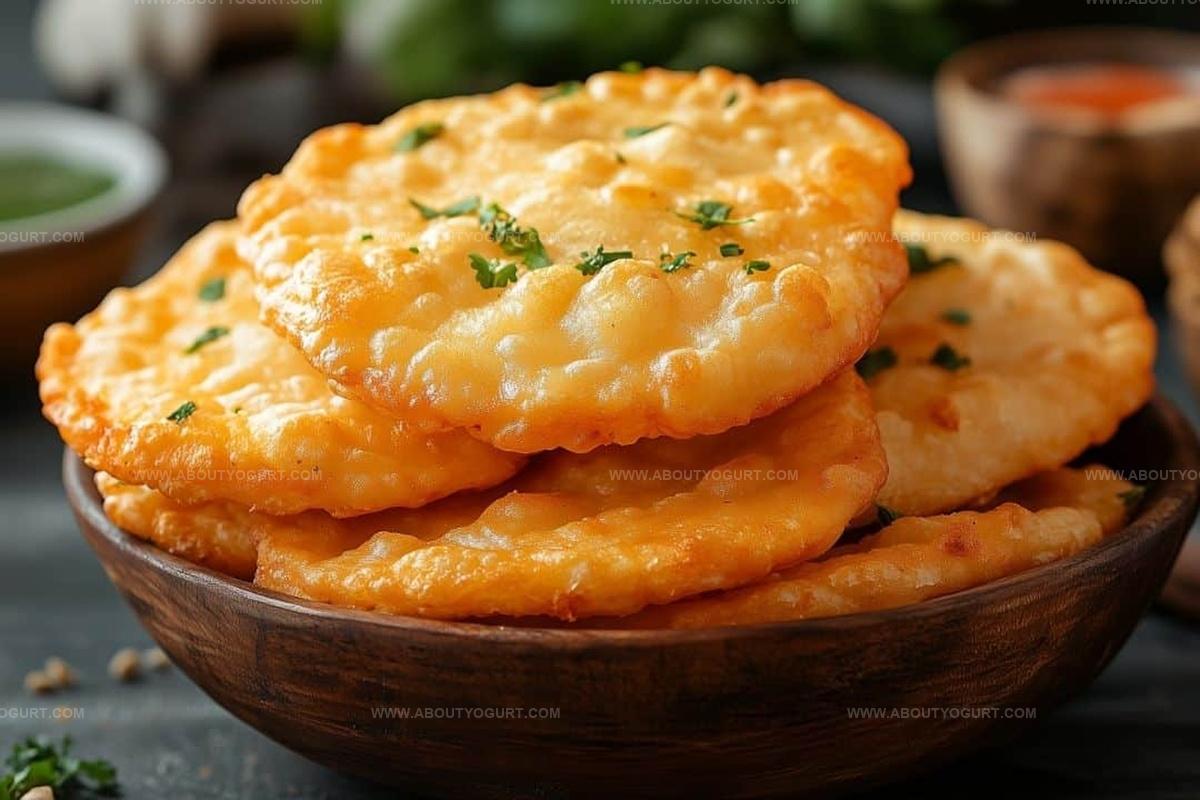
Crispy golden edges promise a sensory experience that celebrates indigenous culinary heritage.
Why Traditional Indian Frybread Is a Treat

Ingredients for Traditional Indian Frybread
Dry Ingredients:Liquid Ingredients:Cooking Ingredients:Making Traditional Indian Frybread
Step 1: Prepare Dough Base
Mix flour, baking powder, and salt in a medium bowl. Gradually pour milk while stirring until a slightly sticky dough forms. The consistency will be soft and pliable.
Step 2: Knead and Rest Dough
Sprinkle flour on work surface and gently knead dough until smooth. Avoid overworking the mixture. Place dough in a covered bowl and refrigerate for 30 minutes to allow ingredients to settle.
Step 3: Prepare Frying Station
Select a deep frying pan or kettle. Fill with oil approximately one inch deep. Heat oil to 350°F, ensuring consistent temperature for perfect golden frying.
Step 4: Shape Frybread Discs
Remove chilled dough and divide into four equal portions. Roll each section into circular discs approximately quarter-inch thick. Create a small center hole in each disc to promote even cooking.
Step 5: Fry Bread Perfectly
Carefully lower dough discs into hot oil. Fry each side for 1-2 minutes until achieving a gorgeous golden-brown color. Rotate midway to ensure uniform crispiness.
Step 6: Finish and Garnish
Transfer fried bread onto paper towel-lined plate to absorb excess oil. Serve immediately with preferred toppings like honey, powdered sugar, or savory accompaniments.
Tips for Successful Indian Frybread

Variations for Indian Frybread
Pairings for Traditional Indian Frybread
Storage Tips for Indian Frybread
FAQs About Traditional Indian Frybread
Frybread originated during the Native American reservation period when indigenous people were given limited food supplies like flour, sugar, and lard by the US government, leading to this creative survival food.
Not at all! It requires basic ingredients like flour, milk, and baking powder, and the process is straightforward. Even beginners can master this recipe with a little practice.
Yes, you can test oil temperature by dropping a small piece of dough into the oil. If it sizzles and rises immediately, the oil is ready for frying.
The hole helps the bread cook evenly and prevents it from puffing up too much during frying, ensuring a consistent texture throughout.
Print
Traditional Indian Frybread Recipe
- Total Time: 48 minutes
- Yield: 4 1x
Description
Crispy golden “Traditional Indian Frybread” brings Native American culinary heritage to your kitchen, celebrating simple ingredients and cultural richness. Salt, flour, and hot oil combine into a delectable canvas you’ll savor with pride and connection.
Ingredients
Main Ingredients:
- 1 cup all-purpose flour
- 1/2 cup + 2 tablespoons milk
Leavening and Seasoning:
- 1 1/2 teaspoons baking powder
- 1/4 teaspoon salt
Cooking Ingredient:
- Vegetable oil for frying (about 1 inch deep)
Instructions
- Prepare the foundational mixture by blending flour, baking powder, and salt in a medium mixing vessel, gradually incorporating milk until a slightly tacky dough emerges.
- Transfer the dough onto a flour-dusted surface and gently manipulate until achieving a smooth consistency, avoiding excessive handling. Encase in a container and refrigerate for approximately 30 minutes to rest and stabilize.
- Select a deep skillet and fill with oil reaching roughly 1-inch depth. Heat oil to precisely 350°F, creating an optimal frying environment for achieving a crisp exterior.
- Remove chilled dough and partition into four uniform segments. Roll each portion into thin, circular shapes approximately ¼-inch thick, creating a small central perforation to facilitate even thermal distribution during cooking.
- Delicately introduce dough discs into the heated oil, monitoring each side’s transformation. Allow 1-2 minutes of cooking per surface, rotating midway to ensure uniform golden-brown coloration and crisp texture.
- Extract frybread using a slotted utensil, positioning on absorbent paper towels to eliminate excess oil. Transfer immediately to serving plate while maintaining optimal temperature and crispness.
Notes
- Choose high-quality flour for a more tender and flavorful frybread that melts in your mouth.
- Keep the oil temperature consistent at 350°F to prevent soggy or burnt bread, using a kitchen thermometer for accuracy.
- Experiment with alternative flours like whole wheat or gluten-free blends to accommodate different dietary needs while maintaining the classic crispy texture.
- Create a healthier version by using a shallow pan with less oil and draining excess oil thoroughly on paper towels to reduce overall fat content.
- Prep Time: 40 minutes
- Cook Time: 8 minutes
- Category: Snacks, Appetizer, Breakfast
- Method: Frying
- Cuisine: Indian
Nutrition
- Serving Size: 4
- Calories: 223
- Sugar: 2 g
- Sodium: 270 mg
- Fat: 7 g
- Saturated Fat: 1 g
- Unsaturated Fat: 6 g
- Trans Fat: 0 g
- Carbohydrates: 35 g
- Fiber: 1 g
- Protein: 6 g
- Cholesterol: 10 mg
Sarah Mitchell
Content Specialist & Home Cooking Enthusiast
Expertise
Education
Asheville-Buncombe Technical Community College – Asheville, NC
American Fitness Professionals & Associates – Online
Sarah’s passion for food was sparked by weekend trips to the farmers’ market and her belief that healthy meals should never feel boring.
After earning her culinary diploma and becoming a certified Nutrition and Wellness Consultant, she set out to help others fall in love with simple, wholesome cooking.
She’s all about celebrating the small wins in the kitchen: a colorful yogurt bowl, a new twist on a classic dish, or a homemade snack that feels just a little extra special.
Outside the kitchen, Sarah is a gardener at heart, a yoga enthusiast, and a believer that fresh herbs can brighten any meal, and any day.