
Fluffy Cherry Cheesecake Recipe: Sweet, Light & Fresh Treat
Sweet memories dance through my cherry cheesecake fluff, whisking you back to childhood birthday parties.
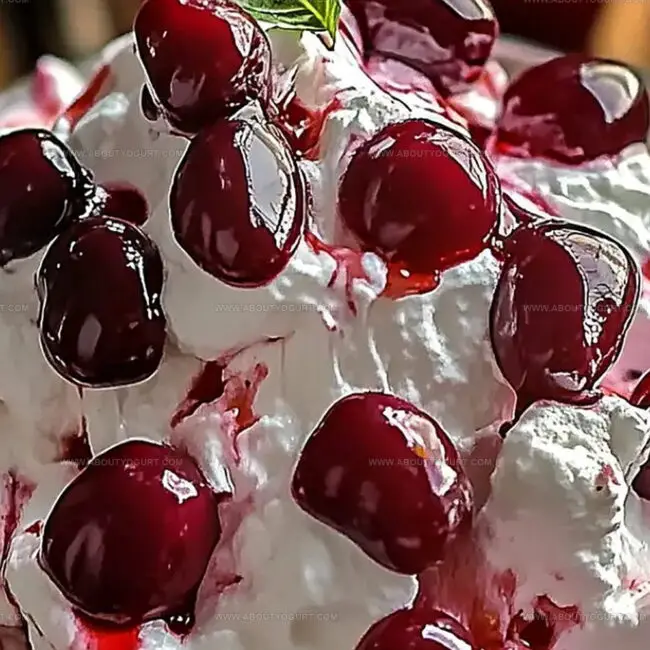
Creamy clouds of marshmallow and cream cheese swirl together in delightful harmony.
Soft peaks of whipped delight promise instant comfort and joy.
Mixing takes mere minutes, making this dessert a quick miracle for busy cooks.
Each spoonful delivers a light, dreamy experience that melts smoothly on your tongue.
Cool and refreshing, this treat brings instant smiles to every gathering.
Grab a spoon and dive into pure deliciousness that will have everyone asking for seconds.
Light and Sweet: Cherry Cheesecake Fluff Delight
Ingredients for Cherry Cheesecake Fluff
For the Base:For the Sweeteners and Flavors:For the Texture and Mix-ins:How to Prepare Cherry Cheesecake Fluff
Step 1: Whip the Cream Cheese
Grab a large mixing bowl and toss in the softened cream cheese. Use an electric mixer to beat the cream cheese until it transforms into a silky, velvety smooth texture with no lumps.
Step 2: Create a Sweet Base
Slowly sprinkle in the powdered sugar and vanilla extract. Mix thoroughly until the ingredients blend seamlessly, creating a rich and creamy foundation for your fluffy dessert.
Step 3: Fold in Whipped Topping
Gently introduce the whipped topping into the mixture. Use a spatula to fold carefully, creating an airy and light texture that will make your dessert incredibly delectable.
Step 4: Mix in Delightful Additions
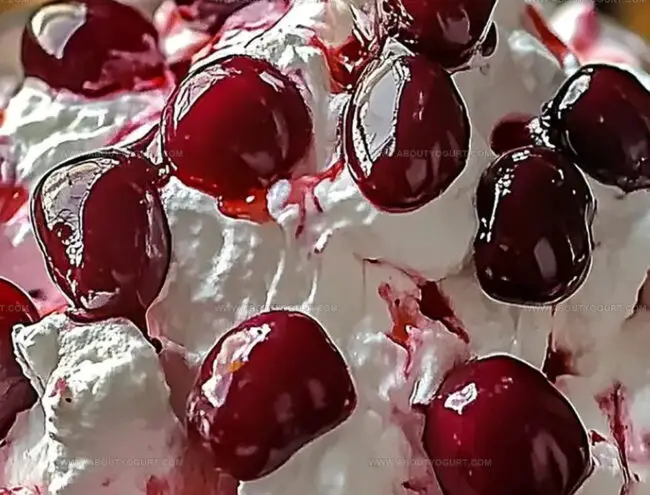
Carefully stir in the cherry pie filling, creating a vibrant color and fruity burst. Add the following ingredients:Blend everything together until evenly distributed throughout the mixture.
Step 5: Chill and Develop Flavors
Cover the bowl with plastic wrap and tuck it into the refrigerator. Allow the dessert to rest and mingle for at least 2 hours, letting the flavors develop and intensify.
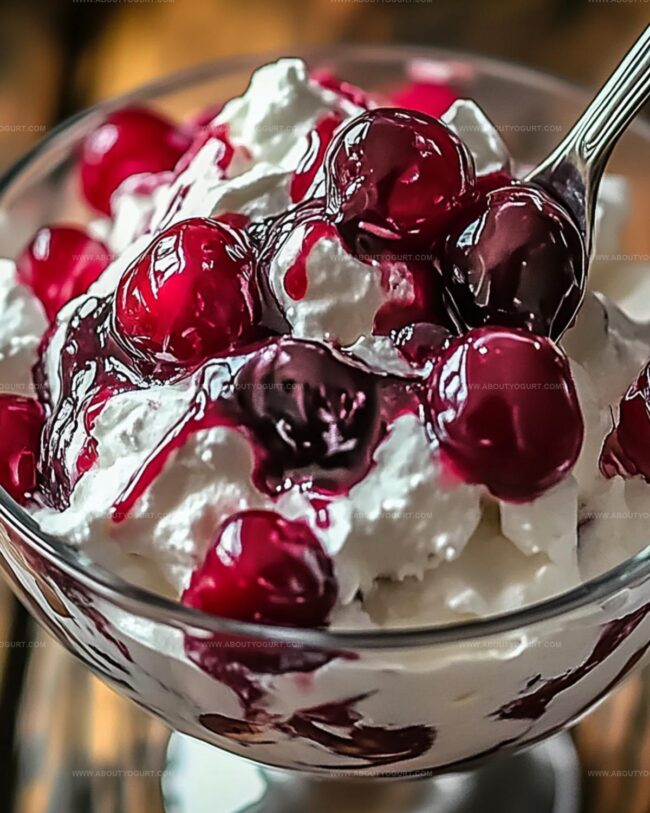
Step 6: Serve and Indulge
Give the fluff a gentle stir just before serving. Scoop into dessert bowls and watch as your guests dive into this creamy, dreamy treat with pure delight.
Pro Tips for Fluffy Cherry Cheesecake Delight
Variations on Cherry Cheesecake Fluff
Pairing Ideas for Cherry Cheesecake Fluff
Indulge Cherry Cheesecake Delight: Perfect Pairings
Storage Tips for Cherry Cheesecake Fluff
Store the cherry cheesecake fluff in an airtight container in the refrigerator for up to 3-4 days. Seal tightly to prevent absorption of other food odors.
Transfer the dessert to a freezer-safe container with a tight lid. Freeze for up to 2 months. Wrap the container in plastic wrap for extra protection against freezer burn.
Remove from the freezer and let the fluff thaw in the refrigerator overnight. Avoid thawing at room temperature to maintain its creamy texture.
Stir the thawed or chilled fluff gently to restore its original light and fluffy consistency. If needed, fold in a small amount of fresh whipped topping to revive its texture.
FAQs
Yes, this Cherry Cheesecake Fluff is completely no-bake, which means you won’t need an oven to prepare it. Simply mix the ingredients and chill in the refrigerator.
Absolutely! You can prepare this fluff up to 24 hours in advance. Just keep it covered in the refrigerator and stir gently before serving.
No special equipment is required. You’ll only need a mixing bowl, electric mixer or whisk, and a spatula to create this delicious dessert.
Print
Cherry Cheesecake Fluff Recipe
- Total Time: 2 hours 15 minutes
- Yield: 8 1x
Description
Sweet summer memories bloom in this cherry cheesecake fluff, where creamy indulgence meets light, airy perfection. Cool whipped cream and tangy cream cheese swirl with juicy cherries, promising delightful spoonful after spoonful for passionate dessert enthusiasts.
Ingredients
Main Ingredients:
- 21 ounces (595 grams) cherry pie filling
- 8 ounces (226 grams) cream cheese, softened
- 8 ounces (226 grams) whipped topping, thawed
- 2 cups mini marshmallows
Secondary Ingredients:
- 1 cup powdered sugar
Garnish and Optional Ingredients:
- 1/2 cup chopped pecans
- 1 teaspoon vanilla extract
Instructions
- In a spacious mixing vessel, whip cream cheese until velvety and uniform in texture, ensuring no lumps remain.
- Incorporate powdered sugar and vanilla extract, blending thoroughly until the mixture achieves a silky consistency.
- Gently introduce whipped topping, folding delicately to maintain a light, airy texture without deflating the mixture.
- Carefully fold in cherry pie filling, distributing evenly throughout the creamy base for a vibrant marbled effect.
- Add mini marshmallows and chopped pecans, stirring minimally to preserve the fluffy structure.
- Transfer the mixture to a sealed container and refrigerate for 2-3 hours, allowing flavors to harmonize and texture to set.
- Before serving, give the fluff a gentle stir to redistribute ingredients and restore its pillowy consistency.
- Garnish with additional pecans or a sprinkle of marshmallows if desired, and serve chilled for maximum enjoyment.
Notes
- Soften cream cheese completely at room temperature to ensure a smooth, lump-free base that blends seamlessly.
- Use an electric mixer on medium speed to achieve the perfect creamy consistency without overbeating the cream cheese.
- Fold whipped topping gently to maintain the light, airy texture that makes this dessert so irresistible.
- Customize the recipe by swapping cherry pie filling with other fruit options like blueberry, strawberry, or peach for variety.
- Prep Time: 15 minutes
- Cook Time: 2 hours
- Category: Desserts, Snacks
- Method: Refrigerating
- Cuisine: American
Nutrition
- Serving Size: 8
- Calories: 312
- Sugar: 32 g
- Sodium: 153 mg
- Fat: 19 g
- Saturated Fat: 7 g
- Unsaturated Fat: 10 g
- Trans Fat: 0 g
- Carbohydrates: 29 g
- Fiber: 1 g
- Protein: 4 g
- Cholesterol: 34 mg
Michael Thompson
Founder & Recipe Developer
Expertise
Education
Cascade Culinary Institute – Bend, OR
ServSafe Food Handler Certification – Portland, OR
Focus: Certified in core food safety and hygiene principles for both home and professional kitchens, with emphasis on ingredient handling, kitchen cleanliness, and safe preparation methods.
Mike’s kitchen journey began with a single goal: to make everyday meals feel like something worth celebrating.
After earning his Certificate in Culinary Arts from Cascade Culinary Institute, he spent years working with local farmers and small kitchens across Oregon, learning the beauty of seasonal, small-batch cooking.
Mike’s approach is simple, cook with what’s fresh, keep it approachable, and always leave room for a little creativity. When he’s not testing yogurt marinades or designing single-serving meals, you’ll find him hiking trails or hunting down the best berries at local markets.