
Lemon Shortbread Recipe with Sweet Buttery Brightness
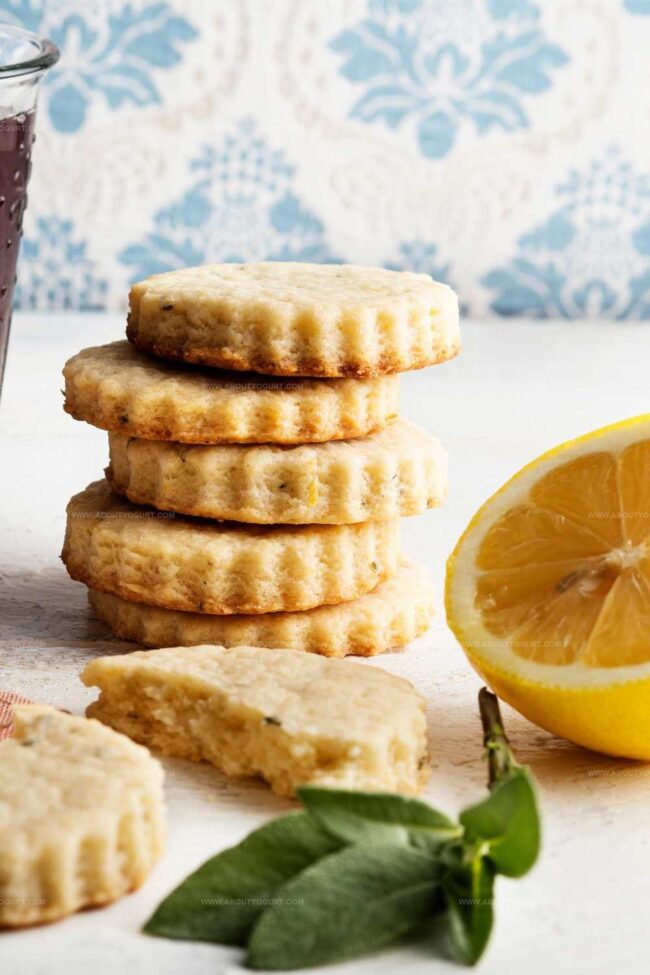
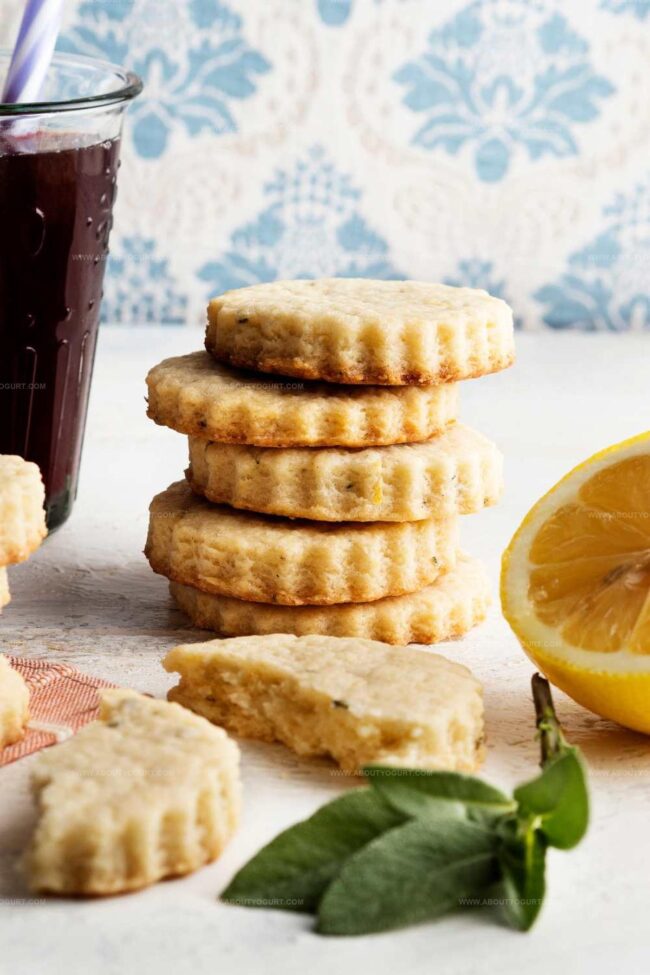
Crisp, buttery lemon shortbread cookies dance with zesty brightness on your palate.
Sunshine-sweet citrus notes weave through delicate, crumbly textures.
Delightful memories of afternoon tea emerge with each tender bite.
Bakers love how simple ingredients create such magical results.
Scottish tradition meets bright, modern flavor in this classic treat.
Perfectly balanced between sweet and tangy, these cookies promise pure comfort.
Craving a delectable moment of pure joy?
This recipe waits to delight you.
Why Nigella Lemon Shortbread Is So Zesty
Nigella Lemon Shortbread Ingredient Breakdown
Base Ingredients:Flavor Enhancers:Decoration and Finishing:How To Bake Nigella Lemon Shortbread
Step 1: Warm Up the Oven
Prepare your oven by setting it to 150°C (fan setting) and line two baking trays with parchment paper for easy cookie removal.
Step 2: Whip Up the Creamy Base
In a mixing bowl, blend together softened butter, sugar, and freshly grated lemon zest. Whip the mixture until it becomes light, airy, and fluffy, which should take around 5 minutes.
Step 3: Fold in the Flour
Gradually add flour to the creamy mixture, stirring gently until just combined. Be careful not to overmix, as this can make the shortbread tough.
Step 4: Shape the Dough
Transfer the dough to a lightly floured surface. Gently knead the dough a few times to bring it together smoothly.
Step 5: Roll and Cut
Using a rolling pin, roll out the dough to a consistent 1 cm thickness. Use a 5-cm round cookie cutter to create perfect circular shortbread cookies.
Step 6: Chill the Cookies
Place the cut cookie rounds on a tray and refrigerate for 15 minutes. This helps the cookies maintain their shape during baking.
Step 7: Bake to Golden Perfection
Slide the chilled cookies into the preheated oven. Bake for 25-30 minutes until the edges are firm and just turning a delicate golden color.
Step 8: Cool and Rest
Remove the cookies from the oven and let them cool on the tray for 5 minutes. Then transfer to a wire rack to cool completely.
Step 9: Create a Zesty Glaze
Prepare a simple icing by mixing powdered sugar with a touch of lemon juice until you reach a smooth, drizzling consistency.
Step 10: Finish with a Flourish
Once the shortbread has cooled, drizzle the lemon icing over the cookies. Allow the icing to set completely before serving these delightful treats.
Tips To Get Nigella Lemon Shortbread Just Right
Fun Variations Of Nigella Lemon Shortbread
What Goes Well With Nigella Lemon Shortbread
How To Store Nigella Lemon Shortbread Properly
FAQs About Nigella Lemon Shortbread
Cold butter helps create a crumbly, tender texture and prevents the cookies from spreading too much during baking, ensuring a perfect shortbread consistency.
Fresh lemon zest provides the best flavor and aromatic oils. Bottled juice lacks the intense citrus essence and won’t give the same bright, vibrant taste to the shortbread.
Don’t overmix the dough and handle it gently. Kneading too much can develop gluten, making the shortbread tough instead of delicate and melt-in-your-mouth.
Use a sharp, clean cookie cutter and dip it in flour between cuts to prevent sticking.
Print
Lemon Shortbread Recipe
- Total Time: 50-55 minutes
- Yield: 12 1x
Description
Zesty lemon shortbread cookies dance with buttery elegance, offering a delightful twist on classic Scottish treats. Crumbly, tangy, and irresistibly smooth, these cookies will transport you to a sunny afternoon with their bright citrus charm.
Ingredients
Main Ingredients:
- 250 grams (8.8 ounces) butter, softened
- 2 1/4 cups (335 grams) plain flour
- 1/2 cup (110 grams) caster sugar
Lemon Flavoring:
- 1 tablespoon finely grated lemon rind
- 1 tablespoon lemon juice
Finishing Ingredients:
- 1 cup (160 grams) icing sugar, sifted
- 1 teaspoon milk or water
Instructions
- Prepare workspace by heating oven to 150°C (fan) and lining baking trays with parchment paper.
- In a mixing bowl, whip butter, sugar, and lemon zest until achieving a pale, airy texture, approximately 5 minutes.
- Gradually incorporate flour into the butter mixture, stirring minimally to maintain a delicate consistency.
- Transfer dough onto a lightly dusted surface and gently manipulate to create a cohesive texture.
- Use a rolling pin to flatten dough uniformly to 1 cm thickness, then utilize a 5-cm circular cutter to shape shortbread rounds.
- Refrigerate cookie rounds for 15 minutes to enhance structural integrity and flavor development.
- Position chilled rounds on prepared trays and bake for 25-30 minutes, monitoring until edges transform to a soft golden hue and texture becomes firm.
- Allow cookies to rest for 5 minutes post-baking, then carefully transfer to a wire cooling rack.
- Prepare icing by blending ingredients until achieving a smooth, drizzleable consistency.
- Once shortbread completely cools, elegantly drizzle icing across surfaces and permit to set before serving.
Notes
- Use room temperature butter for smooth, creamy mixing and better incorporation with sugar and zest.
- Avoid overmixing flour to prevent tough, dense shortbread; stop mixing once dough just comes together.
- Chilling dough before baking helps cookies maintain shape and prevents excessive spreading during baking.
- For gluten-free version, replace wheat flour with almond or gluten-free blend, adjusting liquid slightly for desired consistency.
- Prep Time: 25 minutes
- Cook Time: 25-30 minutes
- Category: Desserts, Snacks
- Method: Baking
- Cuisine: Scottish
Nutrition
- Serving Size: 12
- Calories: 268
- Sugar: 14 g
- Sodium: 4 mg
- Fat: 18 g
- Saturated Fat: 11 g
- Unsaturated Fat: 6 g
- Trans Fat: 0.2 g
- Carbohydrates: 26 g
- Fiber: 1 g
- Protein: 2 g
- Cholesterol: 45 mg
Michael Thompson
Founder & Recipe Developer
Expertise
Education
Cascade Culinary Institute – Bend, OR
ServSafe Food Handler Certification – Portland, OR
Focus: Certified in core food safety and hygiene principles for both home and professional kitchens, with emphasis on ingredient handling, kitchen cleanliness, and safe preparation methods.
Mike’s kitchen journey began with a single goal: to make everyday meals feel like something worth celebrating.
After earning his Certificate in Culinary Arts from Cascade Culinary Institute, he spent years working with local farmers and small kitchens across Oregon, learning the beauty of seasonal, small-batch cooking.
Mike’s approach is simple, cook with what’s fresh, keep it approachable, and always leave room for a little creativity. When he’s not testing yogurt marinades or designing single-serving meals, you’ll find him hiking trails or hunting down the best berries at local markets.