
Peanut Butter and Jelly Cheesecake Recipe to Try
My kitchen adventures often lead me to unexpected peanut butter and jelly cheesecake miracles that surprise even seasoned bakers.
Sweet memories of childhood merge with sophisticated dessert techniques in this playful recipe.
Nostalgic flavors dance across creamy textures, creating something magical between classic comfort and culinary innovation.
Combining familiar sandwich ingredients into a decadent cheesecake feels like delicious alchemy.
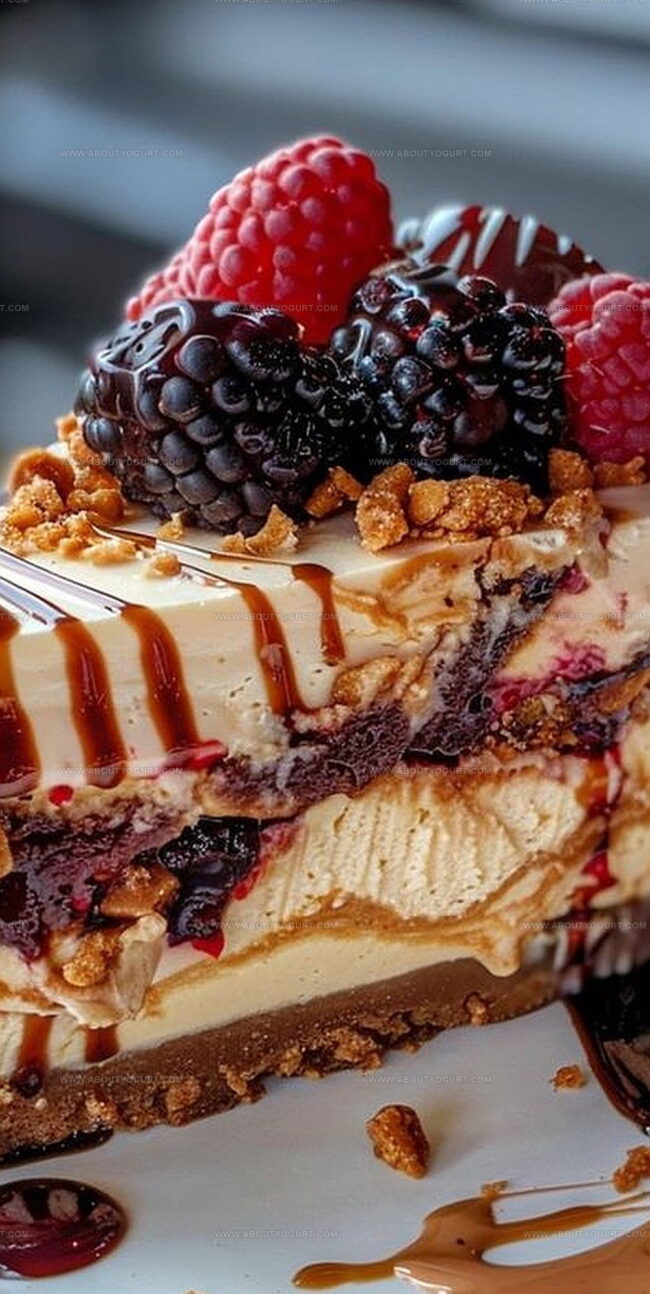
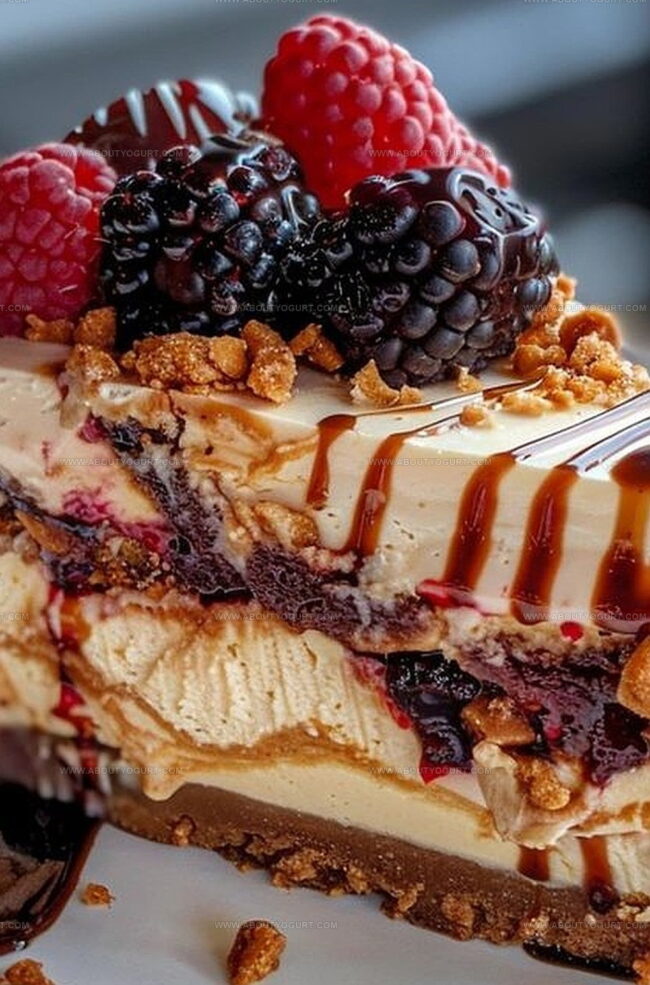
Layers of smooth cream cheese intermingle with grape jelly swirls and rich peanut butter ribbons.
Each bite promises a delightful journey through familiar yet unexpected taste sensations.
Let’s transform those simple sandwich ingredients into an unforgettable dessert experience that will spark joy at your next gathering.
Why Peanut Butter and Jelly Cheesecake Is a Classic Treat
Ingredients for Peanut Butter and Jelly Cheesecake
Crust Ingredients:Cheesecake Filling Ingredients:Topping and Swirl Ingredients:Instructions for Peanut Butter and Jelly Cheesecake
Step 1: Prepare the Baking Station
Warm up the oven to 325F (163C). Grab a 9-inch springform pan and cover its exterior completely with aluminum foil to prevent water from seeping in during baking.
Step 2: Create the Crunchy Crust
Combine graham cracker crumbs, melted butter, and sugar in a mixing bowl. Press this mixture firmly into the bottom of the prepared pan. Slide the pan into the refrigerator to chill while you work on the filling.
Step 3: Whip Up the Creamy Filling
In a large mixing bowl, blend softened cream cheese, peanut butter, sugar, and vanilla extract until the mixture becomes silky smooth and free of lumps.
Step 4: Incorporate the Eggs
Gently add eggs one at a time, mixing thoroughly after each addition. Pour in sour cream and stir until completely incorporated.
Step 5: Layer the First Batter
Carefully spread half of the cheesecake batter over the chilled crust, creating an even layer.
Step 6: Swirl in the Jelly
Dollop spoonfuls of jelly across the batter. Take a knife or toothpick and create a beautiful marbled effect by gently swirling the jelly through the cheesecake layer.
Step 7: Add the Final Batter Layer
Gently pour the remaining cheesecake batter over the jelly-swirled layer, ensuring an even distribution.
Step 8: Create a Water Bath
Position the springform pan inside a large roasting pan. Carefully pour hot water into the roasting pan until it reaches about halfway up the sides of the springform pan.
Step 9: Bake to Perfection
Bake in the preheated oven for 60-70 minutes. The center should be just set with a slight jiggle. Turn off the oven and crack the door open, allowing the cheesecake to cool slowly for one hour.
Step 10: Chill and Set
Remove the cheesecake from the oven and refrigerate for at least 4 hours or overnight to ensure it sets completely.
Step 11: Add the Finishing Touch
Optional: Before serving, drizzle melted peanut butter over the chilled cheesecake for an extra decadent touch.
Pro Tips for Peanut Butter and Jelly Cheesecake
Flavor Variations for Peanut Butter and Jelly Cheesecake
Pairing Suggestions for Peanut Butter and Jelly Cheesecake
Storage Advice for Peanut Butter and Jelly Cheesecake
Common Questions About Peanut Butter and Jelly Cheesecake
Use a water bath by placing the springform pan in a larger pan with hot water. This helps the cheesecake bake more evenly and prevents cracking by creating a moist baking environment.
Absolutely! Feel free to experiment with strawberry, raspberry, grape, or any other jelly you enjoy. Just make sure to use a smooth, spreadable jelly for the best swirling effect.
Let cream cheese sit at room temperature for about 30-45 minutes before mixing. This ensures a smooth, lump-free cheesecake filling that blends easily.
Print
Peanut Butter And Jelly Cheesecake Recipe
- Total Time: 5 hours 55 minutes (including chilling and refrigeration)
- Yield: 8 1x
Description
Creamy peanut butter and jelly cheesecake blends childhood nostalgia with gourmet indulgence. Smooth cream cheese, rich peanut butter, and sweet raspberry swirls create a delightful dessert you’ll savor down to the last crumb.
Ingredients
Main Ingredients:
- 16 ounces (450 grams) cream cheese, softened
- 3/4 cup creamy peanut butter
- 1/2 cup granulated sugar
- 2 large eggs
- 1 teaspoon vanilla extract
Crust Ingredients:
- 1 1/2 cups graham cracker crumbs
- 1/4 cup (4 tablespoons) unsalted butter, melted
- 2 tablespoons granulated sugar
Topping Ingredients:
- 1/2 cup grape jelly or strawberry jam
- 1/4 cup roasted peanuts, chopped (optional)
Instructions
- Prepare the oven at 325F (163C). Coat a 9-inch springform pan with grease and encase the exterior with aluminum foil to prevent water seepage.
- Combine graham cracker crumbs, melted butter, and sugar in a mixing bowl. Press the mixture firmly into the pan’s bottom, creating an even base. Refrigerate the crust while assembling the filling.
- Using an electric mixer, blend cream cheese, peanut butter, sugar, and vanilla extract until achieving a silky, uniform consistency.
- Incorporate eggs individually, thoroughly mixing after each addition. Gently fold in sour cream until completely integrated.
- Transfer approximately half the cheesecake batter onto the chilled crust, spreading evenly.
- Artfully distribute jelly dollops across the initial batter layer. Utilize a knife to create delicate swirling patterns, marbling the jelly throughout the mixture.
- Carefully layer the remaining cheesecake batter over the jelly-infused base, ensuring complete coverage.
- Position the springform pan inside a larger roasting pan. Fill the roasting pan with hot water, reaching midway up the springform’s sides to create a water bath.
- Bake for 60-70 minutes until the center appears slightly wobbly but set. After baking, leave the oven door slightly ajar and allow the cheesecake to gradually cool for one hour.
- Transfer the cheesecake from the oven and refrigerate for a minimum of 4 hours, preferably overnight, to achieve optimal texture and flavor melding.
- Before serving, optionally drizzle melted peanut butter across the chilled cheesecake surface for an extra decadent touch.
Notes
- Prevent cracks by beating cream cheese at room temperature and avoiding overmixing the batter, which can incorporate too much air.
- Customize jelly flavors like strawberry, grape, or raspberry to match personal taste preferences or seasonal availability.
- Use low-fat cream cheese and Greek yogurt as substitutes to create a lighter, healthier version of the cheesecake without compromising taste.
- Create a gluten-free option by replacing graham cracker crust with almond flour or gluten-free cookie crumbs for individuals with dietary restrictions.
- Prep Time: 25 minutes
- Cook Time: 1 hour 30 minutes
- Category: Desserts
- Method: Baking
- Cuisine: American
Nutrition
- Serving Size: 8
- Calories: 155
- Sugar: 4 g
- Sodium: 55 mg
- Fat: 7 g
- Saturated Fat: 3 g
- Unsaturated Fat: 4 g
- Trans Fat: 0 g
- Carbohydrates: 20 g
- Fiber: 1 g
- Protein: 2 g
- Cholesterol: 10 mg
Sarah Mitchell
Content Specialist & Home Cooking Enthusiast
Expertise
Education
Asheville-Buncombe Technical Community College – Asheville, NC
American Fitness Professionals & Associates – Online
Sarah’s passion for food was sparked by weekend trips to the farmers’ market and her belief that healthy meals should never feel boring.
After earning her culinary diploma and becoming a certified Nutrition and Wellness Consultant, she set out to help others fall in love with simple, wholesome cooking.
She’s all about celebrating the small wins in the kitchen: a colorful yogurt bowl, a new twist on a classic dish, or a homemade snack that feels just a little extra special.
Outside the kitchen, Sarah is a gardener at heart, a yoga enthusiast, and a believer that fresh herbs can brighten any meal, and any day.